How to integrate a payment gateway into a website: A step-by-step guide

Payments
Payments

针对不同规模业务打造的支付解决方案,满足从初创公司到跨国企业的多维度需求,助力全球范围内线上线下付款。

了解更多 
  1. 导言
  2. What is a payment gateway?
  3. How do payment gateways work?
  4. How to integrate a payment gateway into your website
    1. 1. Choose a payment gateway
    2. 2. Set up a merchant account
    3. 3. Obtain API keys
    4. 4. Integrate the payment gateway into your website
    5. 5. Test the payment gateway
    6. 6. Go live
  5. How to integrate Stripe into your website
    1. 1. Create a Stripe account
    2. 2. Obtain API keys
    3. 3. Install Stripe’s libraries
    4. 4. Integrate Stripe on your website
    5. 5. Set up a server-side endpoint
    6. 6. Collect payment details on the client-side
    7. 7. Submit payment information to your server
    8. 8. Process the payment on the server-side
    9. 9. Handle the response and update your website
    10. 10. Handle errors and edge cases
    11. 11. Test the integration
    12. 12. Go live

Nearly $7.4 trillion in global ecommerce sales are forecasted for 2025—a 74% increase from 2020. Businesses should understand how to manage online transactions to tap into this growing market. Integrating a payment gateway into your website is a key step in creating a fully functioning ecommerce platform.

Payment gateway integration isn’t just about accepting online payments—it’s also about enhancing the customer experience, improving conversion rates, and ensuring transaction security. Modern customers overwhelmingly demand an intuitive, quick, and effective online checkout experience. Integrating a payment gateway into your business website can create a smooth and secure checkout process and build customer trust, enthusiasm, and loyalty.

Below, we’ll discuss what a payment gateway is, describe how they work, and explain how to integrate a payment gateway into your website.

What’s in this article?

  • What is a payment gateway?
  • How do payment gateways work?
  • How to integrate a payment gateway into your website
  • How to integrate Stripe into your website

What is a payment gateway?

A payment gateway is a digital tool that online businesses use to process and authorize digital customer payments, such as debit or credit cards, digital wallets, and electronic bank transfers. It’s the online equivalent of a physical card-reading device. Payment gateways are intermediary services that securely check, approve, or reject electronic transactions on behalf of the online business via the internet.

How do payment gateways work?

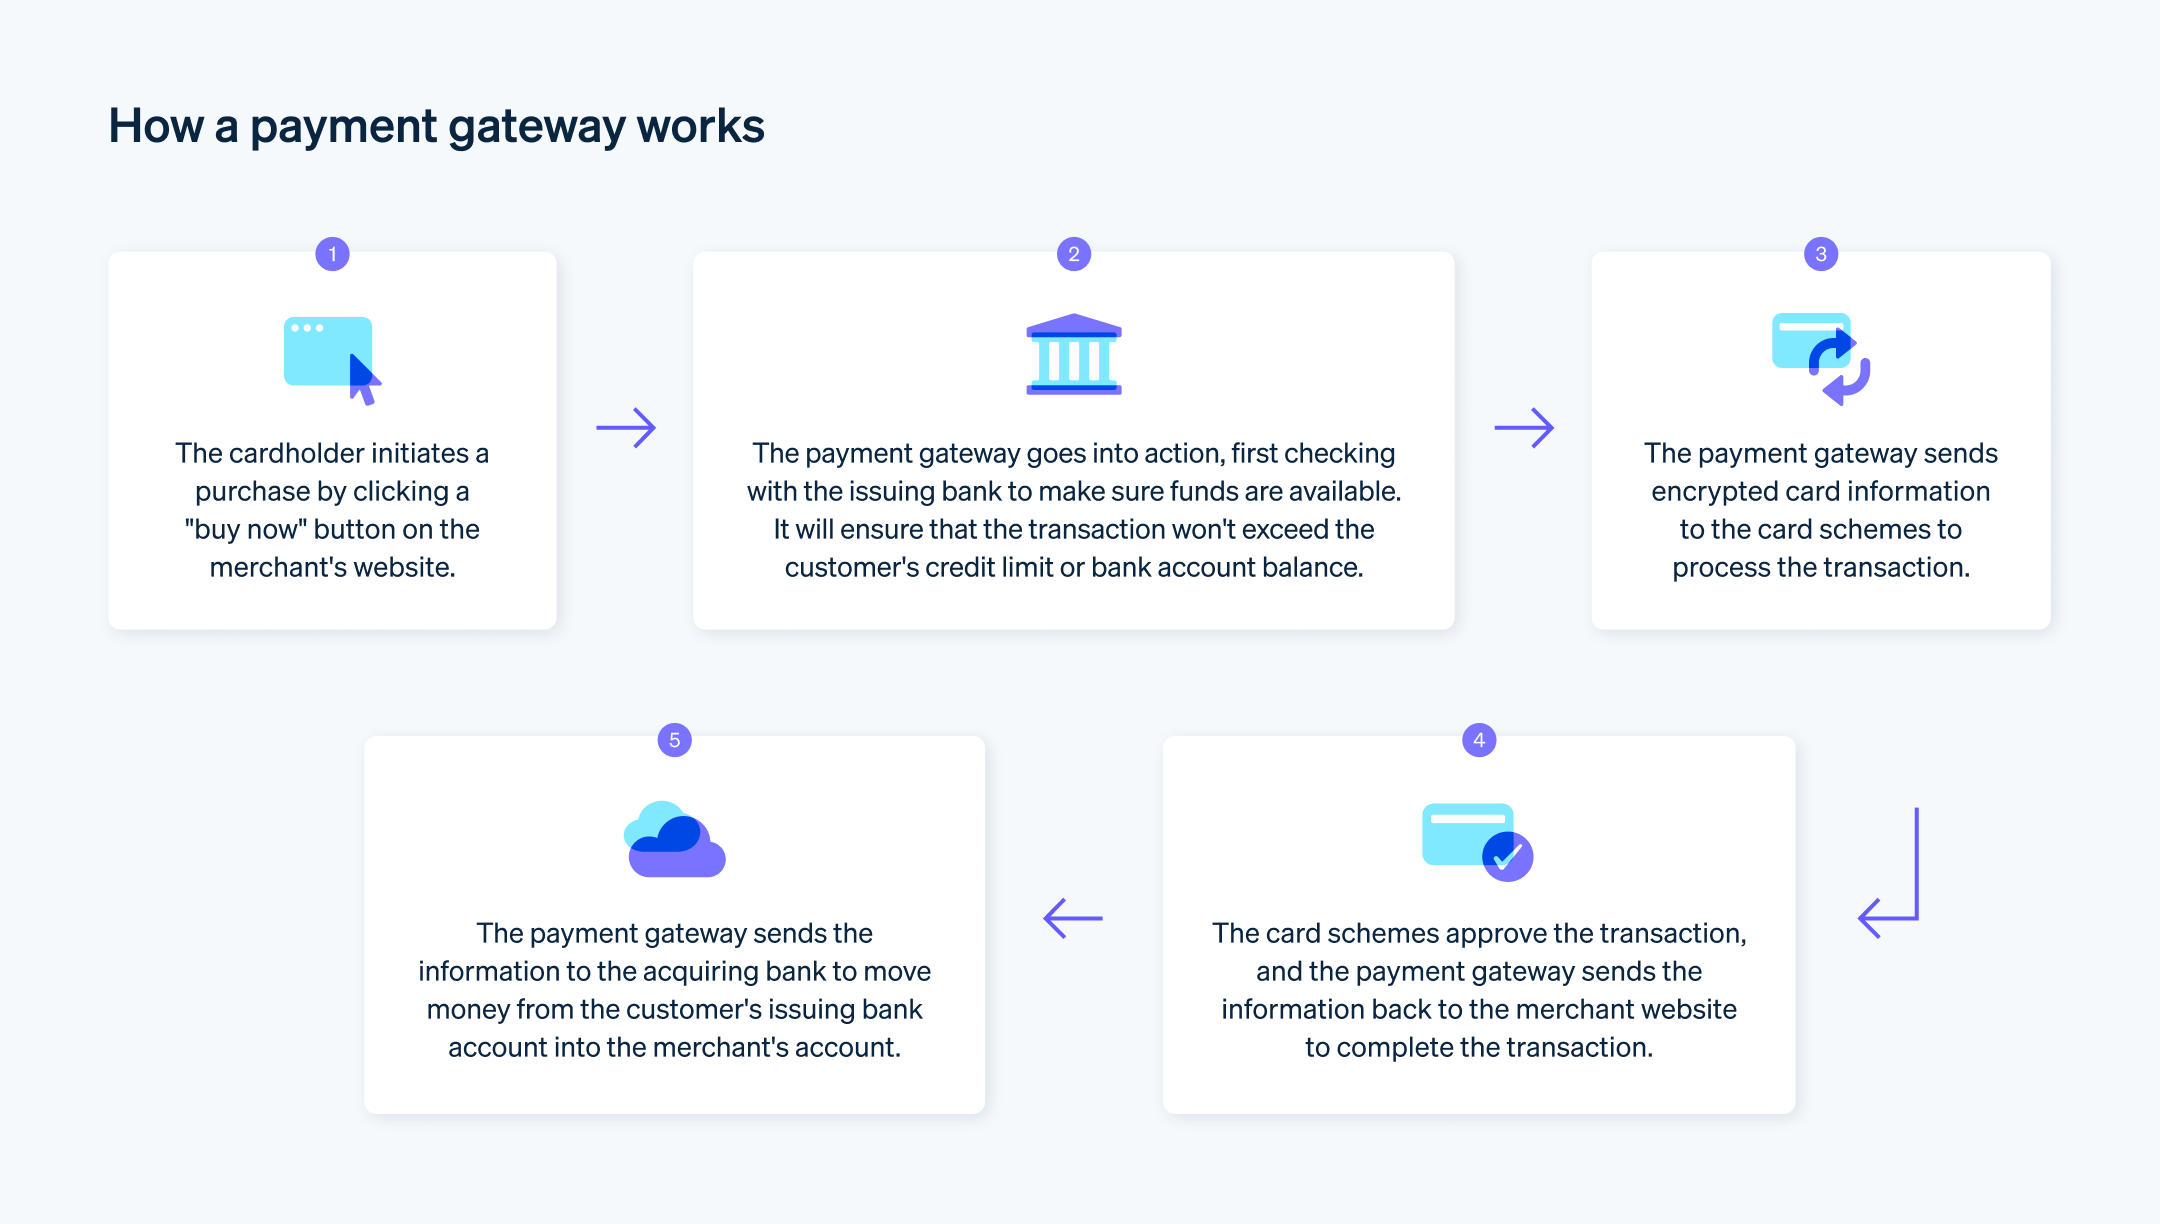
Here is an overview of how a payment gateway functions:

  1. Customer makes a purchase: When a customer decides to buy a product or service on your website, they’ll enter their payment information on your checkout page. This could be credit card details or information for another type of digital payment.
  2. Data encryption and secure transfer: The payment information is then encrypted and sent securely from the website to the payment gateway. This is an important step to protect sensitive data.
  3. Transaction forwarding: The payment gateway takes this encrypted information and forwards it to the payment processor.
  4. Payment processor and card company communication: The payment processor sends the transaction details to the card issuing company or bank for transaction authorization.
  5. Transaction approval or denial: The issuing bank then approves or denies the transaction. This decision is based on the customer’s available funds and other security checks.
  6. Communication back to the payment gateway: The approval or denial is then sent back through the same chain from the card company to the payment processor, then to the payment gateway.
  7. Transaction completion: If approved, the transaction is completed and the customer receives confirmation. If declined, the customer is notified and the transaction is halted.
  8. Funds settlement: At the end of the day, the payment gateway sends all approved transactions to your acquiring bank for settlement. The bank then deposits the total approved funds into your business bank account. The timing of this deposit can vary based on your agreement with your acquiring bank or payment processor.

The primary role of a payment gateway is to securely transmit data, making it an important part of any online transaction process. Even though there are many steps in this process, it is automated and typically takes only a few seconds.

How to integrate a payment gateway into your website

Integrating a payment gateway into a website involves several steps, which are typically straightforward. The specific process can vary depending on the particular payment gateway you’re using and the platform your website is built on, but here’s a general step-by-step guide:

1. Choose a payment gateway

The first step is to select a payment gateway that aligns with your business needs. You can find a more complete guide to choosing a payment gateway here, but in general, you should consider factors such as transaction fees, types of payments accepted, security measures, and compatibility with your ecommerce platform when deciding which payment gateway provider to work with.

2. Set up a merchant account

Depending on the payment gateway, you might need to set up a merchant account—or you might not. Some payment gateway providers, such as Stripe, combine merchant account functionality in tandem with the payment gateway, offering comprehensive payments support with a seamless setup.

3. Obtain API keys

After setting up your account with the payment gateway, you’ll typically need to obtain API keys, which are unique identifiers used to connect an online business’s website or application to the payment gateway’s services. They are part of the system that allows secure communication between the business’s platform and the payment gateway. These keys will allow your website to interact with the gateway’s server.

4. Integrate the payment gateway into your website

This step can vary significantly depending on the payment gateway and your website’s platform. Some ecommerce platforms, such as Shopify or WooCommerce, offer plugins and extensions that make integration straightforward. Otherwise, you might need to manually add code to your website to integrate the gateway. Stripe’s APIs are very developer-friendly and easy to implement.

5. Test the payment gateway

Before going live, test the payment gateway. Most gateways offer a “sandbox” or testing environment where you can make test purchases to ensure everything is working correctly.

6. Go live

Once you’ve tested the payment gateway and everything is working as expected, you can go live. At this point, customers should be able to make purchases and payments on your website.

Remember to ensure the security of your customers’ data throughout this process. Always use secure, encrypted connections and comply with Payment Card Industry Data Security Standard (PCI DSS) requirements, if you’re handling credit card information.

How to integrate Stripe into your website

Integrating Stripe into your website as a payment gateway solution involves several steps, but can typically be done quickly and efficiently. Here is a general outline of the process:

1. Create a Stripe account

Visit the Stripe website and sign up for an account. You’ll need to provide details about your business and how you plan to use Stripe, along with the business bank account where you want Stripe to send your payouts from transactions.

2. Obtain API keys

After creating your Stripe account, you’ll need to obtain your API keys. These keys are the authentication mechanism for your website’s communication with Stripe’s servers. In your Stripe Dashboard, navigate to the “Developers” section to locate and generate your API keys.

3. Install Stripe’s libraries

If you’re building a custom integration, you’ll need to install Stripe’s libraries in your project. This is where your workflow will differ depending on which developer resources you’re using. For instance, the process using an in-house developer will look a bit different from the process if you’re using a freelance developer or an agency. No matter what your resourcing looks like, Stripe’s solutions are intentionally designed to be incredibly developer-friendly, efficient, and easy to integrate. Stripe provides libraries for many languages, including JavaScript, Ruby, Python, and more. Go here for detailed installation instructions specific to your chosen language.

4. Integrate Stripe on your website

  • Frontend: If you’re using a platform like WordPress, you can use a plugin like WooCommerce that supports Stripe. If you’re coding your website, you’ll need to add a form where users can enter their card details, and then use Stripe.js to securely send these details to Stripe.
  • Backend: On your server, you’ll need to handle requests to create payments—this is where you’ll use your secret key. When the user submits the form on your website, you’ll make a request to Stripe’s servers to create a payment intent.

5. Set up a server-side endpoint

Stripe requires a server-side component to securely process payment requests and interact with its API. Create a dedicated server-side endpoint or route within your application to handle payment-related actions.

  • Utilize the Stripe library in your server-side code to initialize Stripe with your secret key.
  • Implement a route or function that receives payment requests from your client-side code, validates them, and communicates with Stripe’s API to create payment intents or charges.
  • Perform any necessary post-payment actions, such as updating your database or sending confirmation emails.

6. Collect payment details on the client-side

Integrate Stripe’s prebuilt UI components or customize your own elements to securely collect payment details on your website’s checkout page. These components ensure sensitive information is handled securely without being stored on your servers.

  • Include the Stripe JavaScript library on your checkout page.
  • Design a form or UI elements to capture necessary payment information, such as card details and billing address.
  • Initialize Stripe on the client-side using the obtained publishable key.
  • Attach appropriate event listeners to the form or UI elements to capture payment information when users submit the form.

7. Submit payment information to your server

When a user submits the payment form, capture the payment details using JavaScript and transmit them securely to your server-side endpoint.

  • Use AJAX requests or form submissions to securely transmit payment data to your server.
  • Ensure the data is transmitted over a secure HTTPS connection to maintain confidentiality.

8. Process the payment on the server-side

Upon receiving payment information at your server-side endpoint, process the payment using the Stripe library. This involves creating payment intents or charges through the Stripe API while ensuring the collected payment details are passed securely.

9. Handle the response and update your website

After Stripe processes the payment request, you’ll receive a response on your server. Manage the response to determine the payment’s success or failure.

  • Update your database or undertake necessary actions based on the payment status.
  • Communicate the payment outcome back to the client-side, providing a clear indication of the transaction result.

10. Handle errors and edge cases

Implement robust error handling and account for potential edge cases in your integration. Ensure proper handling of scenarios where payments fail due to insufficient funds, expired cards, or other issues.

11. Test the integration

Before deploying your payment gateway, conduct thorough testing in a sandbox or test environment. This allows you to validate functionality, simulate different payment scenarios, and address any potential issues proactively.

12. Go live

Once you’re confident everything is working, you can switch to live mode. Replace your test API keys with your live ones, and you’re ready to start accepting real payments.

Again, this is a high-level guide. The specific steps might vary depending on your website’s architecture and the technology stack you’re using. Start here for more detailed instructions about implementing Stripe payment solutions in a way that’s tailored to your needs.

本文中的内容仅供一般信息和教育目的,不应被解释为法律或税务建议。Stripe 不保证或担保文章中信息的准确性、完整性、充分性或时效性。您应该寻求在您的司法管辖区获得执业许可的合格律师或会计师的建议,以就您的特定情况提供建议。

准备好开始了?

无需签署合同或填写银行信息,创建账户即可开始收款。您也可以联系我们,为您的业务设计定制套餐。
Payments

Payments

借助为各种企业打造的支付解决方案,实现全球范围线上线下收款。

Payments 文档

查找 Stripe 的付款 API 集成指南。