Customize checkout for Payment Links
When you create a payment link, you can customize the look and feel of a checkout session for your user. You can also choose what type of customer information to collect and save for later.
Limit the number of times a payment link can be paid
You can limit the amount of times a payment link is paid for. This is helpful, for example, if you have limited inventory, or only want the links to be used once. When the payment link reaches the limit, it automatically deactivates and customers can’t use it to make a purchase. If a customer tries to open the link after the limit has been reached, they’re shown the default message for deactivated links or a message that you can customize.
A payment link is considered “paid for” when a checkout session is complete. You can see the payments for completed checkout sessions in two different ways, depending on the type of payment link:
- For payment links that include subscriptions (that is, any link that has a recurring price), go to Billing > Subscriptions.
- For all other payment links, go to the payment link’s details page, then Payments and analytics > Recent payments.
Set a custom message for deactivated links
If customers try to open a deactivated payment link, they’re shown a default message. You can customize this message in the Dashboard or with the API.
Collect customer addresses and phone numbers
You can collect addresses and phone numbers with payment links by adding those fields to the checkout session.
You can configure Payment Links to always collect a billing address, or always collect both a billing and a shipping address. When you collect shipping addresses, you can define the allowed values for shipping countries, and create one or more shipping rates to include in your link. Learn more about how to charge for shipping.
You can configure Payment Links to collect a phone number for shipping or invoicing. Only collect phone numbers if you need them for the transaction. When choosing this option, the payment page shows a required field to capture your customer’s phone number.
Collect business customer tax IDs
To display a customer’s tax ID and legal business name on invoices, enable tax ID collection on your Payment Links. Learn how to collect customer tax IDs with Checkout.
Collect taxes
Payment Links work with Stripe Tax to calculate and collect tax on your payments. Stripe Tax is a paid product that automatically calculates the tax on your transactions without the need to define the rates and rules.
Fees only apply after you’ve added at least one location where you’re registered to calculate and remit tax.
To get started, activate Stripe Tax in the Dashboard. Learn how to use products, prices, tax codes, and tax behavior to automatically calculate tax.
Collect agreement to your terms of service
You can require that your customers accept your terms of service before completing their purchase. When your terms of service URL is set in your account’s Public details, you have the option to require a terms of service agreement when you create a payment link in the Dashboard. Enabling this setting requires that your customers click a checkbox to accept your terms in their checkout page. The checkout page also links to your Privacy policy when a URL to your Privacy policy is set your public details.
Add custom fields
Caution
Don’t use custom fields to collect personal, protected, or sensitive data, or information restricted by law.
You can add custom fields on the payment form to collect additional information from your customers. The information is available after the payment is complete and is useful for fulfilling the purchase. You can add the following types of fields.
| Type | Description |
|---|---|
| Text | Collects freeform text up to 255 characters. |
| Numbers only | Collects only numerical values up to 255 digits. |
| Dropdown | Presents your customers with a list of options to select from. Payment links created through the Dashboard support up to 10 options. You can add up to 200 options after you create a link through the API. |
- Click Add custom fields in the Options section.
- Select a type of field to add.
- Enter a label for the field.
- (Optional) Mark your field as required.
Labels for custom fields aren’t translated, but you can use the locale URL parameter to set the language of your payment link to match the same language as your labels.
After your customer completes the payment, you can view the fields on the payment details page in the Dashboard.
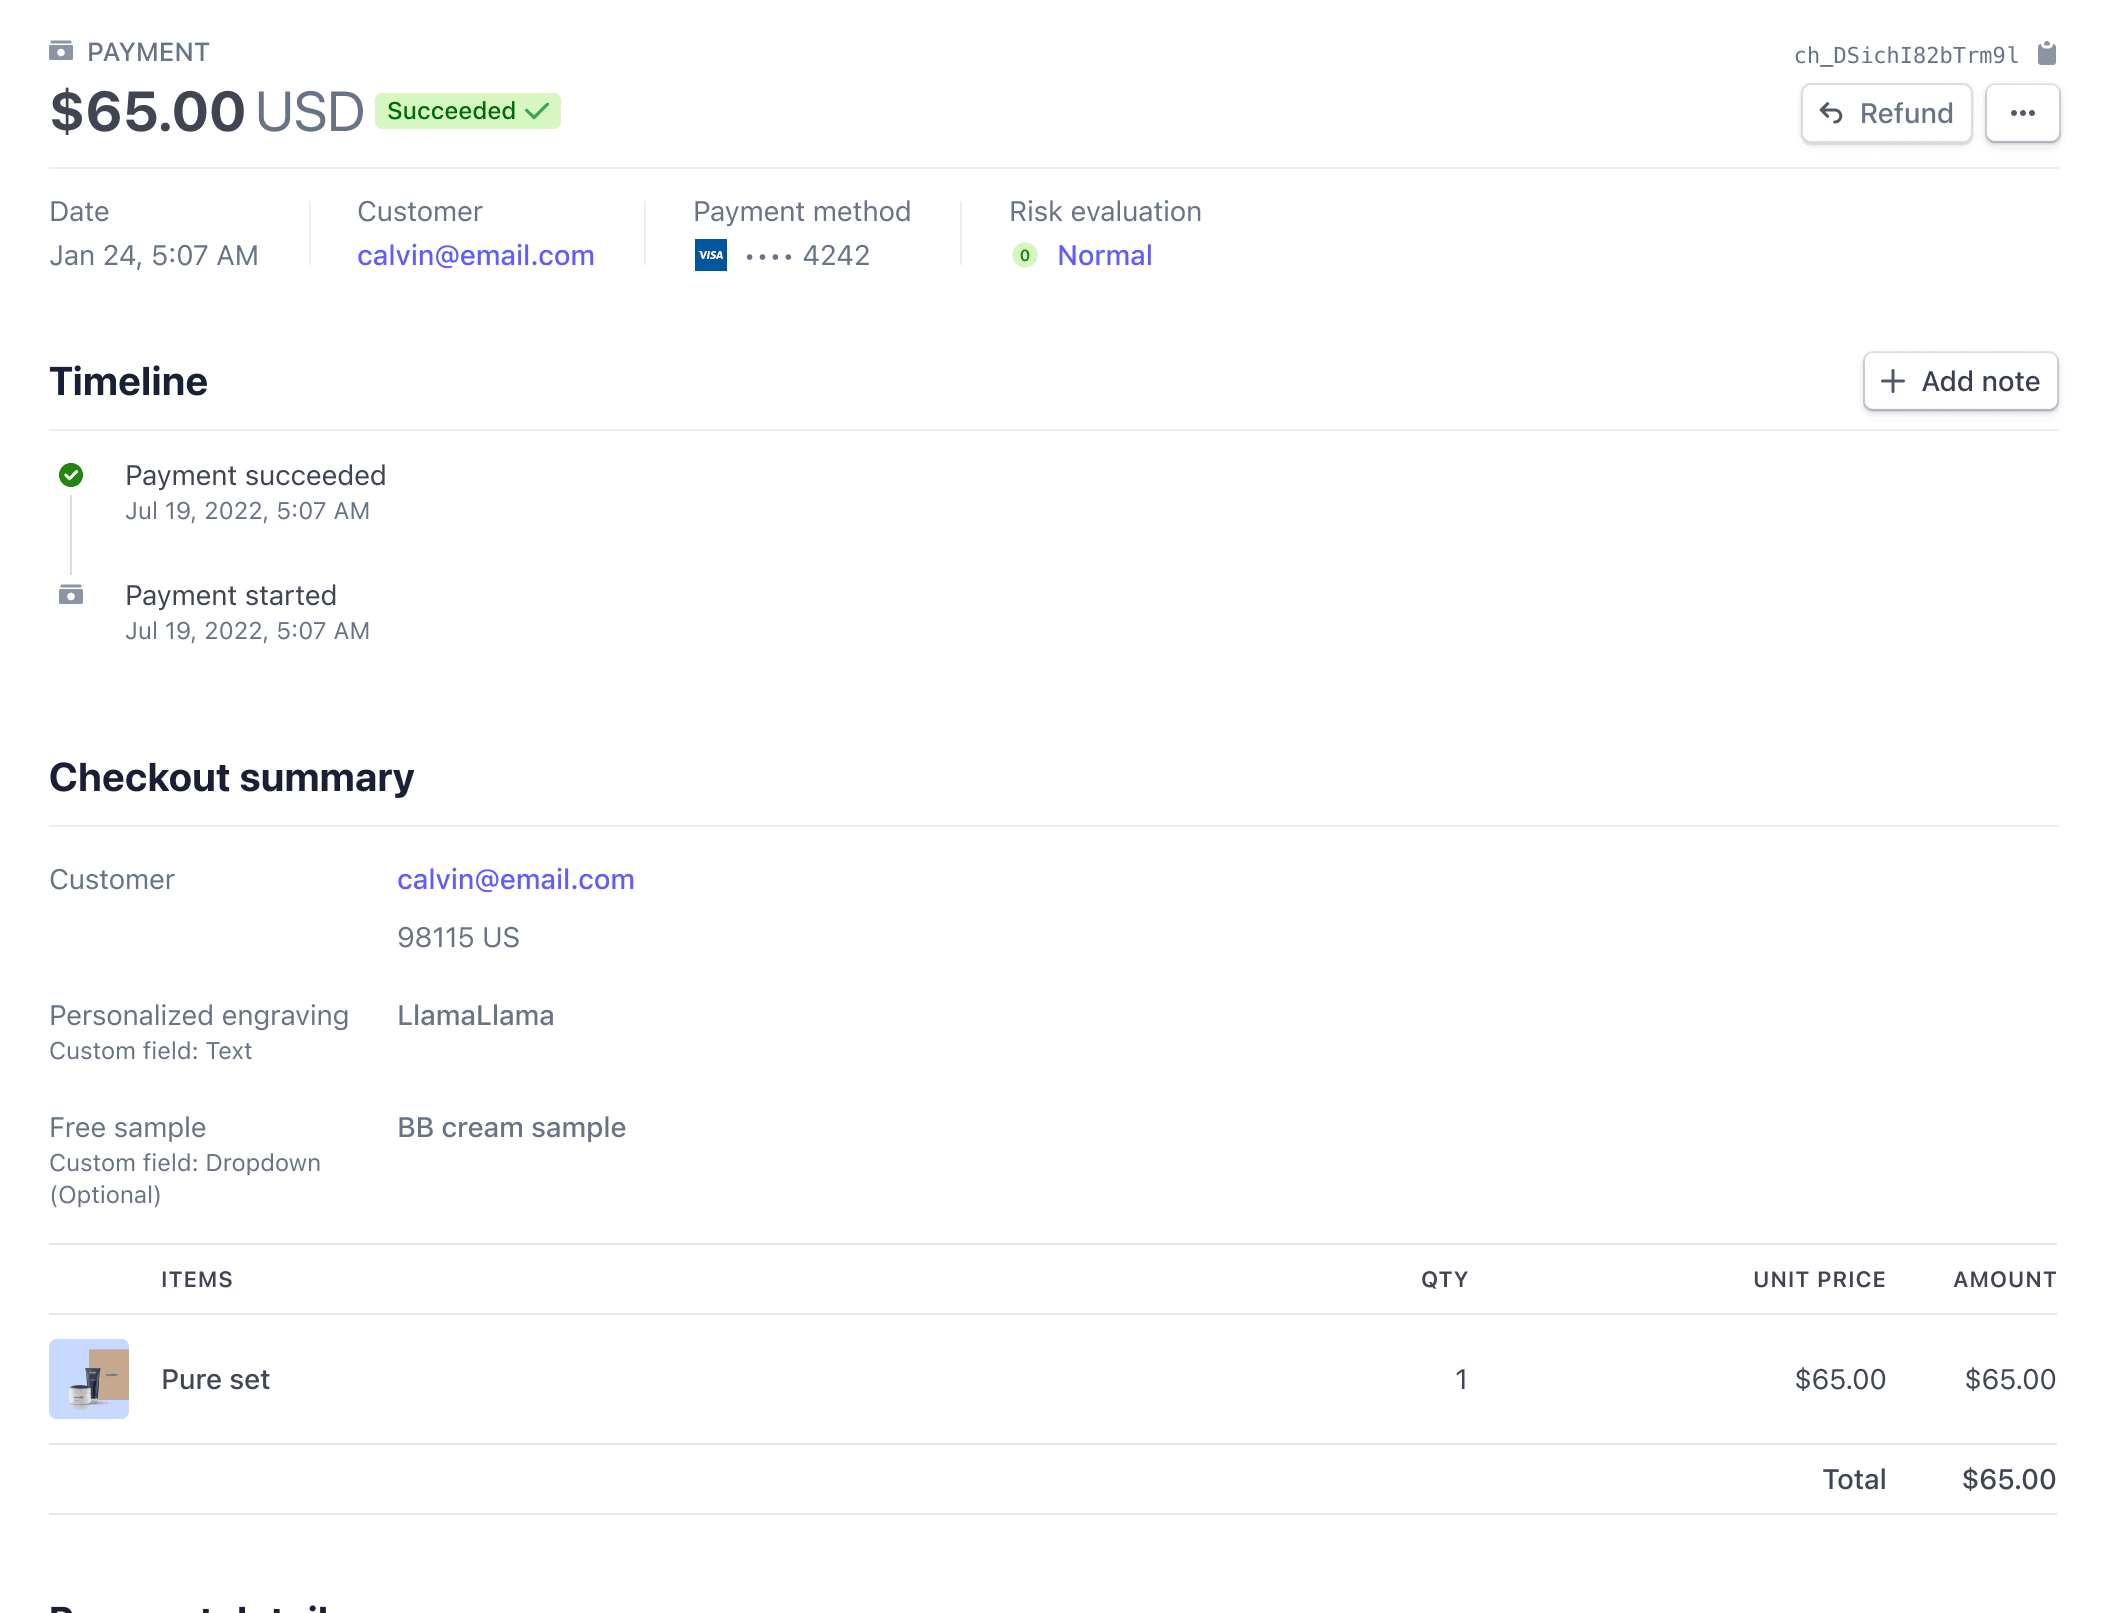
The custom fields are also sent in the checkout.session.completed webhook upon payment completion.
Automatically convert prices to local currencies
Enable Adaptive Pricing in the Stripe Dashboard in either test or live mode to let prices automatically convert to an international customer’s local currency depending on their location.
Alternatively, you can set pricing manually for each currency using multi-currency prices.
Save payment details for future use
Caution
Consult with your legal counsel or compliance team regarding saving and using payment details. For example, the European Data Protection Board issued guidance regarding the saving of payment details for faster future checkouts.
If you want to save the payment method information to provide returning customers an optional 1-click payment experience in the future, we recommend using Link.
To save payment details for a customer, select Save payment details for future use in the Advanced options section when you create a payment link. You can use the payment details to charge the customer again.
Apply branding
You can customize the look and feel of the payment page in the Stripe Dashboard. Go to your branding settings to:
- Upload a logo or icon
- Customize the payment page’s background color, button color, font, and shapes
Learn more about custom fonts and font compatibility.
Use your own domain
If you have your own custom domain, you can add it in the Stripe Dashboard. Instead of Stripe-branded payment links (buy.stripe.com/), you can create links using your own subdomain (pay.example.com)
Note
Learn more about custom domains.
Set store policies and contact information
You can display your return, refund, and legal policies on the payment page in addition to your support contact information.
Go to the Checkout and Payment Links settings to configure the information you want to display.
Presenting this information can increase buyer confidence and minimize cart abandonment.
Customize checkout with URL parameters
URL parameters allow you to add additional context to your payment page and streamline checkout. Specify the language that appears during checkout, prefill an email address or promotional code for your customers, track campaigns, and streamline reconciliation.
You can configure URL parameters directly from the Stripe Dashboard, and use them in the query string of your payment link URL. From the payment links page, click a specific payment link, then click the dropdown menu on the Copy button to add URL parameters.
Here’s an example link with prefilled email, promotional code, and locale parameters.
https://buy.stripe.com/test_eVa3do41l4Ye6KkcMN?prefilled_email=jenny%40example.com&prefilled_promo_code=20off&locale=de
| Parameter | Description | Syntax |
|---|---|---|
| Use |
We recommend encoding email addresses that you attach as URL parameters to reduce the risk of them not being passed through to your payment page. |
| Use You must also enable promotion codes on your payment link, or this parameter has no effect. |
|
locale | Use locale to display your payment link in a specific language for your customers regardless of their location. | View the complete list of all supported languages. |
You can also use URL parameters to track payment links and related campaigns.
Limit customers to one subscription
You can redirect customers that already have a subscription to the customer portal or your website to manage their subscription. Learn more about limiting customers to one subscription.
Support free trials without collecting payment method details
For Payment Links that you create with a product that includes a free trial, you can allow customers to sign up for a subscription without providing their payment method details.