Faster checkout with Link
Let your customers check out faster with Link.
Link allows your customers to select a saved payment method at checkout instead of entering payment information. Your customers can save their credit cards, debit cards, or US bank accounts for faster checkout at any Link-enabled business. Link also lets you accept Instant Bank Payments. All Link transactions confirm immediately, and successful payments settle to your Stripe balance on the same timeline as card payments, regardless of the payment method that funds the payment.
Customers can make changes to their account, view their purchase history, or reach out to the Link customer support team by visiting link.com. For information about how your payment integration affects Link, see Link in different payment integrations.
Country availability
Link isn’t available in India. In Brazil and Thailand, the Payment Element doesn’t support Link.
Add Link to your prebuilt checkout page
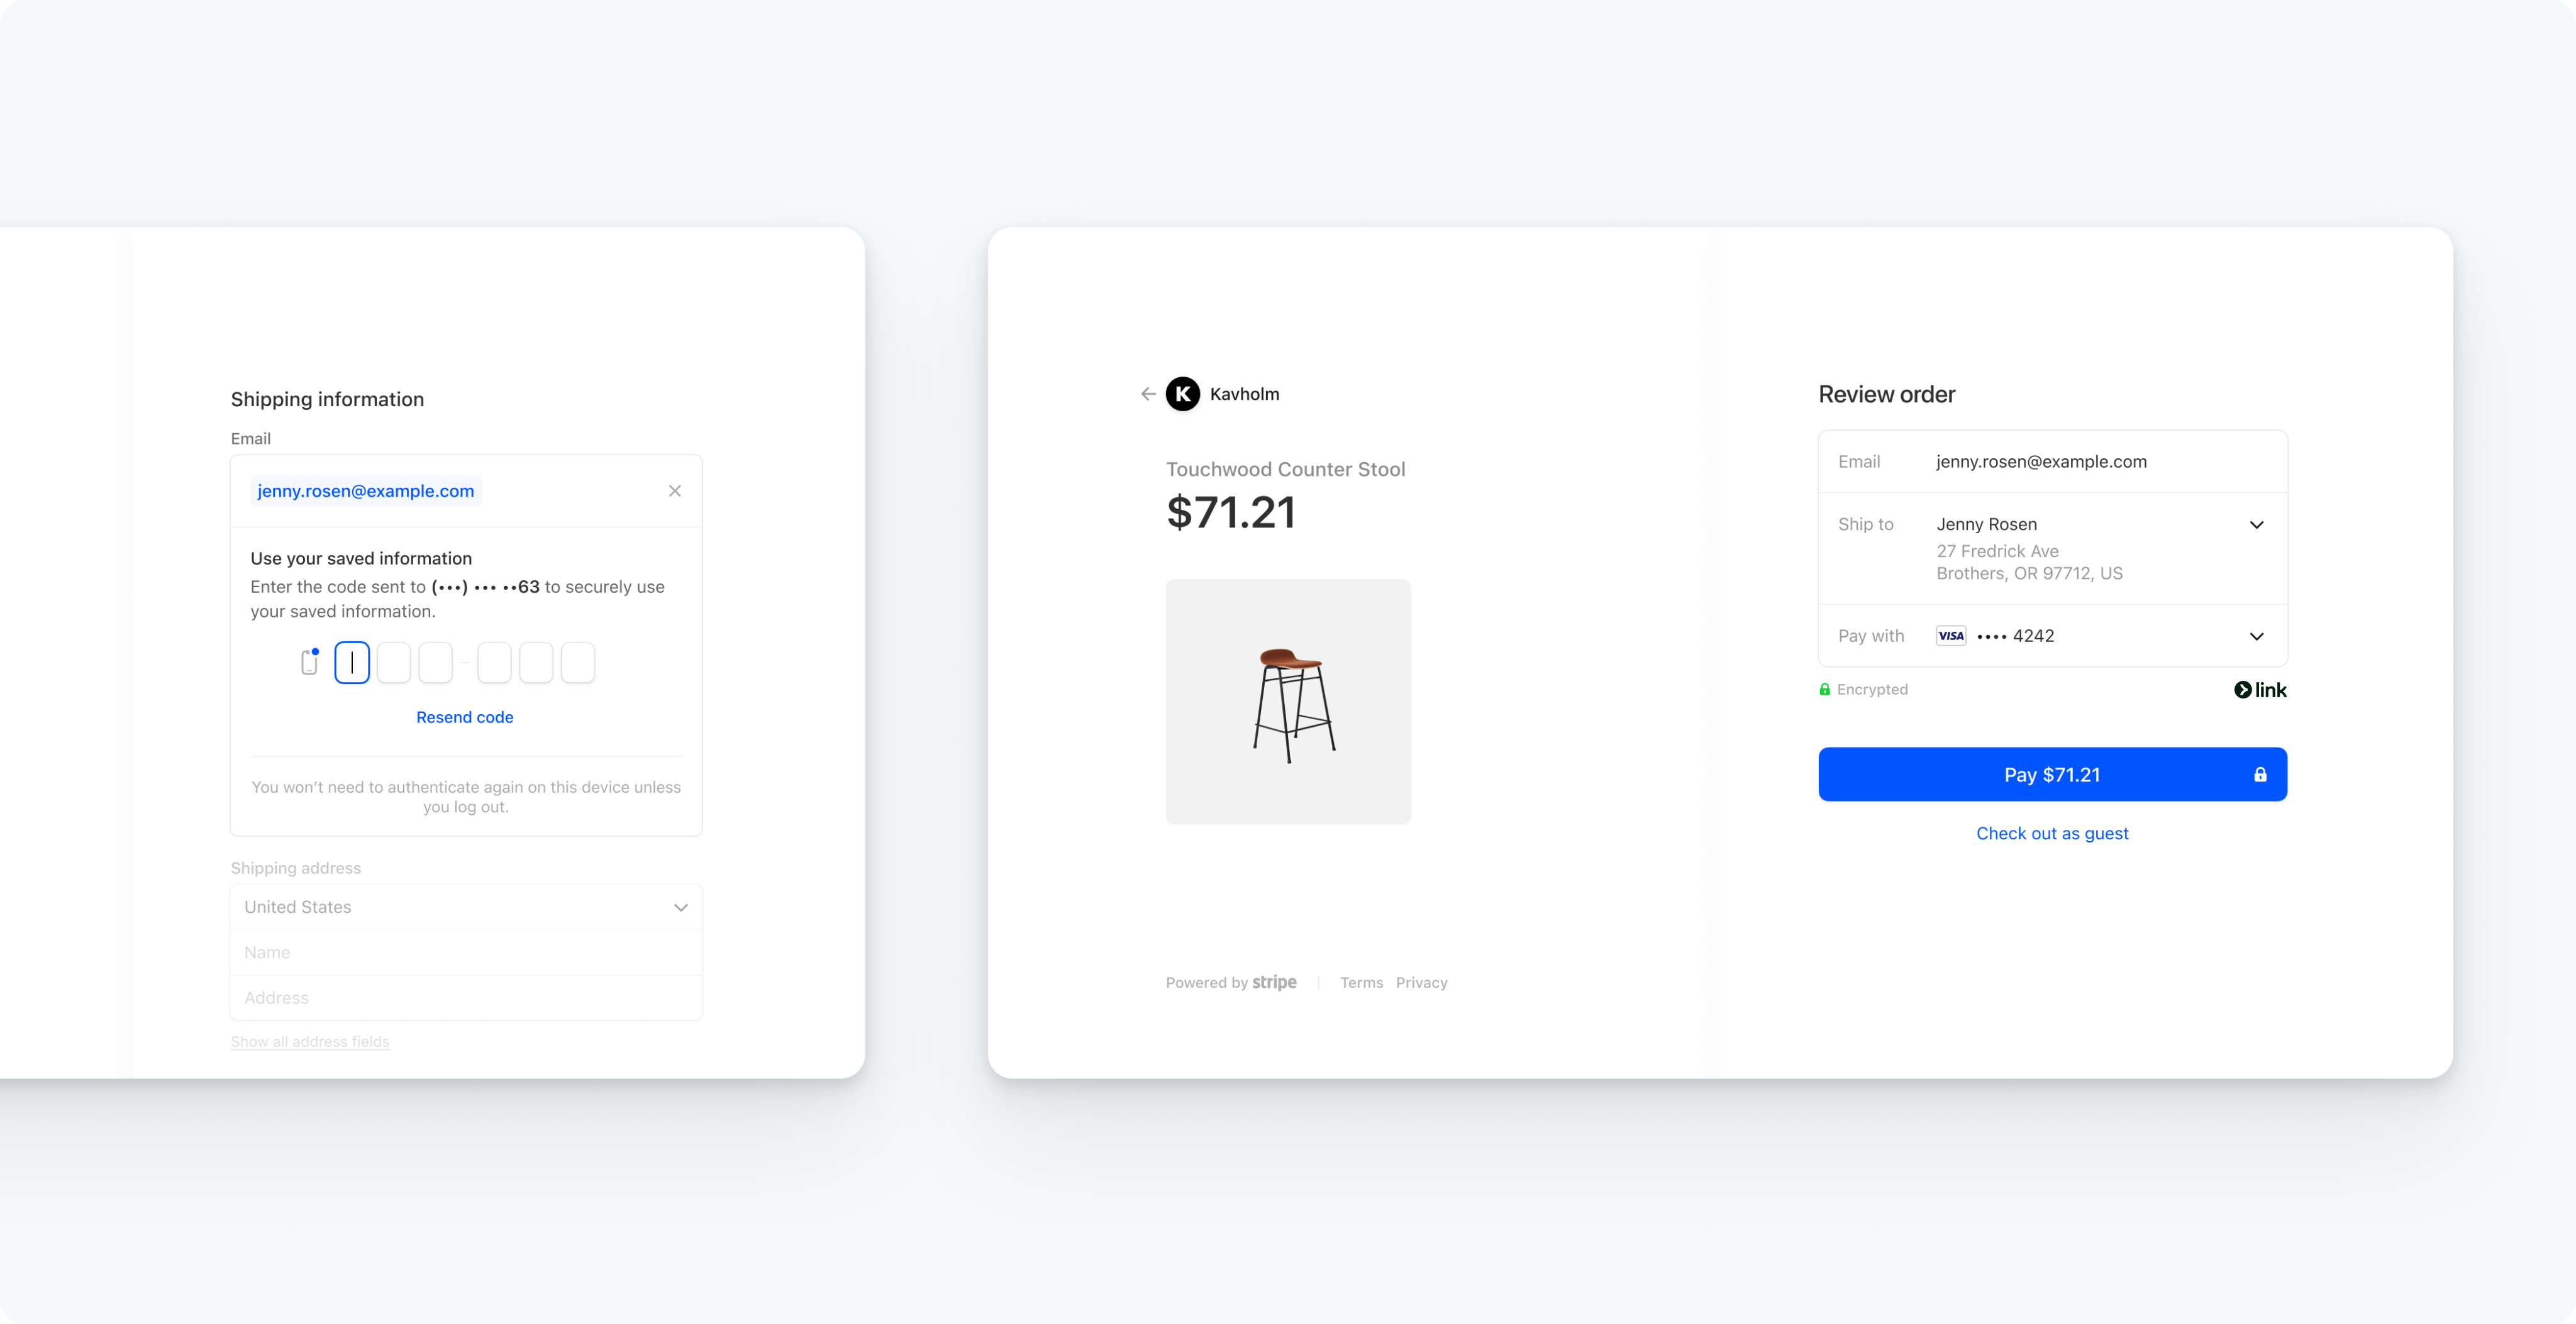
Link authentication 
Here’s how Link authenticates existing customers:
- Link automatically detects if a customer is enrolled by using their email address, phone number, or browser cookie.
- The customer receives a one-time passcode to authenticate their session.
- After authentication succeeds, Link autofills their card or bank payment details and shipping information.
After a customer enrolls with Link, they can add backup payment methods and change shipping addresses.
Link works with Checkout, Payment Links, Web Elements, Mobile Elements, and Invoicing. To accept payments using Link, go to your payment method settings.