Set up BBPOS WisePOS E
Learn how to set up the BBPOS WisePOS E.
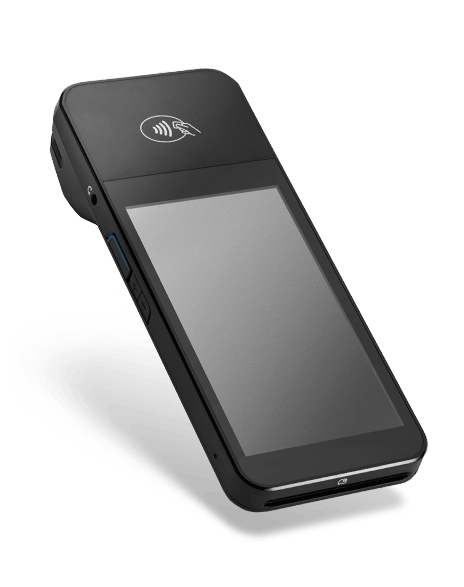
The BBPOS WisePOS E is a countertop reader for Stripe Terminal apps.
The Stripe Terminal SDK connects to the reader over the internet or LAN.
This reader is compatible with the following integrations:
- JavaScript SDK
- iOS SDK
- Android SDK
- React Native SDK
- Server-driven
For BBPOS WisePOS E, we recommend the server-driven integration, which uses the Stripe API instead of a Terminal SDK. To view the reader’s parts and features, see the BBPOS WisePOS E product sheet.
Warning
Stripe readers aren’t liquid-proof and we recommend that users make appropriate efforts to make sure their devices remain dry. If your device has experienced liquid ingress, we recommend that you stop using the device and let it dry thoroughly before attempting to re-use or charge the device. If your device doesn’t properly operate or charge properly after drying, you need to replace it.
Turn the reader on and off 
When you first receive the device, install the battery. With the back of the device facing you, lift up from the indentation at the bottom left corner to detach the back cover. Insert the battery by sliding it into the exposed slot with the gold connectors at the top aligned. After the battery is in place, charge the reader by using an outlet or the optional ethernet dock. Connect the reader to power by plugging the provided cable into the port with the lightning bolt symbol.
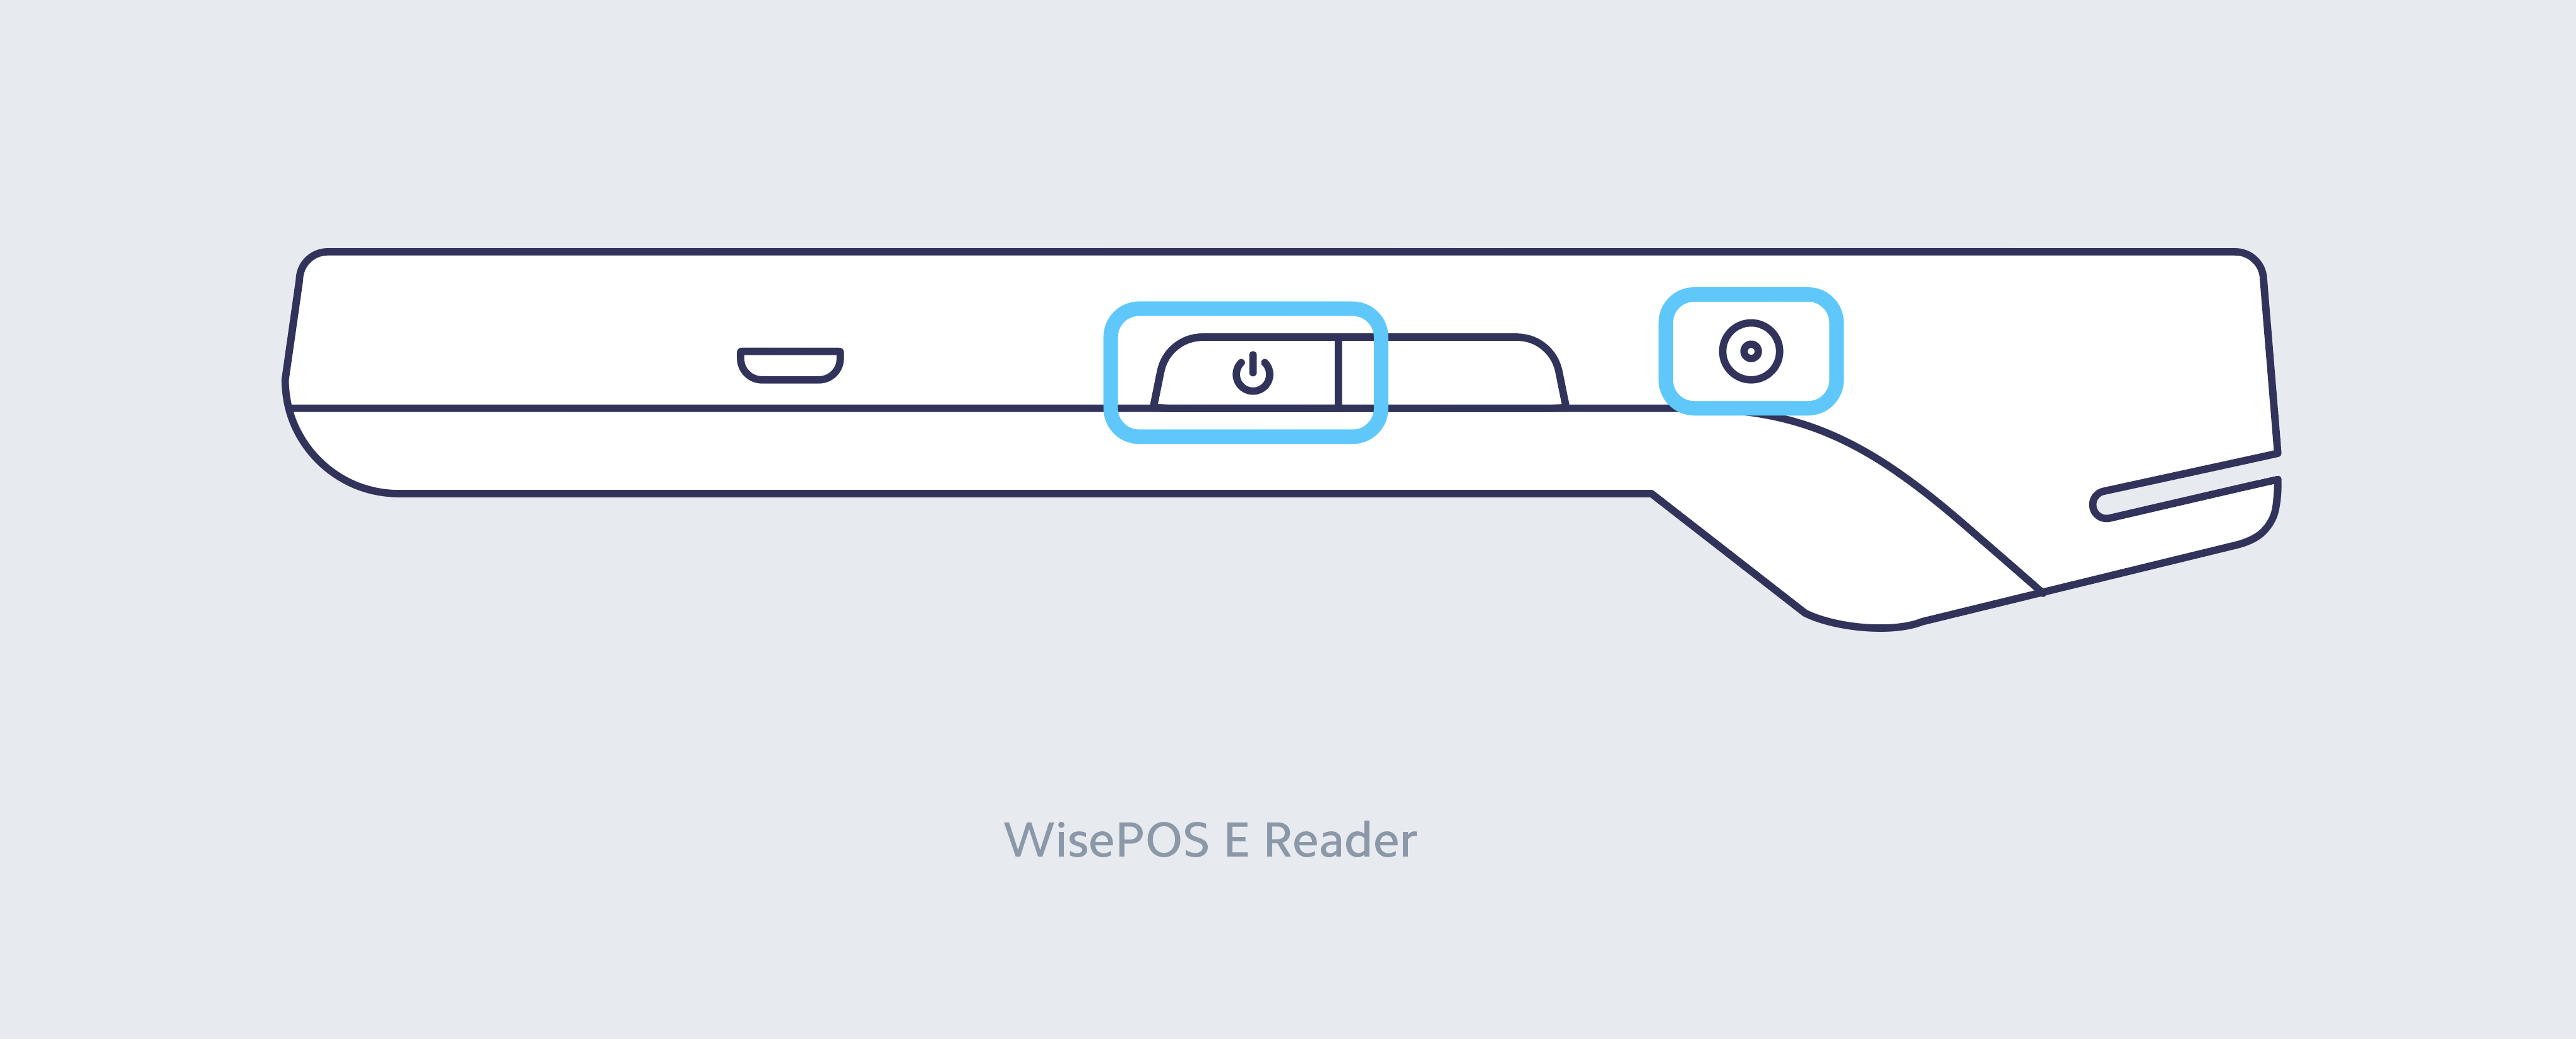
After the reader is fully charged, hold down the power button on the right hand side until the screen turns on. After the device powers on, press the power button to sleep or wake the device. To fully power off the device, hold down the power button until the power off option is shown on the screen, then select it.
In a countertop deployment, leaving the device on for extended periods is expected. With a full charge, you can expect the battery to last about eight hours.
Note
Even when it’s not in use, leave the BBPOS WisePOS E plugged in and powered on to receive automatic software updates.
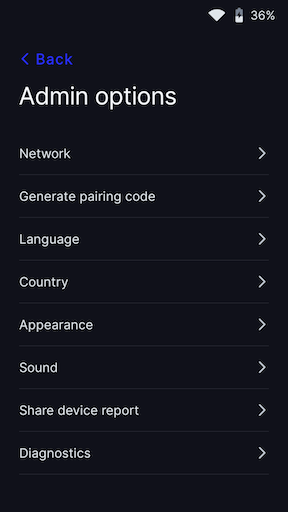
Access settings
To open the settings menu, swipe right from the left edge of the reader screen to reveal a Settings button. Tap the Settings button and enter the admin PIN 07139. From here, you can update your WiFi settings or generate a pairing code for device registration. Battery status is displayed at the top right of this screen. To close the settings menu, click the back arrow in the top left corner.
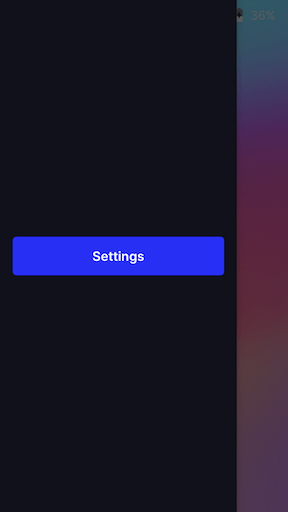
Settings button
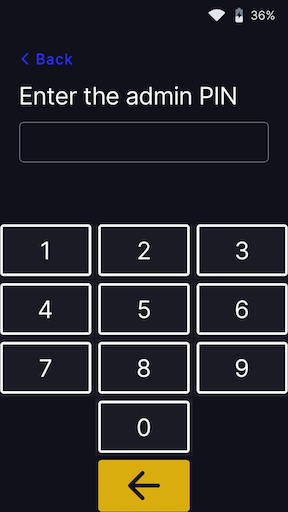
Admin PIN screen
Settings menu
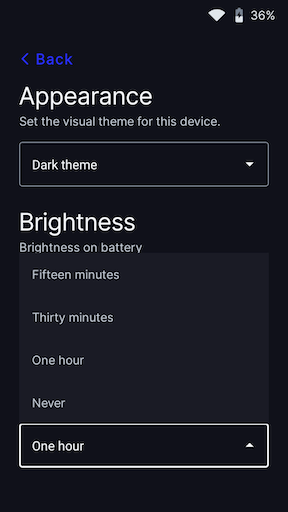
Screen timeout
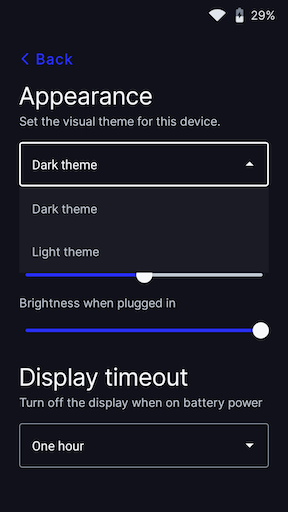
The screen times out when the reader isn’t connected to a power source. The default timeout of 1 hour improves battery performance. To update this value, go to the settings, select Appearance, then select a new screen timeout from the dropdown. The device screen turns on automatically after a device interaction occurs (such as touching the screen), or when the device enters the payments flow and a payment is initiated.
Settings menu

Appearance menu
Timeout menu
Connect the reader to the internet
Because the BBPOS WisePOS E is a smart reader, its reader software communicates directly with Stripe. Your point of sale application communicates with the reader through either a LAN (using a Terminal SDK) or the internet (using the server-driven integration). When communicating with the reader through the LAN, the reader must connect to the same local network as your point of sale application. If you’re running into issues connecting your reader to the internet, follow the troubleshooting steps to diagnose the issue.
WiFi
To connect to WiFi or switch networks, go to settings, then select WiFi settings to choose the network and connect. Attempting to join a new network disconnects the reader from any existing wireless connection. Learn more about our network requirements and how to configure advanced network settings for supported WiFi networks.
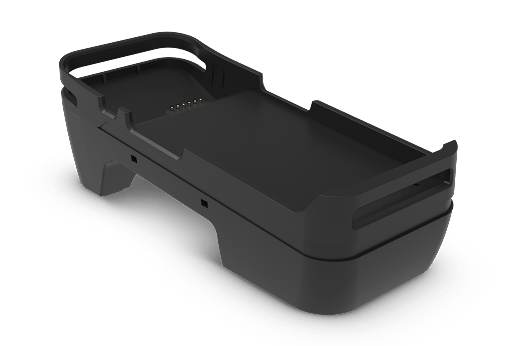
Ethernet
Ethernet connectivity requires the use of an optional dock, which provides wired Ethernet connectivity and keeps your smart reader fully charged using the included charging cable. You can purchase the dock separately through the Stripe Dashboard. The Ethernet Dock features a 10/100 Ethernet port and rubber feet for stable countertop use.
To set up the dock:
- Connect the Ethernet cable from your dock to your router.
- Connect the dock to power. It has a minimum power requirement of 5V-2A (10W) and comes with a wall plug to USB-C charging cable.
- When both cables are connected, insert the reader into the dock.
To confirm that the reader is properly docked, verify the reader is charging and the Ethernet icon is visible in the status bar.
Charging icon
Ethernet icon
Note
The WisePOS E dock also ships with a USB-A to USB-C cable, which you can use to charge the dock with your own USB-A power adapter if you prefer. We recommend charging with the dock wall plug to USB-C charging cable.
The reader obtains an IP address using DHCP. As soon as the network cable is plugged in, the reader attempts to establish communication with Stripe.
Network priority
The BBPOS WisePOS E prioritizes connecting through Ethernet if possible. Even if previously configured for WiFi, the reader switches to using an Ethernet connection when connected to the dock with a plugged-in Ethernet cable. If you remove the reader from the dock, it switches back to the WiFi connection.
If you dock the reader, but you don’t have an Ethernet cable plugged in, it uses WiFi. Regardless of connectivity while docked, you can still connect to WiFi and manage networks on the device.
Change the UI appearance
By default, the user interface of your BBPOS WisePOS E reader uses a dark theme.

Welcome screen
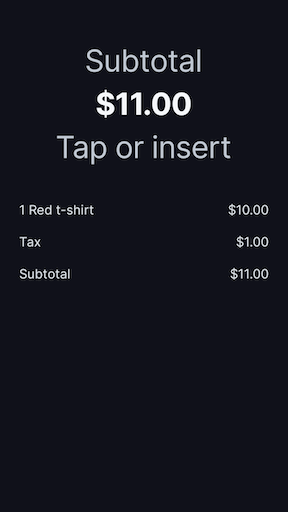
Payment screen
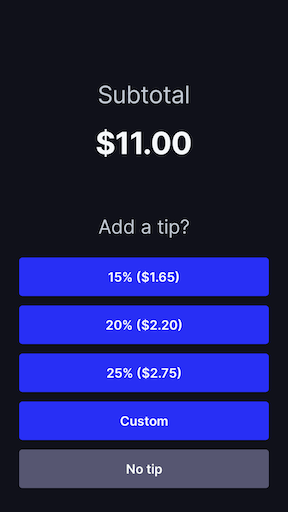
Tipping selection screen*
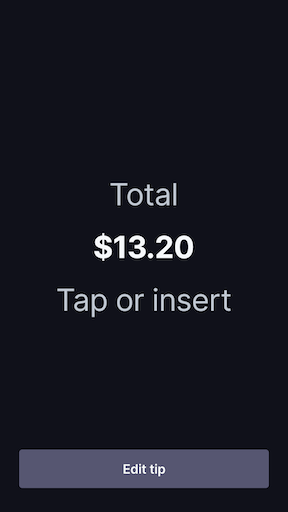
Total screen
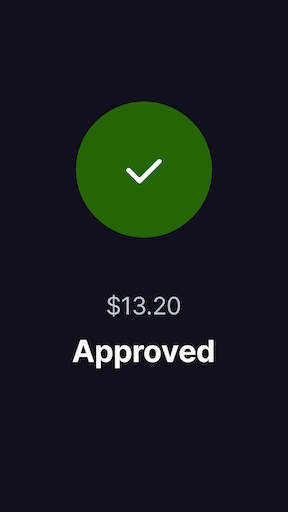
Approved screen
*The tipping selection screen appears if on-reader tipping is configured.
You can change the appearance of the UI to use a different theme in the settings menu. Go to settings, then select Appearance, and select a new theme from the dropdown.
Settings menu
Appearance menu
Theme menu
Change the default reader language
The BBPOS WisePOS E supports changing the reader language in the settings menu. Swipe right across the screen to access the settings menu, and select your language.
Accessories for the reader
You can design your own accessories for the BBPOS WisePOS E. To download the BBPOS WisePOS E mechanical design files (.STP), you must first review and accept our Terminal Design File License Agreement. By downloading the file below, you agree to the terms outlined in the license.
The BBPOS and Chipper™ name and logo are trademarks or registered trademarks of BBPOS Limited in the United States and/or other countries. The Verifone® name and logo are either trademarks or registered trademarks of Verifone in the United States and/or other countries. Use of the trademarks does not imply any endorsement by BBPOS or Verifone.