Payment Request Button
Caution
The Payment Request Button Element dynamically displays wallet options during checkout, giving you a single integration for Apple Pay, Google Pay, and Link. Alternatively, you can use the Express Checkout Element to offer multiple one-click payment buttons to your customers. Compare the Express Checkout Element and Payment Request Button.
Customers see Apple Pay or Google Pay if they enabled them on their device, and depending on the browser they use. If Link appears, it could be because customers:
- Don’t have Apple Pay or Google Pay enabled on their device.
- Use Chrome with active, authenticated Link sessions.
| Browser + Wallet | Payment Button |
|---|---|
| Safari + Apple Pay enabled | Apple Pay |
| Chrome + Link authenticated | Link |
| Chrome + Google Pay enabled and Link not authenticated | Google Pay |
| Chrome on iOS 16 + Apple Pay and Google Pay enabled | Apple Pay |
| Any browser + No active Apple Pay or Google Pay | Link |
Prerequisites
Before you start, you need to:
Review the requirements for each payment button type:
- Apple Pay and Google Pay don’t display for IP addresses in India, so plan your integration testing accordingly.
- Apple Pay requires macOS 10.12.1+ or iOS 10.1+.
- Compatible devices automatically support Google Pay.
Register and verify your domain in both test mode and live mode.
Add a payment method to your browser. For example, you can save a card in Chrome, add a card to your Google Pay account, or add a card to your Wallet for Safari.
Serve your application over HTTPS. This is a requirement both in development and production. One way to get started is to use a service such as ngrok.
Set up Stripe ElementsClient-side
Elements is available as part of Stripe.js. Include this in your page and create a container to use for the paymentRequestButton Element:
<script src="https://js.stripe.com/v3/"></script>
<div id="payment-request-button">
  <!-- A Stripe Element will be inserted here. -->
</div>
Your Stripe publishable API key is also required as it identifies your website to Stripe:
const stripe = Stripe(, { apiVersion: "2024-04-10", });'pk_test_TYooMQauvdEDq54NiTphI7jx'
Create a paymentRequest instanceClient-side
Create an instance of stripe.paymentRequest with all required options.
const paymentRequest = stripe.paymentRequest({
  country: 'US',
  currency: 'usd',
  total: {
    label: 'Demo total',
    amount: 1099,
  },
  requestPayerName: true,
  requestPayerEmail: true,
});
Note
Use the requestPayerName parameter to collect the payer’s billing address for Apple Pay and Link. You can use the billing address to perform address verification and block fraudulent payments. All other payment methods automatically collect the billing address when one is available.
Create and mount the paymentRequestButtonClient-side
Create the paymentRequestButton Element and check to make sure that your customer has an active payment method using canMakePayment(). If they do, mount the Element to the container to display the Payment Request button. If they don’t, you can’t mount the Element, and we recommend that you show a traditional checkout form instead.
Note
If you accept Apple Pay with the Payment Request Button, you must offer Apple Pay as the primary payment option on your website per Apple guidelines. Internally, the Payment Request Button uses the Apple Pay canMakePaymentWithActiveCard API.
const elements = stripe.elements();
const prButton = elements.create('paymentRequestButton', {
  paymentRequest,
});

(async () => {
  // Check the availability of the Payment Request API first.
  const result = await paymentRequest.canMakePayment();
  if (result) {
    prButton.mount('#payment-request-button');
  } else {
    document.getElementById('payment-request-button').style.display = 'none';
  }
})();
Create a PaymentIntentServer-side
Stripe uses a PaymentIntent object to represent your intent to collect payment from a customer, tracking charge attempts and payment state changes throughout the process.
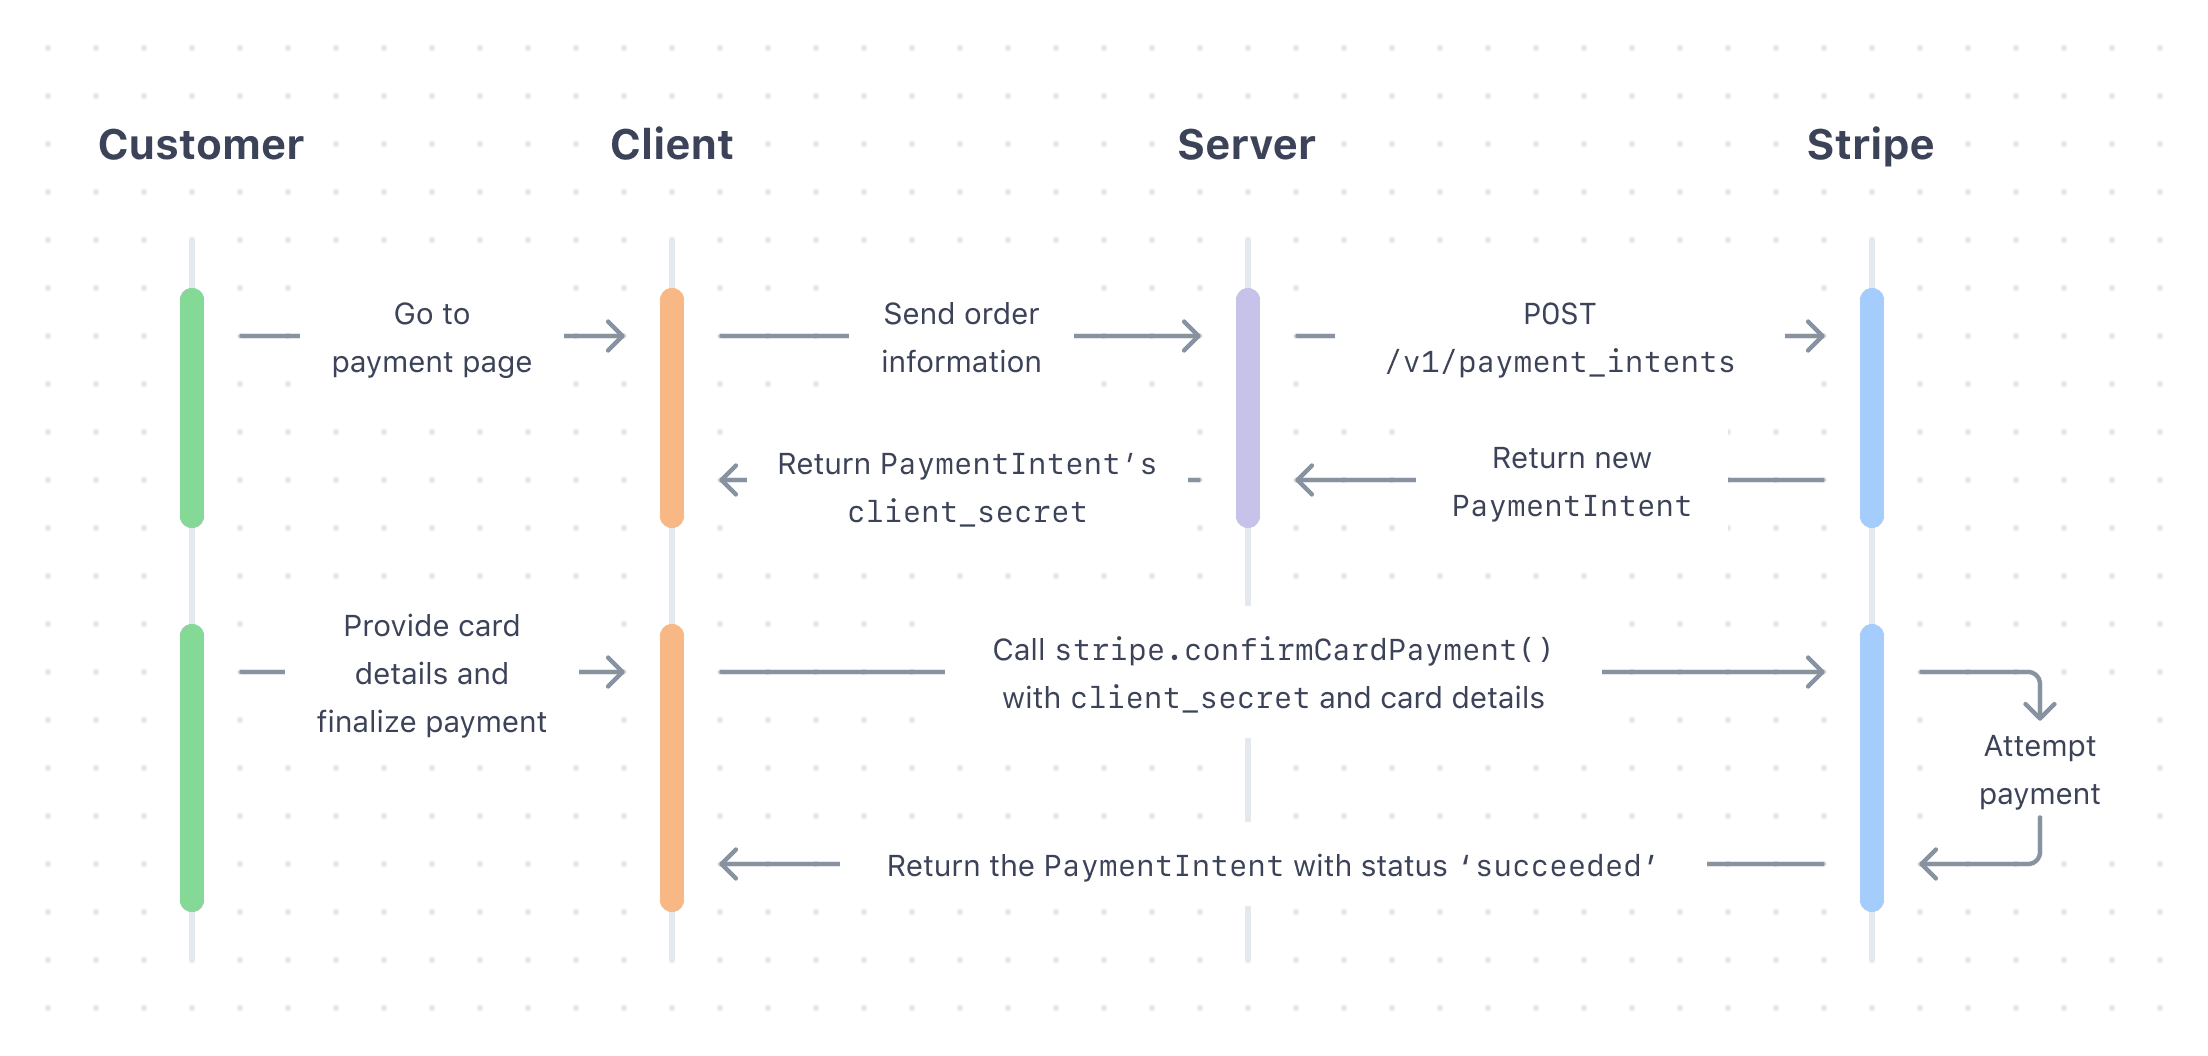
Create a PaymentIntent on your server with an amount and currency. Always decide how much to charge on the server side, a trusted environment, as opposed to the client. This prevents malicious customers from being able to choose their own prices.
Included in the returned PaymentIntent is a client secret, which you use to securely complete the payment process instead of passing the entire PaymentIntent object. Send the client secret back to the client to use in the next step.
Complete the paymentClient-side
Listen to the paymentmethod event to receive a PaymentMethod object. Pass the PaymentMethod ID and the PaymentIntent’s client secret to stripe.confirmCardPayment to complete the payment.
paymentRequest.on('paymentmethod', async (ev) => {
  // Confirm the PaymentIntent without handling potential next actions (yet).
  const {paymentIntent, error: confirmError} = await stripe.confirmCardPayment(
    clientSecret,
    {payment_method: ev.paymentMethod.id},
    {handleActions: false}
  );

  if (confirmError) {
    // Report to the browser that the payment failed, prompting it to
    // re-show the payment interface, or show an error message and close
    // the payment interface.
    ev.complete('fail');
  } else {
    // Report to the browser that the confirmation was successful, prompting
    // it to close the browser payment method collection interface.
    ev.complete('success');
    // Check if the PaymentIntent requires any actions and, if so, let Stripe.js
    // handle the flow. If using an API version older than "2019-02-11"
    // instead check for: `paymentIntent.status === "requires_source_action"`.
    if (paymentIntent.status === "requires_action") {
      // Let Stripe.js handle the rest of the payment flow.
      const {error} = await stripe.confirmCardPayment(clientSecret);
      if (error) {
        // The payment failed -- ask your customer for a new payment method.
      } else {
        // The payment has succeeded -- show a success message to your customer.
      }
    } else {
      // The payment has succeeded -- show a success message to your customer.
    }
  }
});
Caution
The customer can dismiss the payment interface in some browsers even after they authorize the payment. This means that you might receive a cancel event on your PaymentRequest object after receiving a paymentmethod event. If you use the cancel event as a hook for canceling the customer’s order, make sure you also refund the payment that you just created.
Test your integration
To test your integration, you must use HTTPS and a supported browser. If you use the paymentRequestButton Element within an iframe, the iframe must have the allow attribute set to equal “payment *”.
Regional TestingIndia
Stripe Elements doesn’t support Google Pay or Apple Pay for Stripe accounts and customers in India. Therefore, you can’t test your Google Pay or Apple Pay integration if the tester’s IP address is in India, even if the Stripe account is based outside India.
In addition, each payment method and browser has specific requirements:
Collect shipping information
To collect shipping information, begin by including requestShipping: true when creating the payment request.
You can also provide an array of shippingOptions at this point, if your shipping options don’t depend on the customer’s address.
const paymentRequest = stripe.paymentRequest({
  country: 'US',
  currency: 'usd',
  total: {
    label: 'Demo total',
    amount: 1099,
  },

  requestShipping: true,
  // `shippingOptions` is optional at this point:
  shippingOptions: [
    // The first shipping option in this list appears as the default
    // option in the browser payment interface.
    {
      id: 'free-shipping',
      label: 'Free shipping',
      detail: 'Arrives in 5 to 7 days',
      amount: 0,
    },
  ],
});
Next, listen to the shippingaddresschange event to detect when a customer selects a shipping address. Use the address to fetch valid shipping options from your server, update the total, or perform other business logic. You can anonymize the address data on the shippingaddresschange event in the browser to not reveal sensitive information that isn’t necessary for shipping cost calculation.
The customer must provide valid shippingOptions at this point to proceed in the flow.
paymentRequest.on('shippingaddresschange', async (ev) => {
  if (ev.shippingAddress.country !== 'US') {
    ev.updateWith({status: 'invalid_shipping_address'});
  } else {
    // Perform server-side request to fetch shipping options
    const response = await fetch('/calculateShipping', {
      data: JSON.stringify({
        shippingAddress: ev.shippingAddress
      })
    });
    const result = await response.json();

    ev.updateWith({
      status: 'success',
      shippingOptions: result.supportedShippingOptions,
    });
  }
});
Display line items
Use displayItems to display PaymentItem objects and show the price breakdown in the browser’s payment interface.
const paymentRequest = stripe.paymentRequest({
  country: 'US',
  currency: 'usd',
  total: {
    label: 'Demo total',
    amount: 2000,
  },

  displayItems: [
    {
      label: 'Sample item',
      amount: 1000,
    },
    {
      label: 'Shipping cost',
      amount: 1000,
    }
  ],
});
Style the button
Use the following parameters to customize the Element:
elements.create('paymentRequestButton', {
  paymentRequest,
  style: {
    paymentRequestButton: {
      type: 'default',
      // One of 'default', 'book', 'buy', or 'donate'
      // Defaults to 'default'

      theme: 'dark',
      // One of 'dark', 'light', or 'light-outline'
      // Defaults to 'dark'

      height: '64px',
      // Defaults to '40px'. The width is always '100%'.
    },
  },
});
Using your own button
If you want to design your own button instead of using the paymentRequestButton Element, you can show your custom button based on the result of paymentRequest.canMakePayment(). Then, use paymentRequest.show() to display the browser interface when your button is clicked.
When building your own button, follow the Apple Pay Human Interface Guidelines and Google Pay Brand Guidelines.
Caution
Link isn’t supported in custom button configurations and won’t display for the customer if you decide to use one.
Add an Apple Pay merchant token for merchant initiated transactions
Set up your Payment Request Button to request an Apple Pay MPAN to facilitate merchant initiated transactions (MIT) for recurring, auto-load, or deferred payments.
- Create an instance of the Payment Request.
- Pass the
applePayobject relevant to your MPAN use case (choose from the drop-down to see use case code samples). - Include relevant parameters for your use case.
Use the Payment Request Button with Stripe Connect
Connect platforms that either create direct charges or add the token to a Customer on the connected account must take additional steps when using the Payment Request Button.
- On your frontend, before creating the
PaymentRequestinstance, set thestripeAccountoption on the Stripe instance:
const stripe = Stripe(, { apiVersion: "2024-04-10", stripeAccount: 'CONNECTED_STRIPE_ACCOUNT_ID', });'pk_test_TYooMQauvdEDq54NiTphI7jx'
- Register all domains where you plan to show the Payment Request Button.
Link for the Payment Request Button
When new customers come to your site, they can use Link in the Payment Request Button to pay with their saved payment details. With Link, they don’t need to manually enter their payment information. Link requires domain registration.
Disclose Stripe to your customers
Stripe collects information on customer interactions with Elements to provide services to you, prevent fraud, and improve its services. This includes using cookies and IP addresses to identify which Elements a customer saw during a single checkout session. You’re responsible for disclosing and obtaining all rights and consents necessary for Stripe to use data in these ways. For more information, visit our privacy center.