Manage imported data
After you import data, you can manage it through the Dashboard.
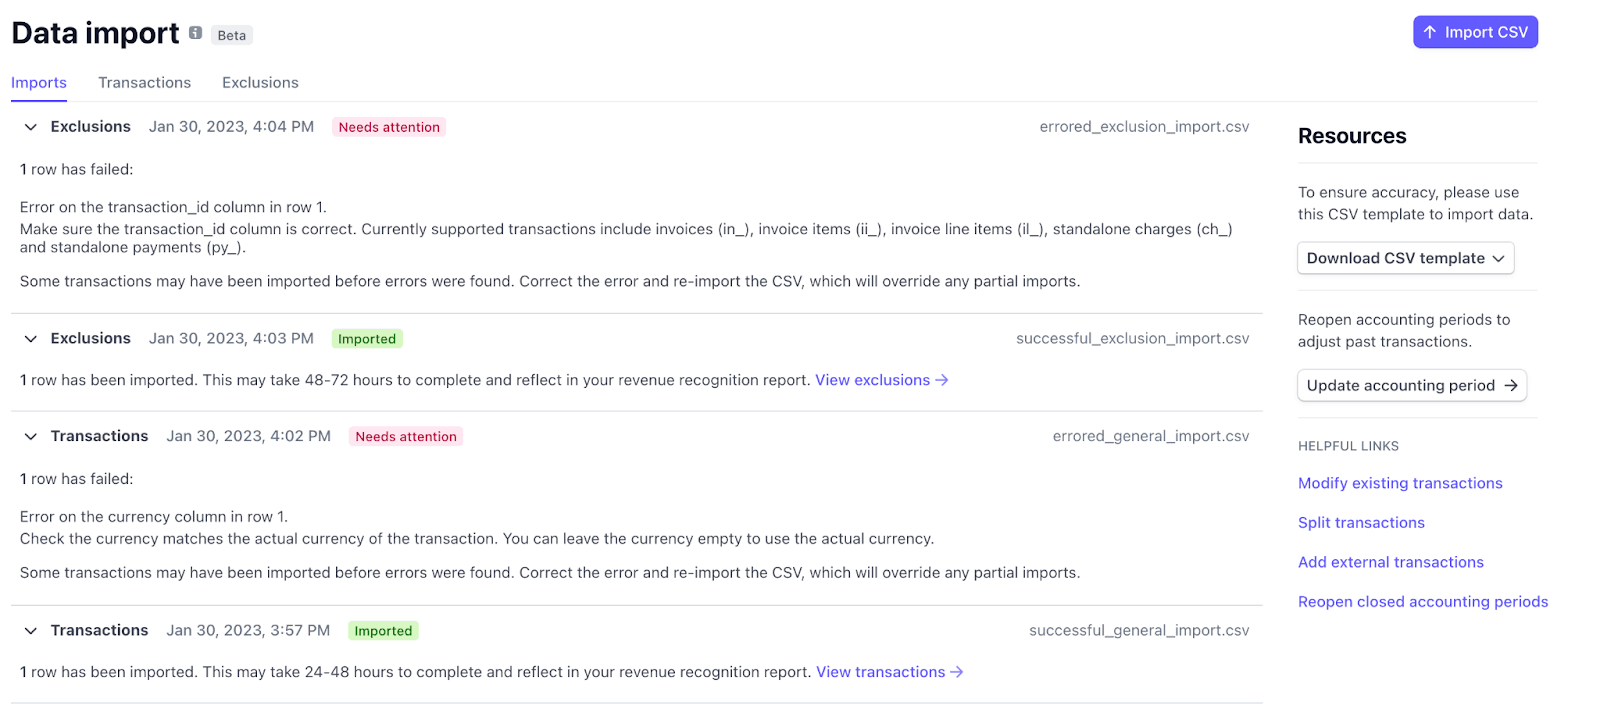
CSV imports 
After you upload a CSV, you can refresh this tab to see the status of the import. To help you identify the import type, a Transaction (for general import) or Exclusion (for exclusion import) tag appears before each import.
Successful imports show the number of lines imported. Click View transactions or View exclusions to navigate to the list of imported transactions or exclusions. Unsuccessful imports show the errors that occurred and each line that the error occurred on.
Transactions
From the list view, you can see a paginated view of all transactions that you’ve imported. For Stripe transactions, we provide a link to the main transaction page in the Dashboard.

The column format follows the CSV format, with the addition of a status column. An Active status indicates that the Revenue Recognition reports include the imported data. A Processing status indicates that our system has recorded the imported data, but revenue recognition reports don’t yet include this data.
Transactions that have been split into multiple components have a caret icon that you can click to reveal the applicable split transactions.
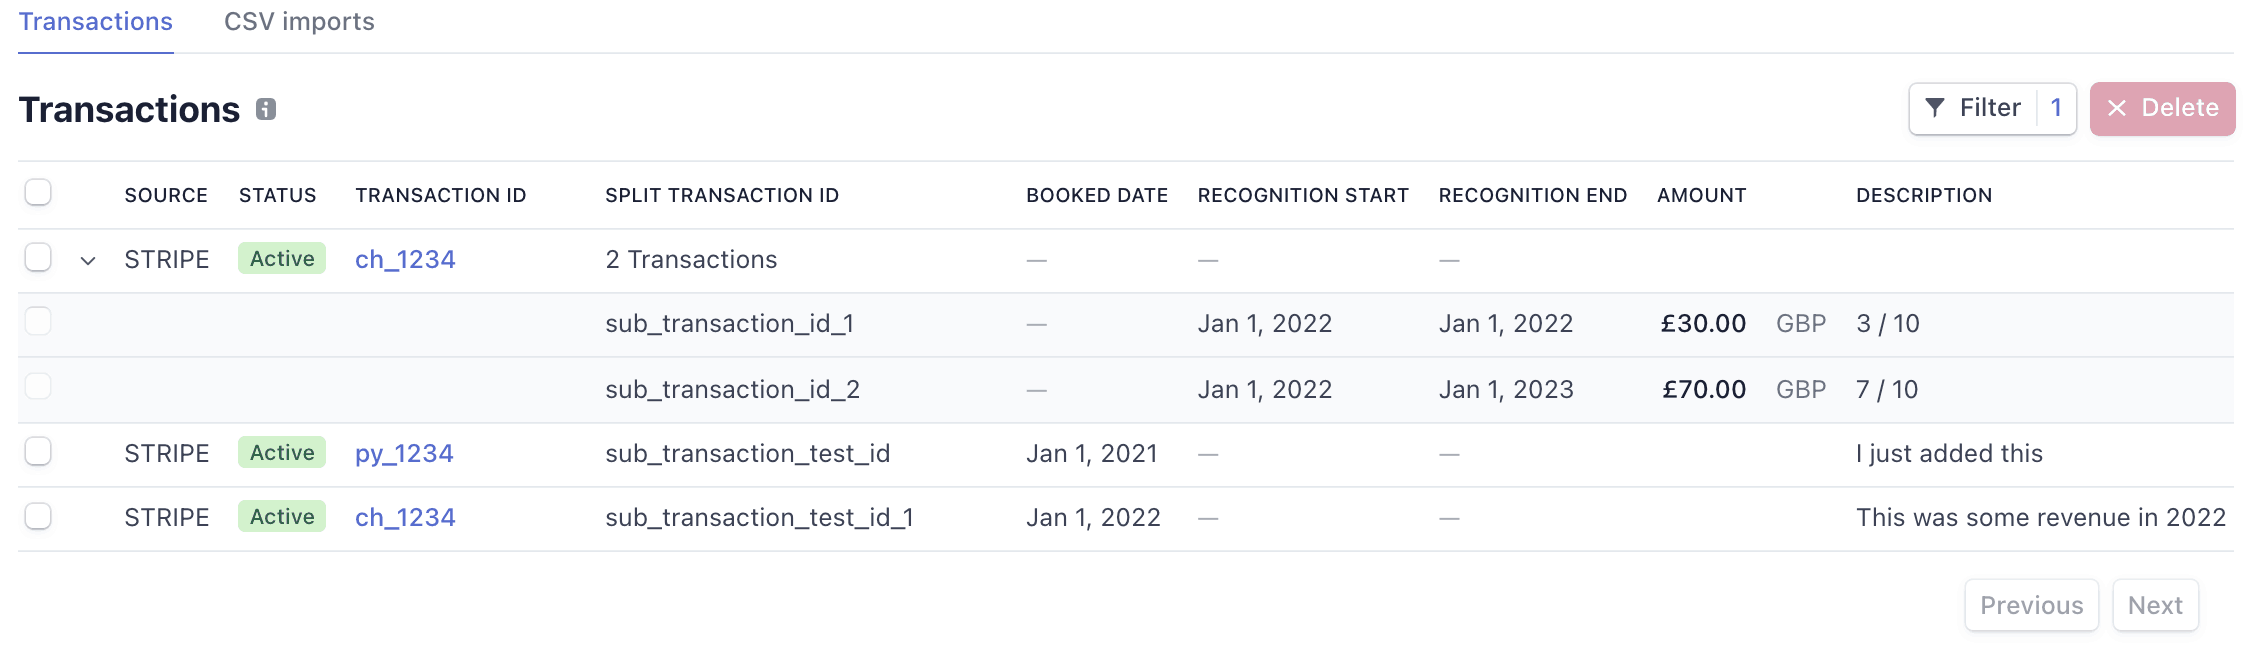
Filtering
The transaction list supports filtering on all of the dates associated with the imported data. Additionally, you can filter on Source, Transaction ID and Split transaction ID, but these values must be exact matches.
Deletion
You can delete transactions by selecting them with the checkbox and then clicking Delete. Deletions take 48-72 hours to reflect in Revenue Recognition reports.
Exclusions
From the list view, you can see a paginated view of all excluded transactions that you imported. For transactions other than invoice items, we provide a link to the main transaction page in the Dashboard.
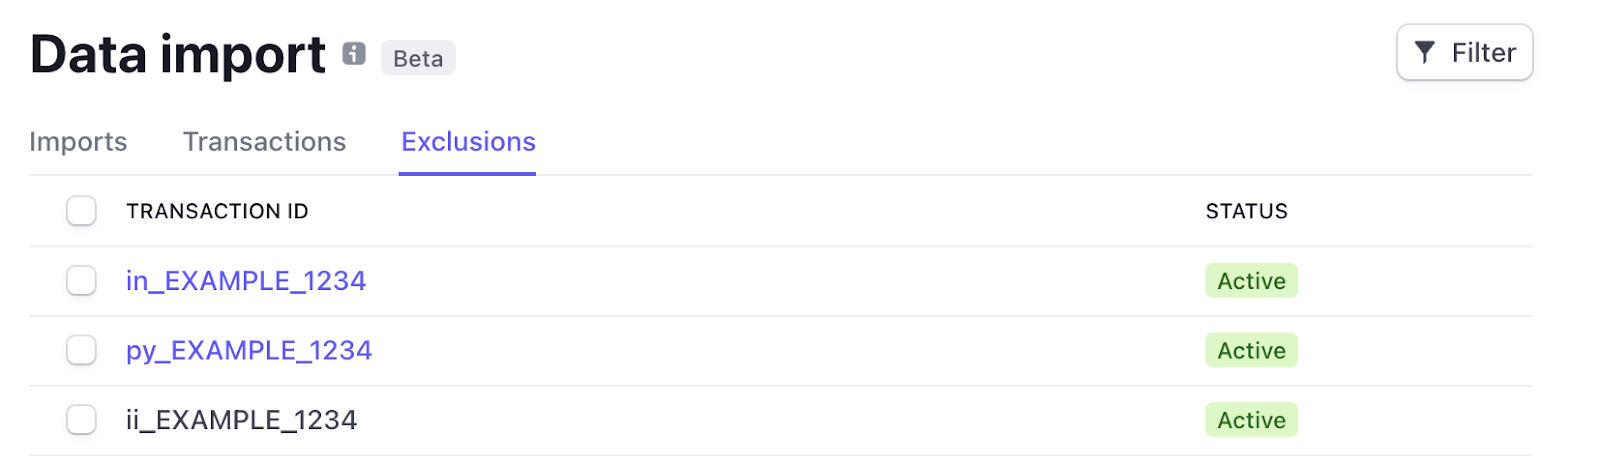
The column follows the exclusion CSV format, with the addition of a status column. An Active status indicates that the transaction is excluded from your Revenue Recognition reports. A Processing status indicates that our system has recorded the transaction to be excluded, but Revenue Recognition reports don’t yet exclude this data.
Filtering
The exclusion list supports filtering on the ID of the excluded transactions on exactly matched values.
Deletion
You can reverse the exclusions by selecting the transaction checkbox and then clicking Delete. Deletions can take 48 to 72 hours to reflect in your Revenue Recognition reports.