Start a team
Learn how to invite and interact with team members.
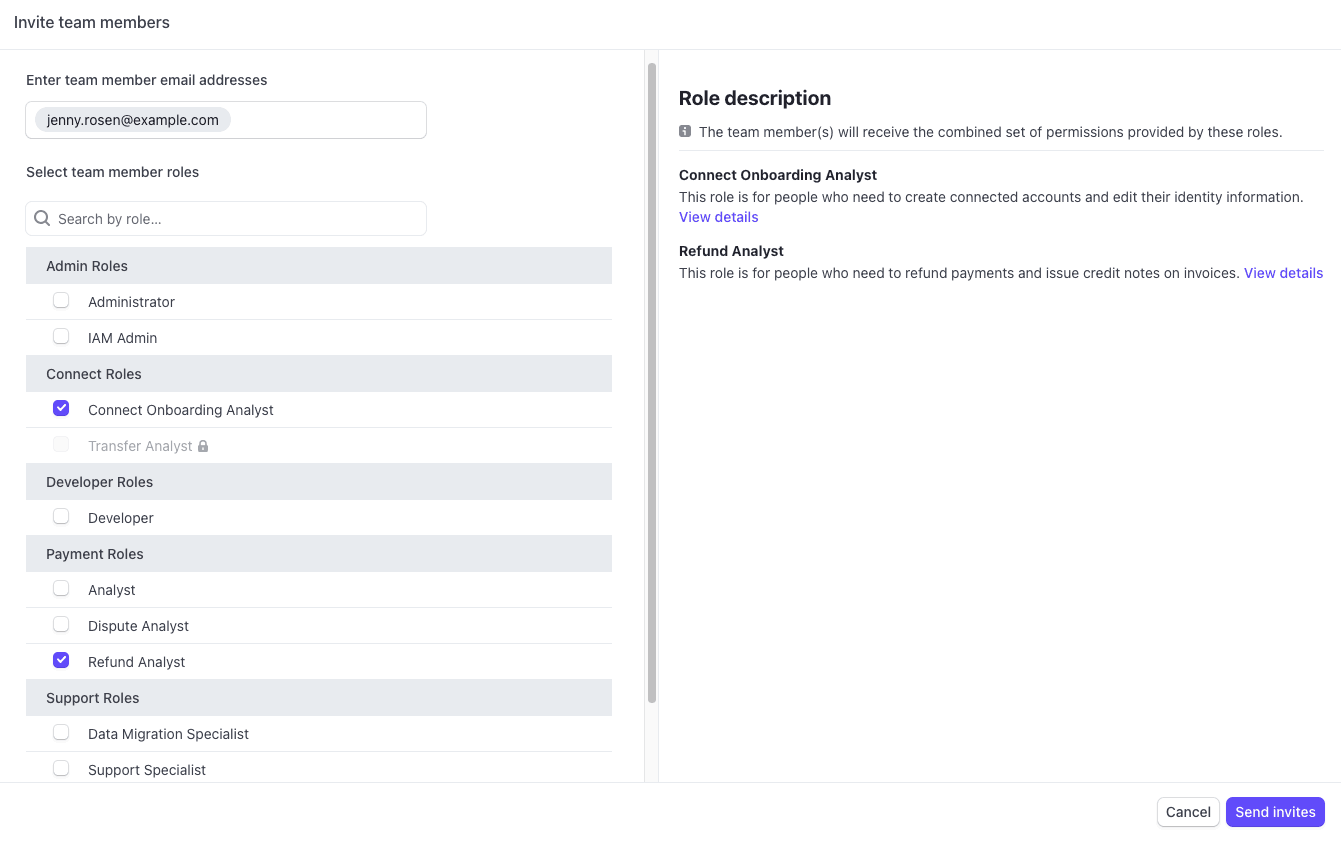
You can invite members of your team to access your Stripe account. You must assign each team member at least one role before you can invite them. Roles protect your sensitive information and restrict the actions team members can perform on your account. See the list of actions that each role can and can’t perform before assigning the role to a team member.
You can invite team members individually, or invite multiple users at the same time by separating their email addresses with a comma or space. You can also assign multiple roles to a team member, which gives them the combined set of permissions granted by those roles. Invites to your Stripe account expire after 10 days.
Invite a team member to access your Stripe account
After a team member has accepted their invite, you can edit their role at any time from your account’s Team settings. To edit a team member’s role, click the overflow menu (), then click Edit.
Mention team members 
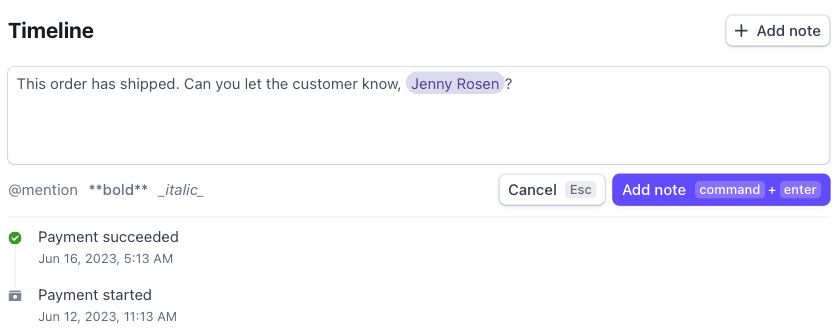
You can mention team members when you add a note to a payment. If you mention a team member, they receive an email notification with the note and a link to the associated payment.
Mention a team member
Receive email notifications
You can configure email notifications under Communication preferences in your Profile, and apply them on a per-user basis. If your team members also want to receive notifications, they must customize their own settings. Stripe sends email notifications to you when any of the following events occur:
- A successful payment is received.
- An application fee is collected from a connected account.
- A payment is disputed by a customer.
- A payment is marked as elevated risk by Stripe or a custom Stripe Radar rule.
- You’re mentioned in a note.
- A customer sends an incorrect amount to pay their invoice.
- A webhook delivery fails.
For a full list of notification events, go to your Communication preferences under Profile.