How Stripe Apps work
Learn how to build apps on Stripe.
Stripe Apps lets you embed custom user experiences directly in the Stripe Dashboard and orchestrate the Stripe API. You can build an app to:
- Create and modify Stripe data, such as customer information, orders, and invoices
- Sync Stripe data into other systems
- Add customizations to the Stripe user interface
For more examples of what you can build with Stripe Apps, see Sample apps.
The basic components of Stripe Apps:
Using Stripe Apps, you can create custom apps for your own account, or you can make your apps available to other Stripe users through the Stripe App Marketplace.
Use this guide to learn about the three types of Stripe Apps you can build and how to use permissions to get access to the information your app needs.
Full-stack applications
Most Stripe Apps have two components:
- A frontend component in the Stripe Dashboard, using UI extensions
- A backend component that’s responsible for saving the state and performing background operations
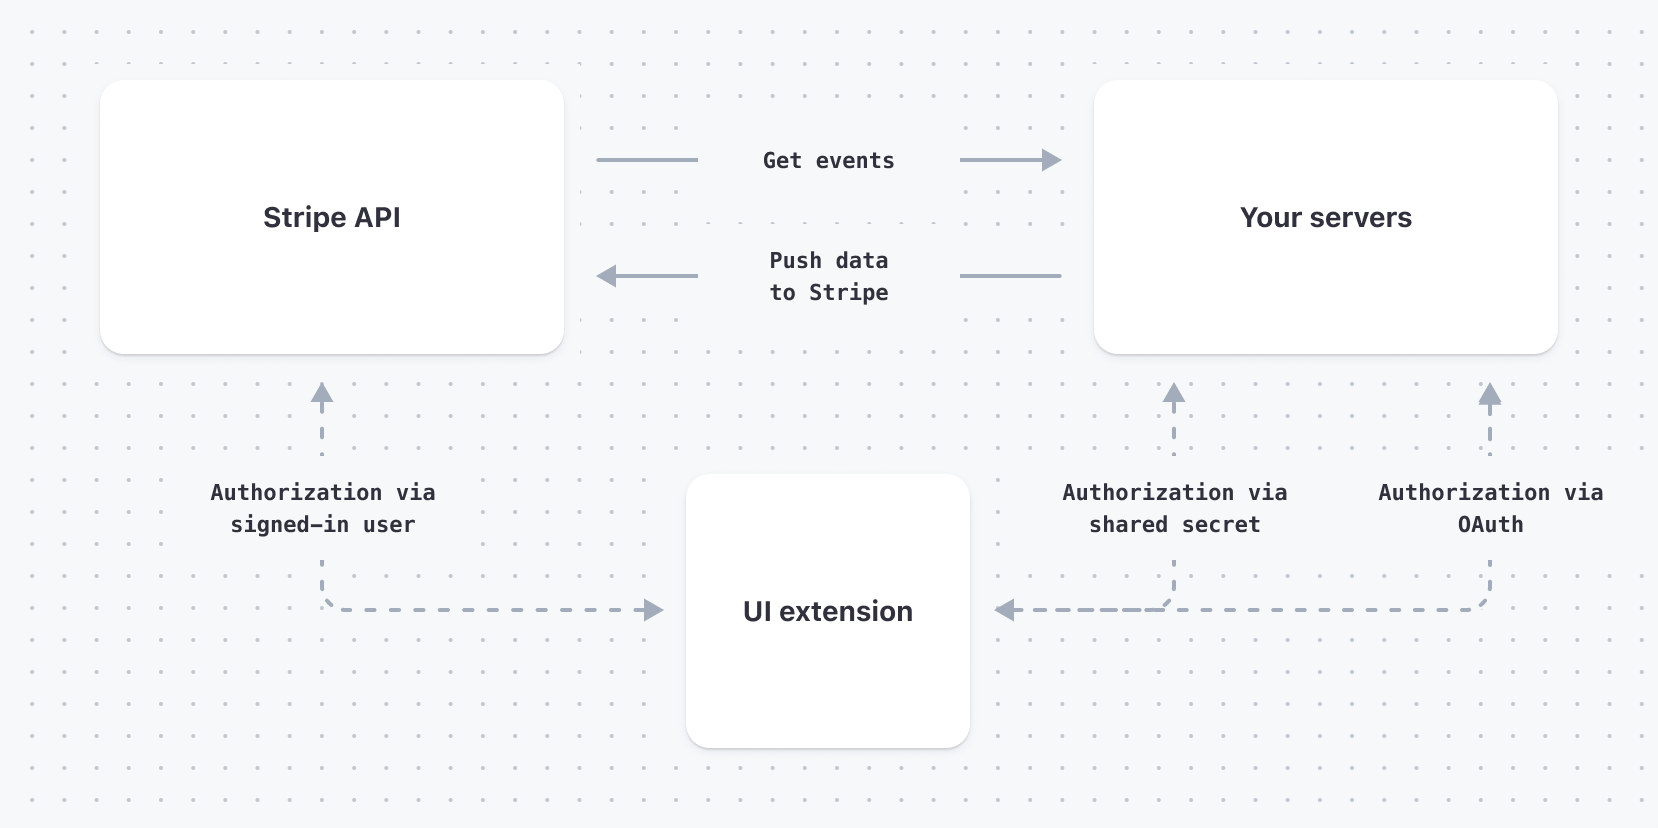
The components of a full-stack application
Authentication between an app’s UI and its corresponding backend services works by using either OAuth or a shared secret.
Note
When building a full-stack Stripe App, first see How UI extensions work and then Server-side logic as needed.
Backend-only applications
You can build a Stripe App without a UI. For example, an app might collect order data from Stripe and send that data to another service for fulfillment.
The components of a backend-only application:
For more information on what you can do with the backend of your app, see Server-side logic.
Frontend-only applications
You can build an app that extends the Stripe Dashboard and doesn’t include any additional backend functionality. A Stripe app can consist solely of a UI. With UI extensions, you create a custom UI and control where and how it appears in the Stripe Dashboard.
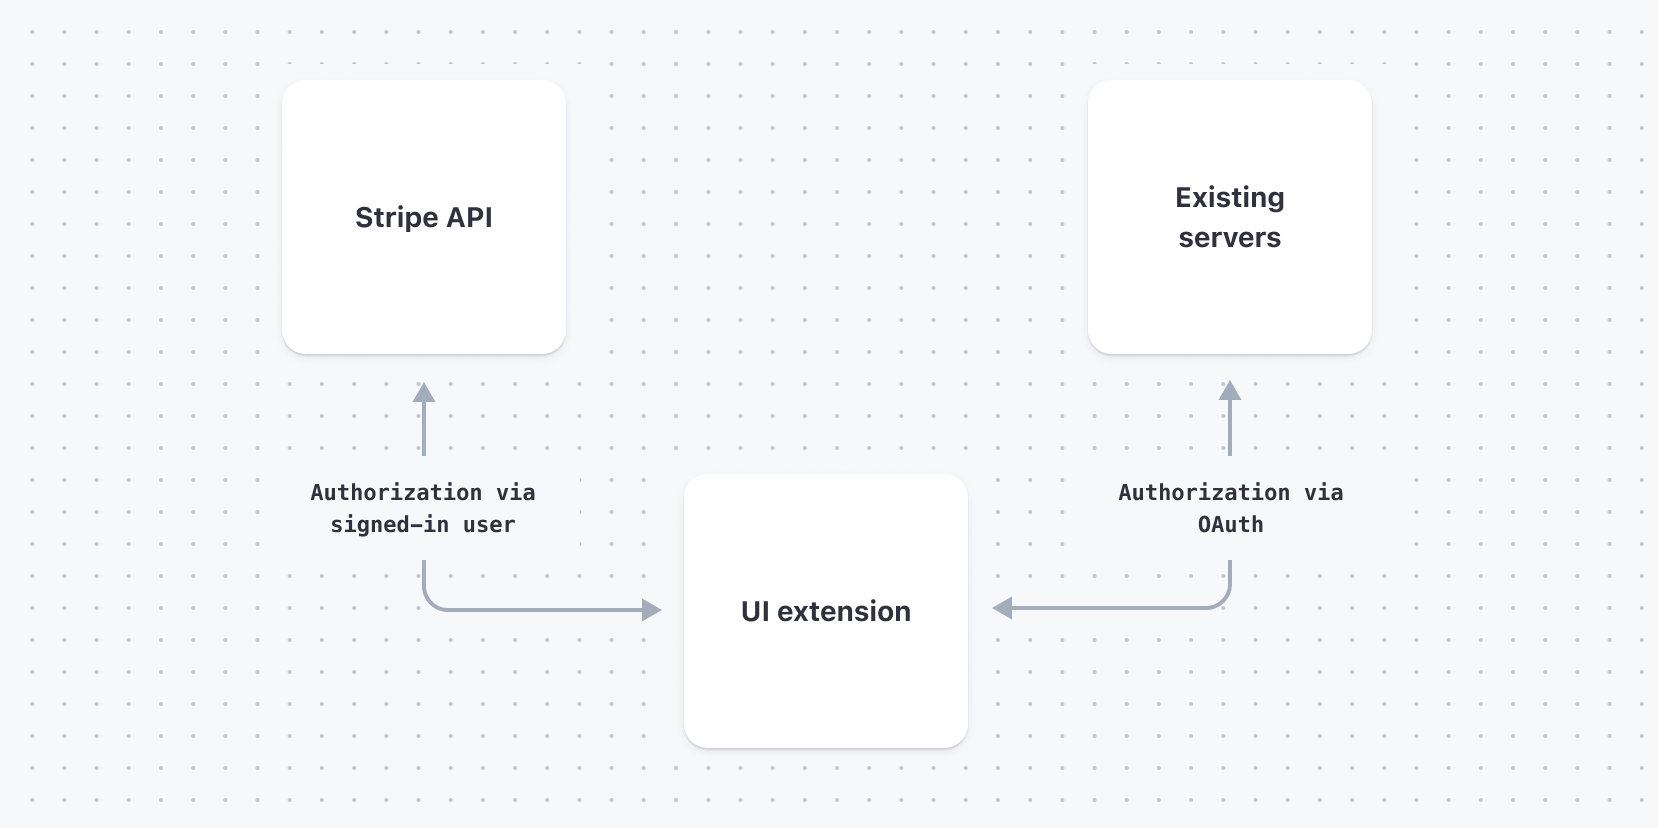
The components of a frontend-only application
Frontend-only applications using UI extensions are a good choice if:
- Your application doesn’t need to communicate with a backend service.
- Your application only needs to communicate with the Stripe API on behalf of a user signed in to the Stripe Dashboard.
- Your application uses an OAuth provider to authenticate users and interact with other services.
For more information, see How UI extensions work.
Application permissions
All Stripe Apps, regardless of type, require explicit permission to access data. These permissions fall into two categories:
- Stripe permissions, which determine what Stripe objects the application can read and write
- Third-party permissions, which determine what other services have access to a user’s Stripe data
The app manifest stores the Stripe and third-party permissions granted to an app.
Stripe permissions
Before an app can access any Stripe data, you must grant permission for that data to the app. See a complete list of all permissions.
Permissions apply in several ways:
- Apps can listen for webhook events on a Stripe object only if they have permission to read the object.
- Apps can make Stripe API calls only if that API grants permission to the application.
- When an app calls a Stripe API from a UI extension, both the app and the signed-in user must have permission to access the API.
UI extensions call the Stripe API on behalf of the signed in user. The app can’t access data or perform actions that the signed in user can’t also do. If the signed in user has permissions that the app didn’t request, the app is still unable to read or write that data. However, if the app has permissions that the signed in user doesn’t have, the app can still perform the action, if the app has permission to do so. In this case, the backend service is responsible for checking the user’s permissions.
Third-party services
Stripe Apps must also explicitly list the URLs for any non-Stripe services that could potentially receive Stripe data.
In UI extensions, accessible URLs are enforced by applying a Content Security Policy (CSP). This policy causes any fetch call to fail unless it’s explicitly listed in the app manifest.
Granting permissions
The app manifest stores all permissions for an application. To grant permissions to a specific Stripe object or backend service, use the stripe app grant command when you upload the app. For more information, see a list of all permissions.