Stripe Payment Element
Accept payment methods from around the globe with a secure, embeddable UI component.
Interested in using Stripe Tax, discounts, shipping, or currency conversion?
Stripe has a Payment Element integration that manages tax, discounts, shipping, and currency conversion for you. See build a checkout page to learn more.
The Payment Element is a UI component for the web that accepts 40+ payment methods, validates input, and handles errors. Use it alone or with other elements in your web app’s front end.
Country availability
In Brazil and Thailand, Payment Elements don’t support Link.
Stripe offers two core payments APIs compatible with Elements that give you the flexibility to accept various types of payments from your customers. You can integrate these APIs into Stripe’s prebuilt payment interfaces. While we recommend using Checkout Sessions for most users, the APIs serve slightly different use cases depending on how you choose to structure your checkout flow and how much control you require. You can build a checkout page with the Checkout Session API or build an advanced integration with the Payment Intents API.
- The Checkout Sessions API allows you to model your customer’s checkout flow. This includes the line items included in their purchase, billing and shipping addresses, applicable tax rates, and coupons or discounts. The Checkout Session allows you to create subscriptions, calculate tax rates with Stripe Tax, and initiate payments.
- The Payment Intents API allows you to model the payments step. Unlike the Checkout Sessions API, which requires line item details, you only pass in the final amount you want to charge. This is suitable for payment flows, such as off-session payments. If you want to use Stripe to calculate applicable taxes or create subscriptions, you must integrate with the Stripe Tax API or Subscriptions API, respectively.

Combine elements
The Payment Element interoperates with other elements. For instance, this form uses one additional element to autofill checkout details, and another to collect the shipping address.
Note
You can’t remove the Link legal agreement because it’s required to ensure compliance with proper user awareness of terms of services and privacy policies. The terms object doesn’t apply to the Link legal agreement.
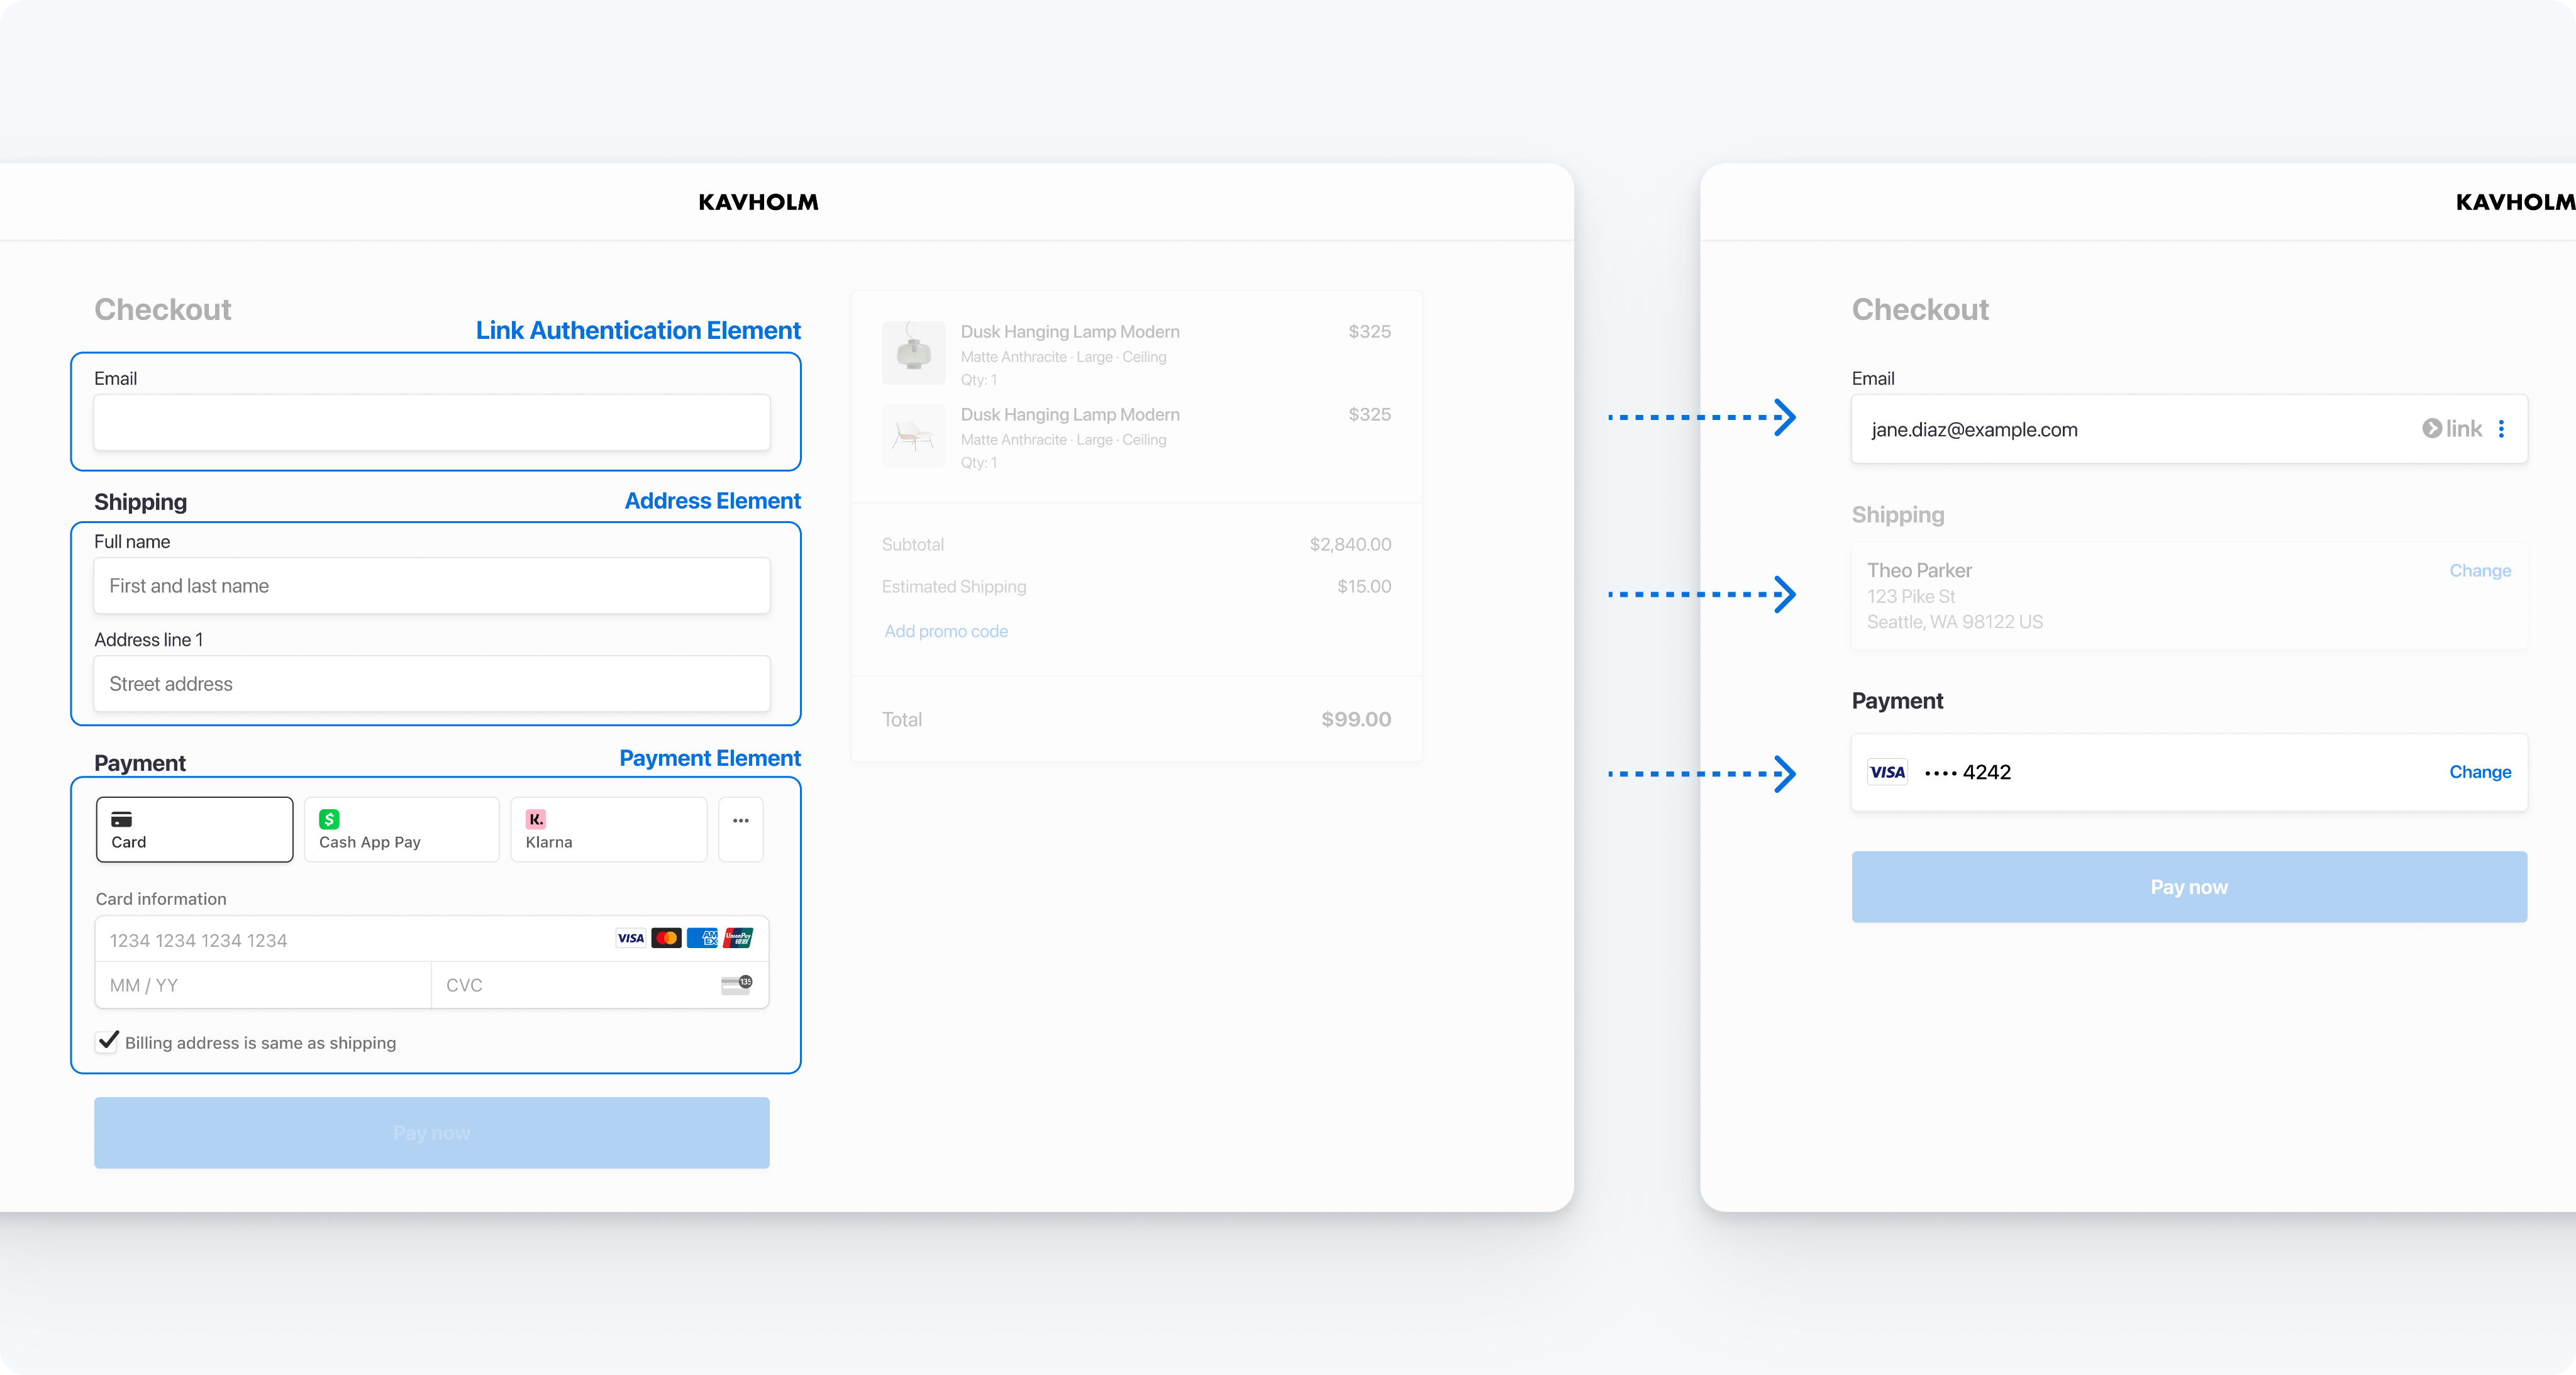
For the complete code for this example, see Add Link to an Elements integration.
You can also combine the Payment Element with the Express Checkout Element. In this case, wallet payment methods such as Apple Pay and Google Pay are only displayed in the Express Checkout Element to avoid duplication.
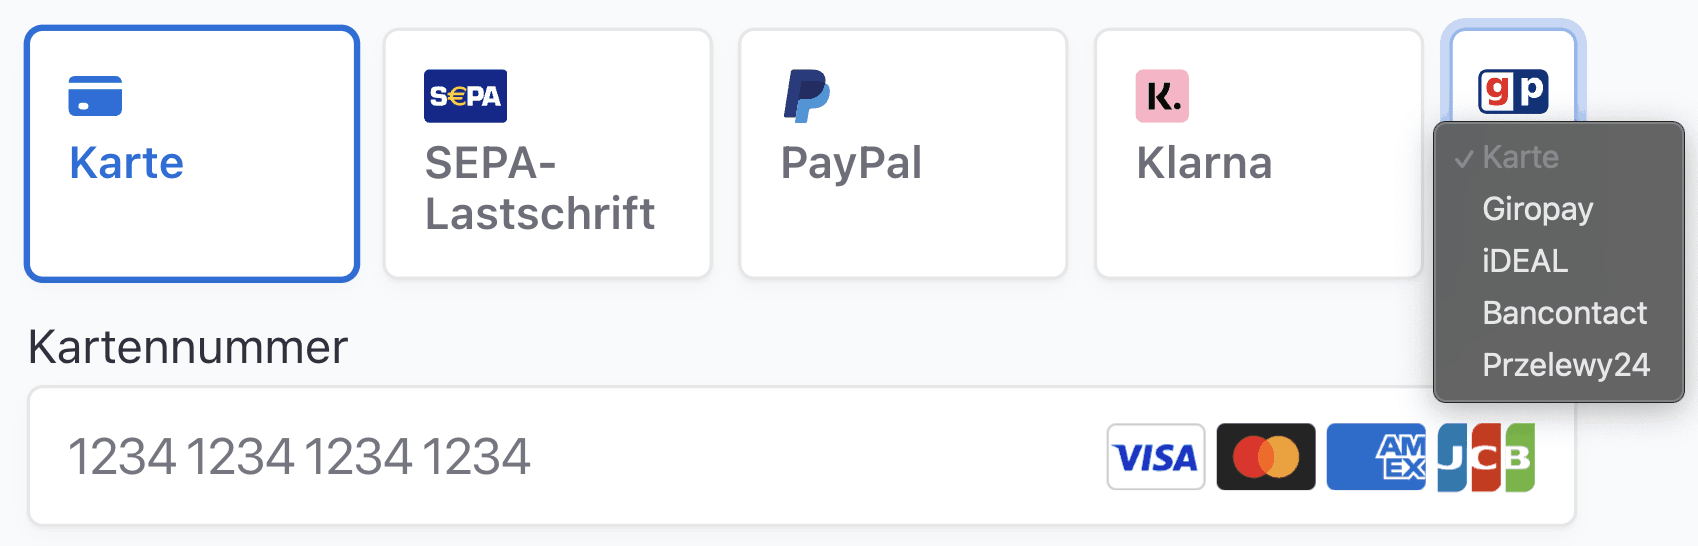
Payment methods
Stripe enables certain payment methods for you by default. We might also enable additional payment methods after notifying you. Use the Dashboard to enable or disable payment methods at any time. With the Payment Element, you can use Dynamic payment methods to:
- Manage payment methods in the Dashboard without coding
- Dynamically display the most relevant payment options based on factors such as location, currency, and transaction amount
For instance, if a customer in Germany is paying in EUR, they see all the active payment methods that accept EUR, starting with ones that are widely used in Germany.
Show payment methods in order of relevance to your customer
To further customise how payment methods render, such as by filtering card brands that you don’t want to support, see Customise payment methods. To add payment methods integrated outside of Stripe, see External payment methods.
If your integration requires you to list payment methods manually, see Manually list payment methods.
Layout
You can customize the Payment Element’s layout to fit your checkout flow. The following image is the same Payment Element rendered using different layout configurations.
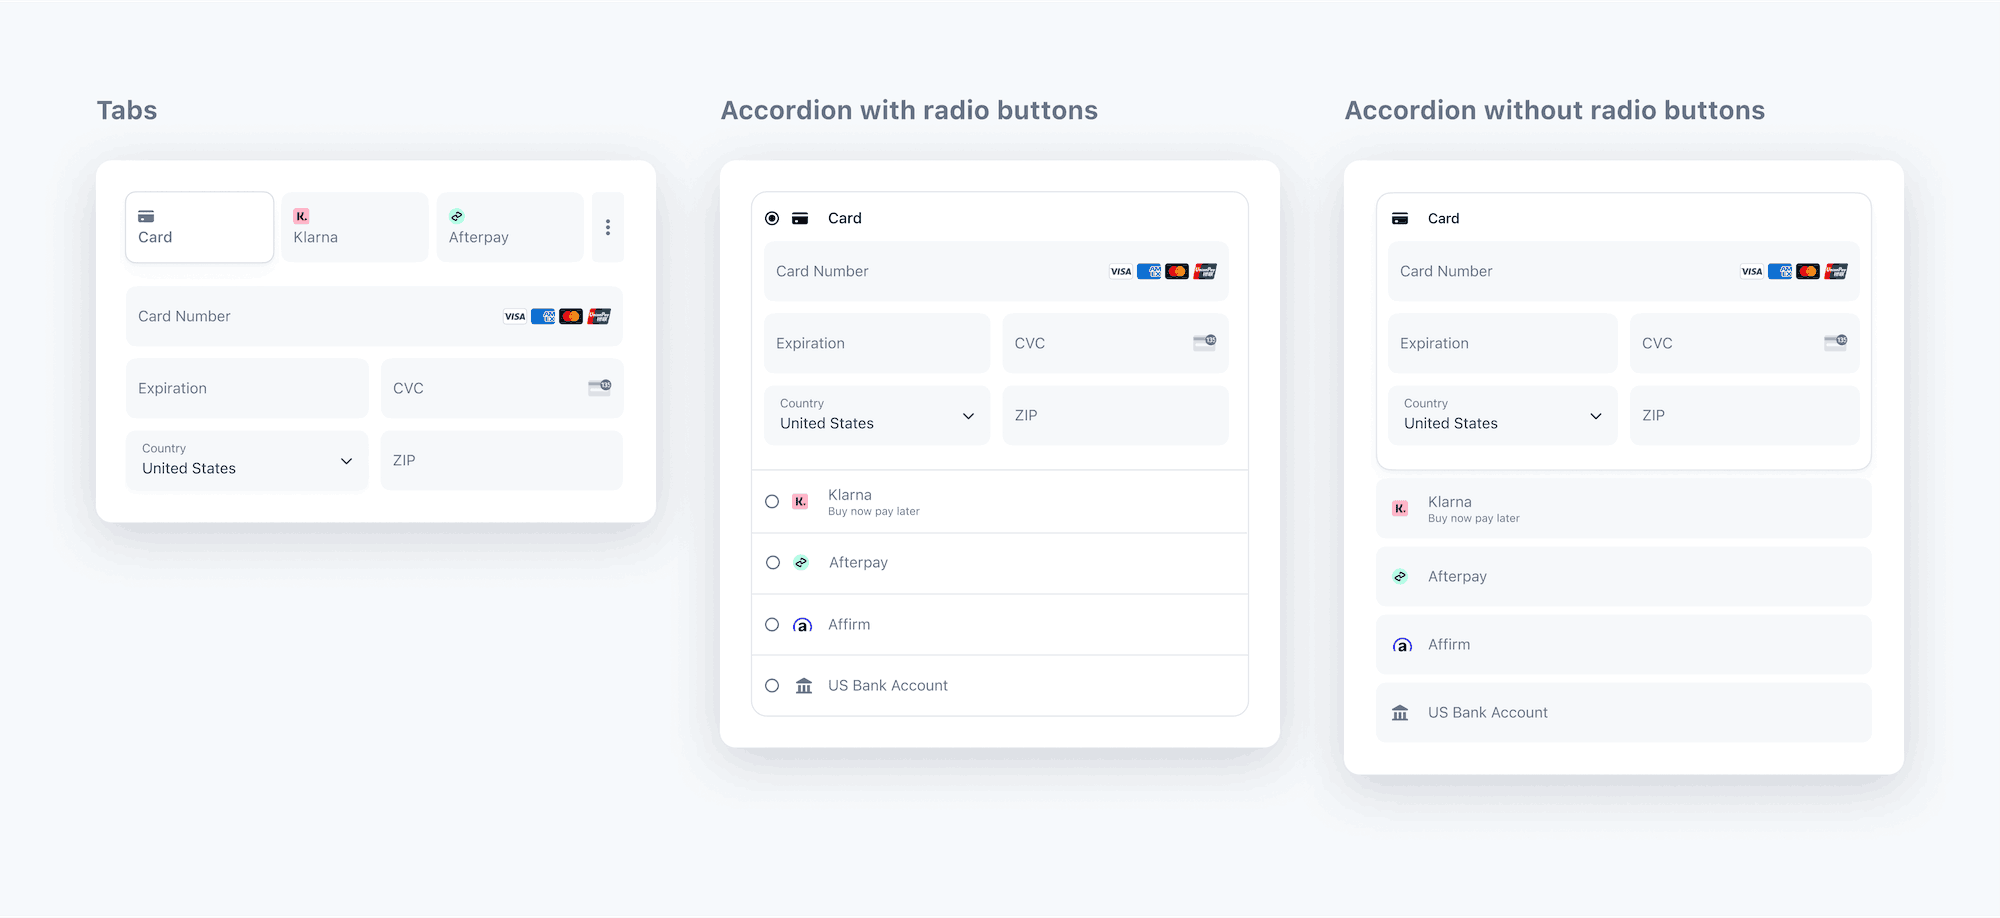
Payment Element with different layouts.
Appearance
Use the Appearance API to control the style of all elements. Choose a theme or update specific details.
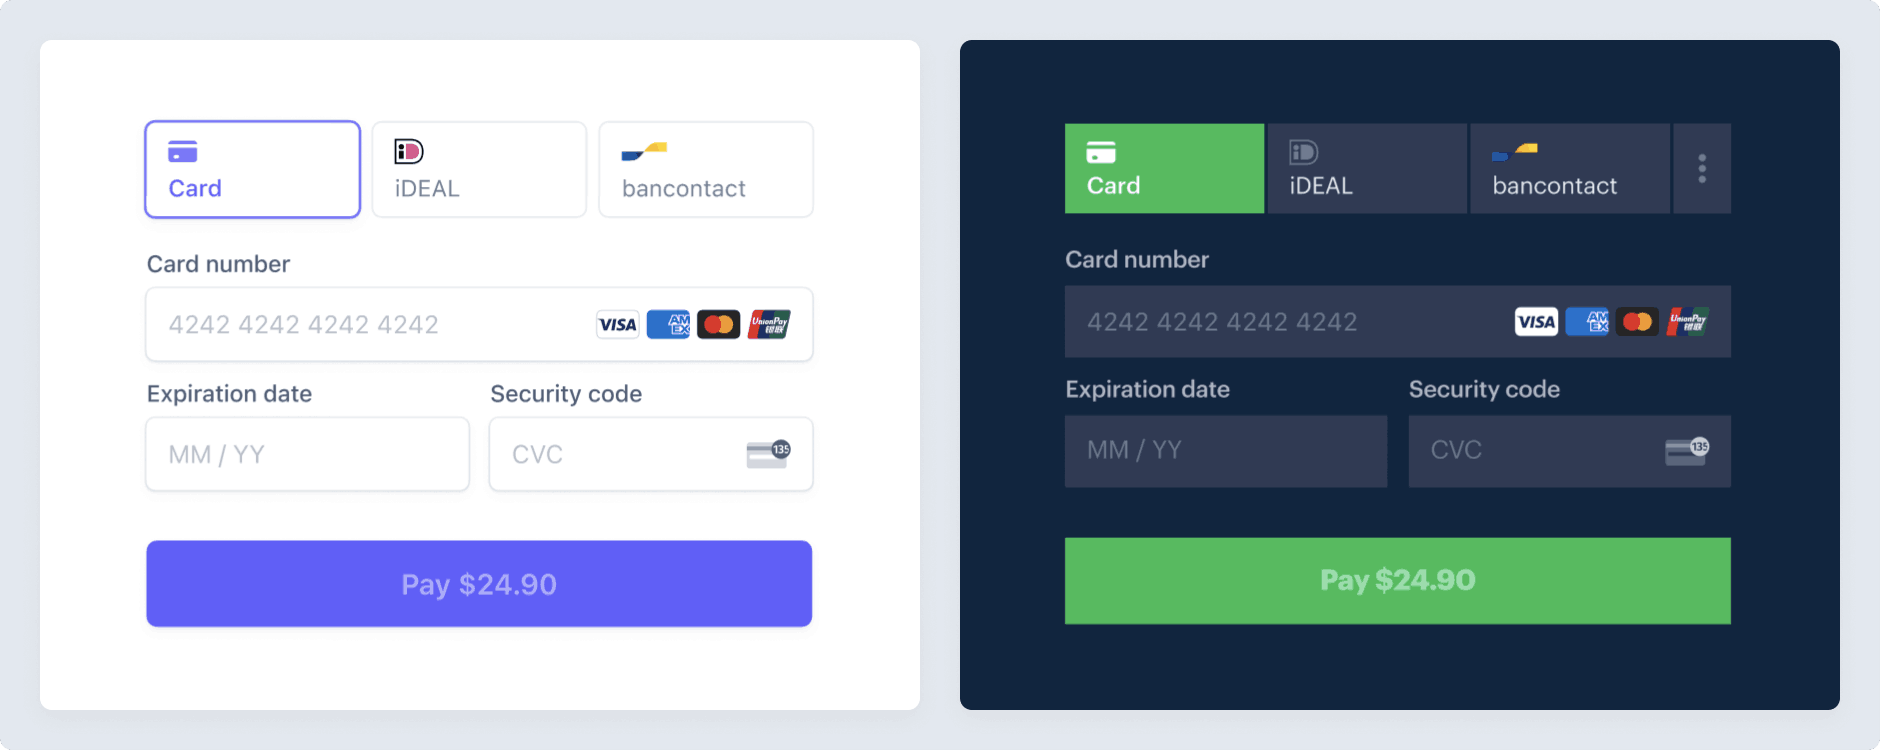
For instance, choose the “flat” theme and override the primary text colour.
const stripe = Stripe(); const appearance = { theme: 'flat', variables: { colorPrimaryText: '#262626' } };'pk_test_TYooMQauvdEDq54NiTphI7jx'
See the Appearance API documentation for a full list of themes and variables.
Options
Stripe elements support more options than these. For instance, display your business name using the business option.
const stripe = Stripe(); const appearance = { /* appearance */}; const options = { business: { name: "RocketRides" } };'pk_test_TYooMQauvdEDq54NiTphI7jx'
The Payment Element supports the following options. See each option’s reference entry for more information.
| layout | Layout for the Payment Element. |
| defaultValues | Initial customer information to display in the Payment Element. |
| business | Information about your business to display in the Payment Element. |
| paymentMethodOrder | Order to list payment methods in. |
| fields | Whether to display certain fields. |
| readOnly | Whether payment details can be changed. |
| terms | Whether mandates or other legal agreements are displayed in the Payment Element. The default behaviour is to show them only when necessary. |
| wallets | Whether to show wallets such as Apple Pay or Google Pay. The default is to show them when possible. |
Errors
Payment Element automatically shows localised customer-facing error messages during client confirmation for the following error codes:
generic_decline insufficient_funds incorrect_zip incorrect_cvc invalid_cvc invalid_expiry_ month invalid_expiry_ year expired_card fraudulentlost_card stolen_card card_velocity_ exceeded
To display messages for other types of errors, refer to error codes and error handling.