Hosted Invoice Page
Use the Hosted Invoice Page to securely collect payment from your customers.
The Hosted Invoice Page provides a secure, private URL where your customers can:
- View the details, amounts, and status of the invoice.
- Pay the invoice using any of the enabled payment methods.
- Download PDF copies of the invoice and receipt.
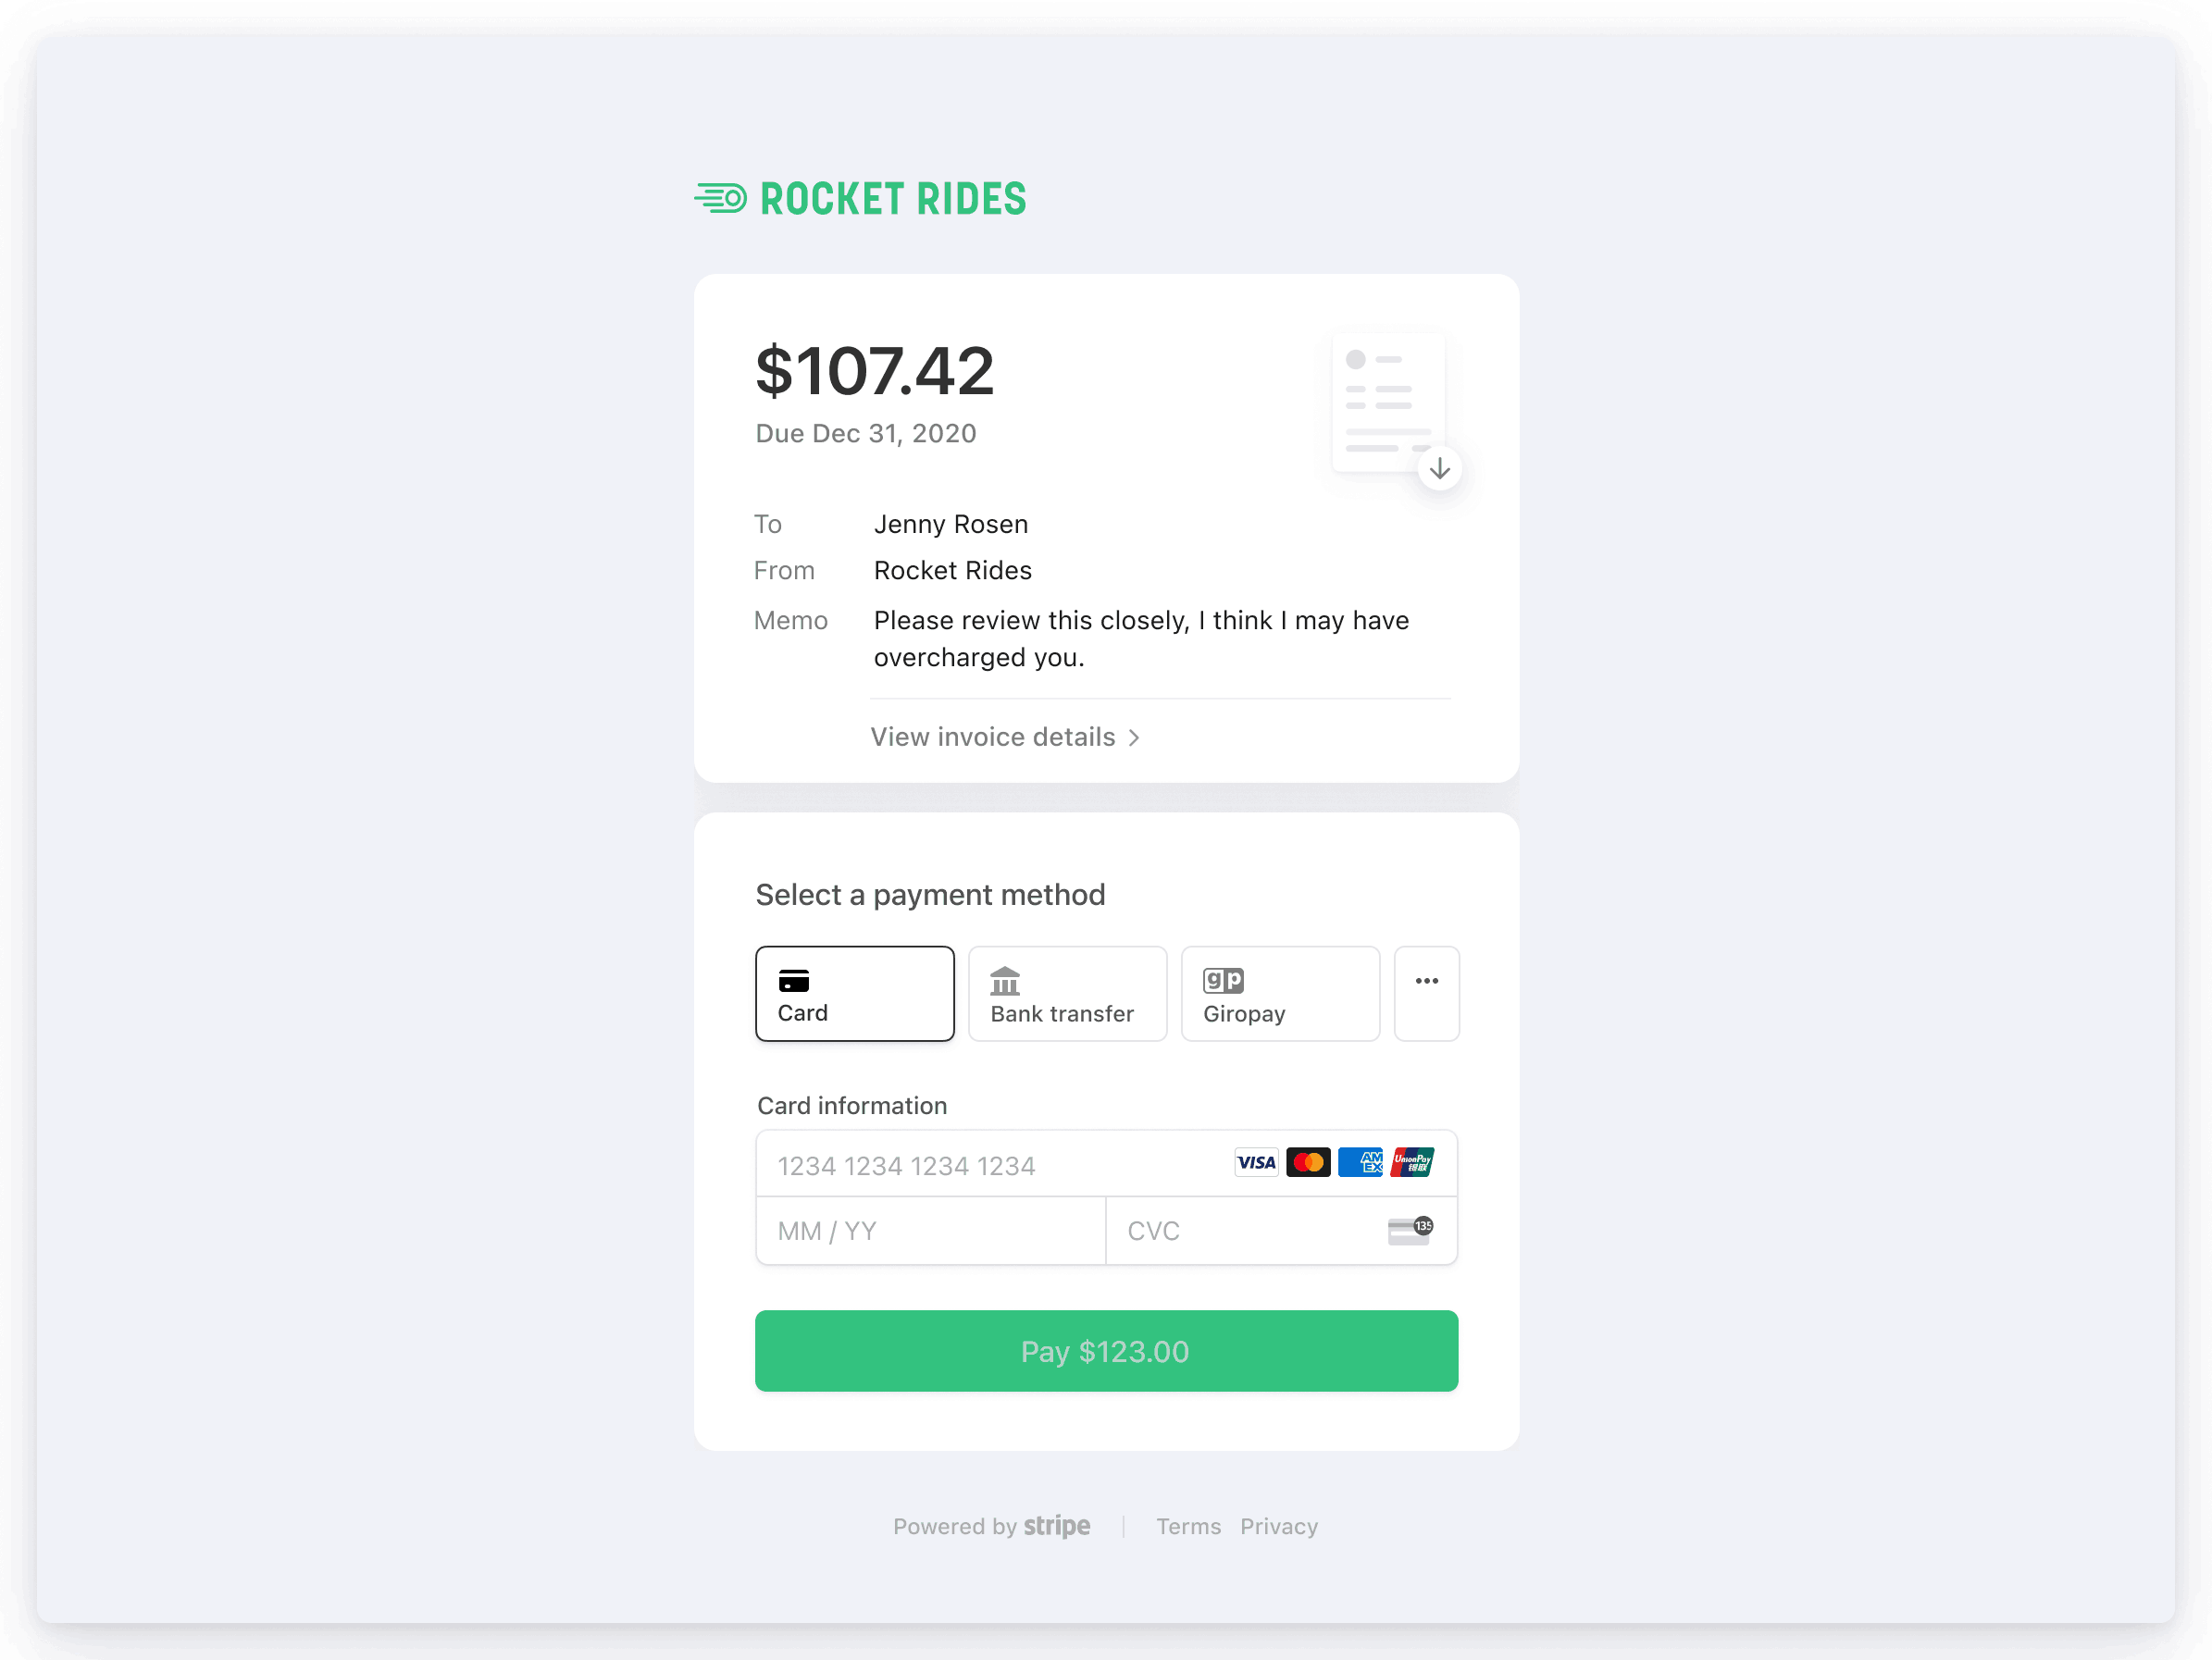
A sample Hosted Invoice Page
Stripe assigns all invoices a unique URL that you can send to your customer. We host these invoices, which means you can securely collect payments without any extra implementation code.
Invoice URLs 
When you create and send an invoice, Stripe generates a unique URL for the Hosted Invoice Page. The URL includes a secure, long, and random identifier, resembling the following example:
https://invoice.stripe.com/i/acct_abcdefghijklmno/test_YWNjdF8xRGZ3UzJDbENJS2xqV3ZzLF9MNGJvMDBzY0xFQ2c1cG1QZzZ6Wk5jV0RXR2lOS1V6LDM0Mjk3NjEz0200wpYOWgBE?s=em
Invoice URLs expire 30 days after the due date. If the invoice doesn’t have a due date, the invoice expires 30 days after it finalizes. In all cases, the expiration window is never longer than 120 days.
Note
Even after expiration, any URLs that the Dashboard displays or a user retrieves through the API are guaranteed to be valid for at least 10 days.
Invoice email links
You can configure the invoice email to include a link to the Hosted Invoice Page. When enabled, the Hosted Invoice Page URL appears in:
- Invoice emails as a payment link.
- The footer of invoice PDFs.
- The Invoice API response as hosted_invoice_url.
To enable the Hosted Invoice Page for all newly created invoices, select the checkbox for Include a Stripe-hosted link to an invoice payment page in the invoice email in the Invoice settings of the Dashboard.
When sending an invoice, you can use the Delivery section to have Stripe automatically send an email to your customer with the Hosted Invoice Page or generate a Hosted Invoice Page that you can send yourself. To send the Hosted Invoice Page yourself, create the invoice and then copy the link to send to your customer.
Page customization
The Hosted Invoice Page is customizable with your:
- Brand color
- Logo
- Icon
You can customize these branding settings in the Dashboard.
Set allowed payment methods
Using the Hosted Invoice Page, you can configure invoices to allow payment with one or more of the supported payment methods. You can set defaults to apply to all of the newly created invoices from the Invoice default payment method configuration. You can also select the payment method on a per-invoice basis when you’re creating an invoice through the Dashboard.
With the Hosted Invoice Page, you can display the allowed payment method list to the customer. This gives them the option to choose a payment method that suits them best. Additionally, enabling the Hosted Invoice Page gives the customer the benefit of having Stripe handle complex payment and authentication flows (without any extra implementation effort from you).
Note
For example, the Strong Customer Authentication (SCA) regulation in Europe requires customers to confirm their payment with 3D Secure (3DS). In this case, the Hosted Invoice Page displays the payment confirmation modal to your customer.
Payment method persistence
Caution
Global privacy laws are complicated and differ by region. You might be required to present your customer with terms and obtain requisite consents before storing a customer’s payment method. Before using this feature, consult with your legal counsel for advice specific to your business.
You can configure how payment method details that customers enter on the Hosted Invoice Page are saved for future use. By default, Stripe doesn’t store payment methods used for one-time payments, unless the customer opts in using a checkbox displayed on the Hosted Invoice Page.
When a customer returns to the Hosted Invoice Page, saved payment methods with allow_redisplay of always are displayed and available to use.
Note
Customers are only presented with saved payment methods of type Card, Link, ACH Direct Debit, or SEPA Debit.
Configuration Options
The following configurations are available for storing payment methods used for one-time invoice payments on the Hosted Invoice Page.
- Offer: Payment methods for one-time invoices are saved only if the customer selects a checkbox displayed before completing payment. (Default for new accounts created after May 30, 2025.)
- If your integration uses the deprecated Sources API for invoices or uses card installments, this checkbox won’t be displayed, so the payment method won’t be saved since the customer cannot provide consent.
- Have terms in place with the customer about how you plan to use payment methods that they decide to save.
- allow_redisplay is set to
alwaysif the customer selects the checkbox, andlimitedif they don’t.
- Never: Payment methods used for one-time invoices aren’t saved.
- allow_redisplay is set to
limited.
- allow_redisplay is set to
- Always: Payment methods used for one-time invoices are always saved, without asking the customer.
- Saving payment methods without explicit customer permission can violate privacy regulations in many jurisdictions. Before selecting this option, make sure that it complies with local laws.
- allow_redisplay is set to
limited.
Select a configuration
To configure saving payment methods, use the controls in the Default payment terms section of the Invoice settings page of your Dashboard. To enable saving payment methods, select Save customer payment information. To allow saving without asking the customer first, deselect Ask customers before saving their payment information.
| Configuration | Save customer payment information | Ask customers before saving their payment information |
|---|---|---|
| Offer | On | On |
| Always | On | Off |
| Never | Off | Off |
Limitations
If saving a payment method is enabled, the Hosted Invoice Page only saves reusable payment methods. These payment methods include:
- Cards
- Link
- Pre-authorized Debit
- BECS Direct Debit
- Bacs Direct Debit
- SEPA Direct Debit
- ACH Direct Debit
Overrides
Some cases override this setting, depending on the invoice and account properties. This only applies to payment methods that are reusable (see list above).
- If the invoice has an attached subscription, the payment method is always saved.
- If your Stripe account allows customers to schedule payments and the customer chooses to schedule their invoice payment, the payment method is always saved.
- If the invoice’s attached PaymentIntent has a setup_future_usage value of
off_orsession on_, the payment method is always saved.session - If the invoice uses card installments, or your integration uses the deprecated Sources API to collect hosted invoice payments, the
offerconfiguration doesn’t save customer payment methods. Those cases don’t support the customer consent checkbox, so the customer can’t provide consent.
Public support information
Invoices include any public information that you specified under Public business information, such as your support email address or business website. Using these settings, you can also choose to include a support phone number in customer-facing documents—like invoice PDFs and emails—or default to your business address.