Address Element
Address Element を使用して詳細な請求先住所と配送先住所を収集します。
Address Element は詳細な住所を受け入れる埋め込み可能な UI コンポーネントです。配送先住所を収集する際や、税務上の目的などで詳細な請求先住所が必要な場合に使用してください。
| オプション | 説明 |
|---|---|
| Theme | Use the dropdown to choose a theme or customize the theme with the Elements Appearance API. |
| Desktop and mobile size | Use the dropdown to set the max pixel width of the parent element that the Address Element is mounted to. You can set it to 750px (Desktop) or 320px (Mobile). |
| Customer location | Use the dropdown to choose a location for accepting complete addresses. Changing the location localizes the UI language and displays locally relevant payment methods. |
| 電話番号 | Enable this option to allow phone number collection when the address form is expanded or using a contact. |
| Autocomplete | Enable this option to decrease checkout time, reduce validation errors, and increase checkout conversion with built-in address autocomplete. Stripe supports 236 regional address formats, including right-to-left address formats. |
| Contacts | Enable this option to add a new address or change an existing address or phone number. |
サンプルから開始する
実際の Address Element を確認するには、まず、以下のいずれかのサンプルをご覧ください。
Address Element を作成する
Address Element を作成する際は、それを配送モードと請求モードのどちらで使用するかを指定します。
その他のエレメントとともに住所 Element を使用する
You can collect both shipping and billing addresses by using multiple Address Elements, one of each mode, on your page.
If you need to collect both shipping and billing addresses and only want to use one Address Element, use the Address Element in Shipping mode and use the Payment Element to collect only the necessary billing address details.
住所 Element を他の Element とともに使用すると、PaymentIntent または SetupIntent の確定時に一部の動作を自動で実行できます。PaymentIntent または SetupIntent の確定時に住所 Element の完全性が検証され、検証エラーが発生した場合はフィールドごとにエラーが表示されます。
住所を使用する
Address Element は Payment または Express Checkout Element と自動的に連携します。購入者が住所と支払い方法を指定すると、Stripe は適切なフィールドに住所を設定して、それらを 1 つの PaymentIntent に結合します。
自動の動作
Element のデフォルトの動作はモードによって異なります。
カスタムの動作
通常は、Address Element のデフォルト動作で十分です。ただし、複雑な決済フローでは、顧客の入力に対するカスタムレスポンスの記述が必要になる場合があります。詳細については、住所の入力をリッスンするをご覧ください。
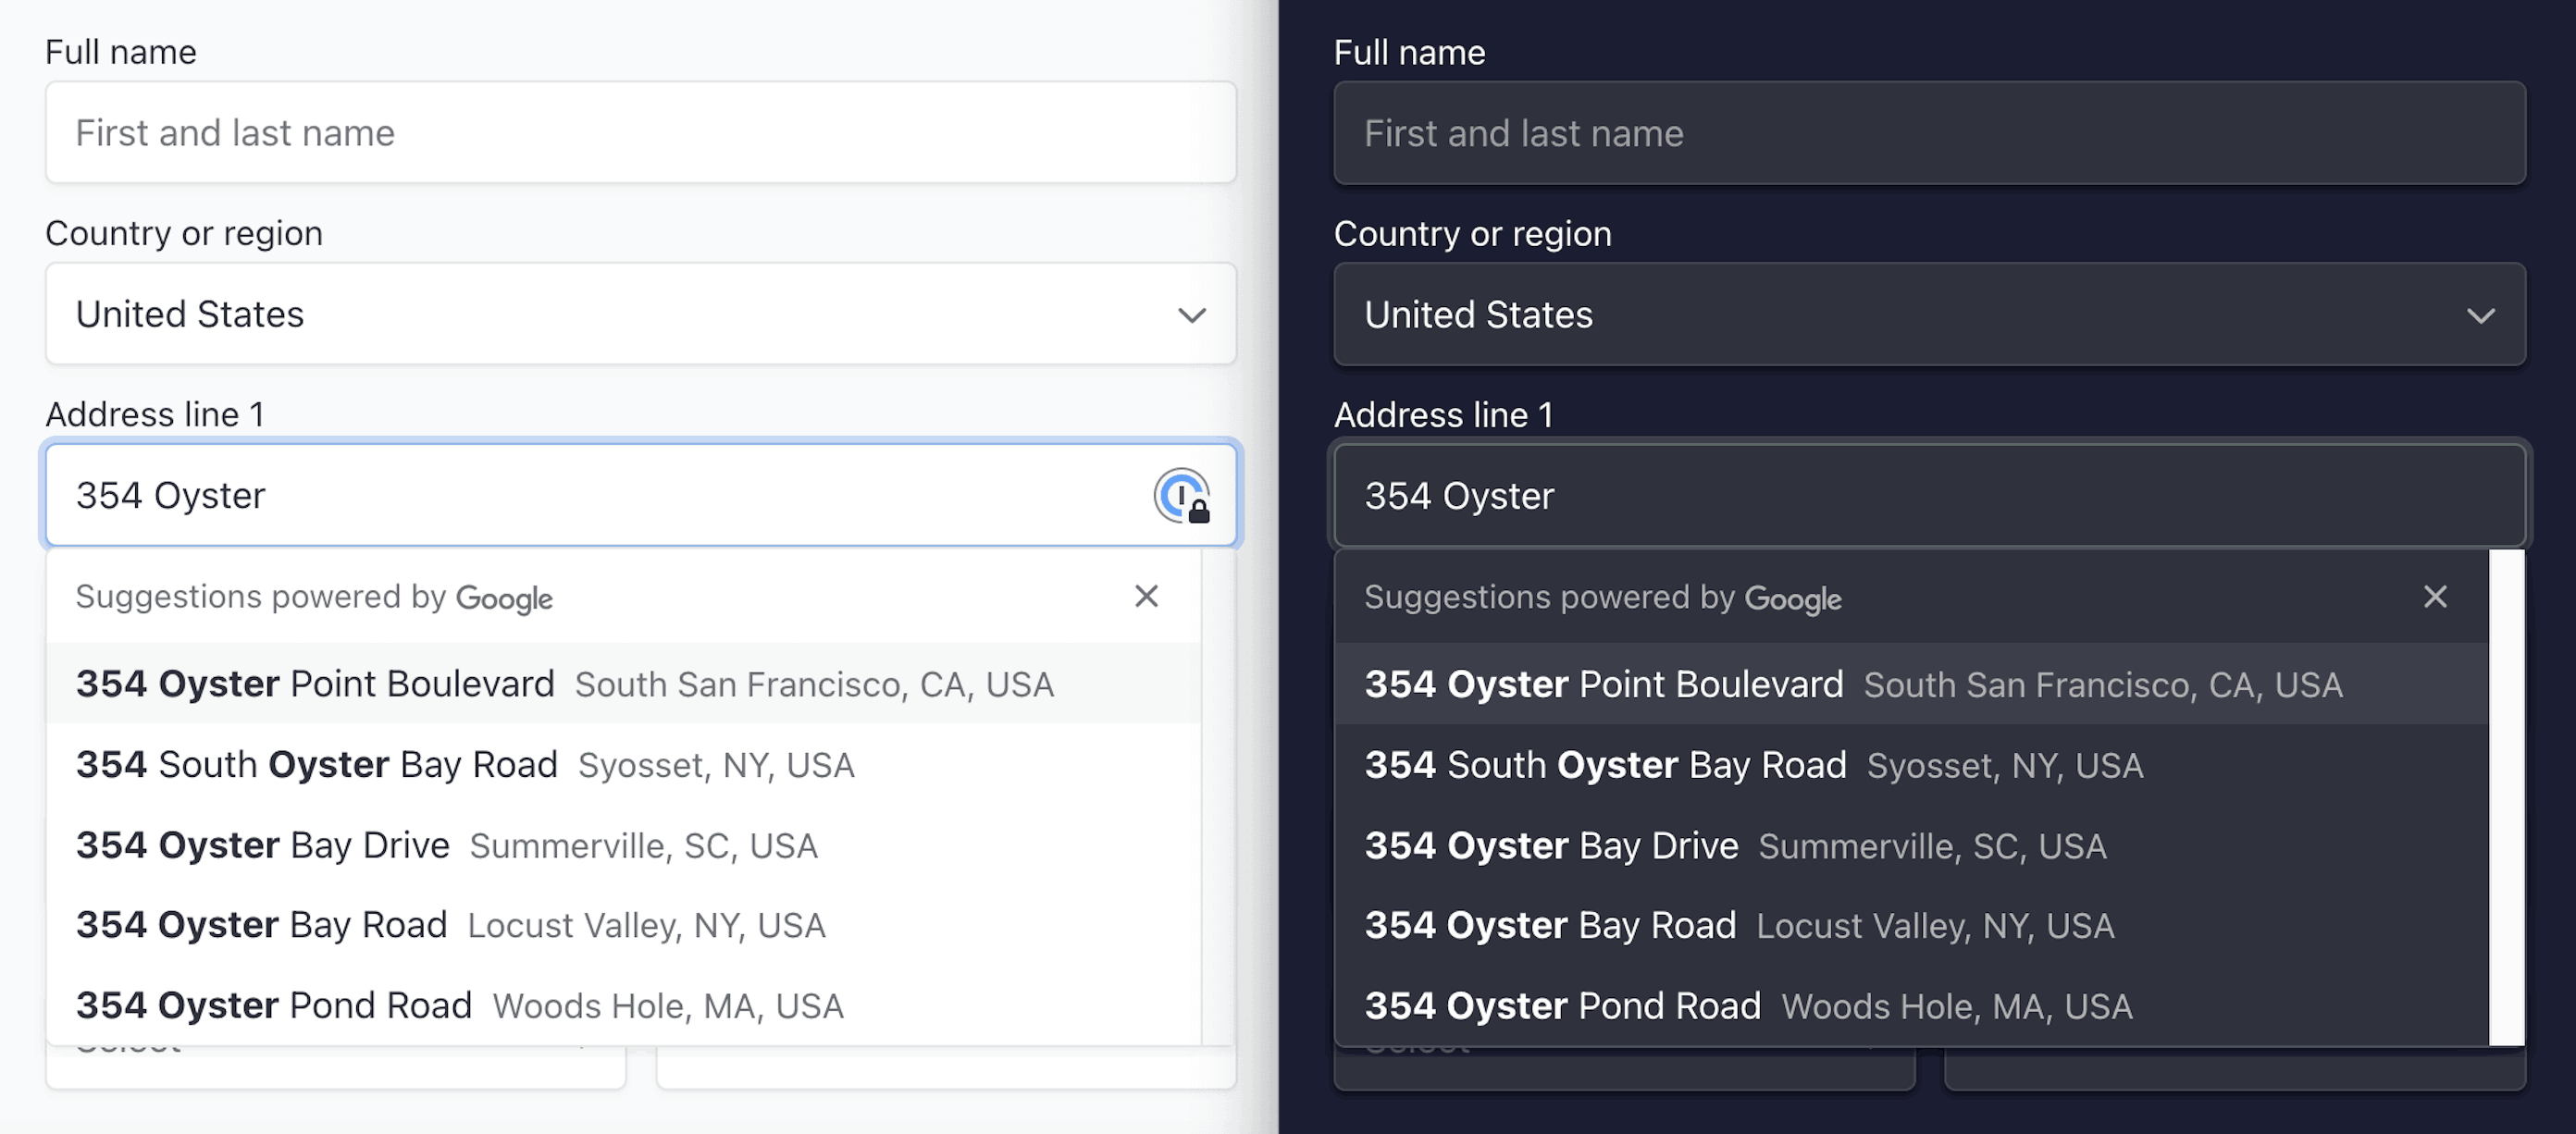
オートコンプリート
Address Element では、25 カ国の住所のオートコンプリートを利用できます。顧客が住所にサポート対象の国を選択した場合に、オートコンプリートオプションが表示されます。オートコンプリートは以下の国でサポートされています。
住所要素と支払い要素を一緒に使用すると、Stripe は設定を必要とせずにオートコンプリートを有効にします。これは、Stripe が提供する Google マップ API キーを使用して行われます。
注
オートコンプリートを使用すると、Google Maps Platform 利用規定に準拠することに同意したことになります。このポリシーに違反した場合、オートコンプリートが無効になるか、必要に応じてその他の措置が講じられることがあります。
Address Element を単体で使用する場合は、Stripe アカウントとは別で管理するご自身の Google Maps API Places Library キーを使用する必要があります。キーを autocomplete.apiKey オプションに渡します。
Link を使用した自動入力
Link は、有効にしたオプションの支払い情報と配送情報を保存し、自動入力します。たとえば、Link の顧客が電話番号を保存した場合、電話番号の収集が有効になっている場合にのみ、Stripe は電話番号を自動入力します。Link のリピート顧客が認証されると、Stripe は Address Element に配送情報を自動入力します。
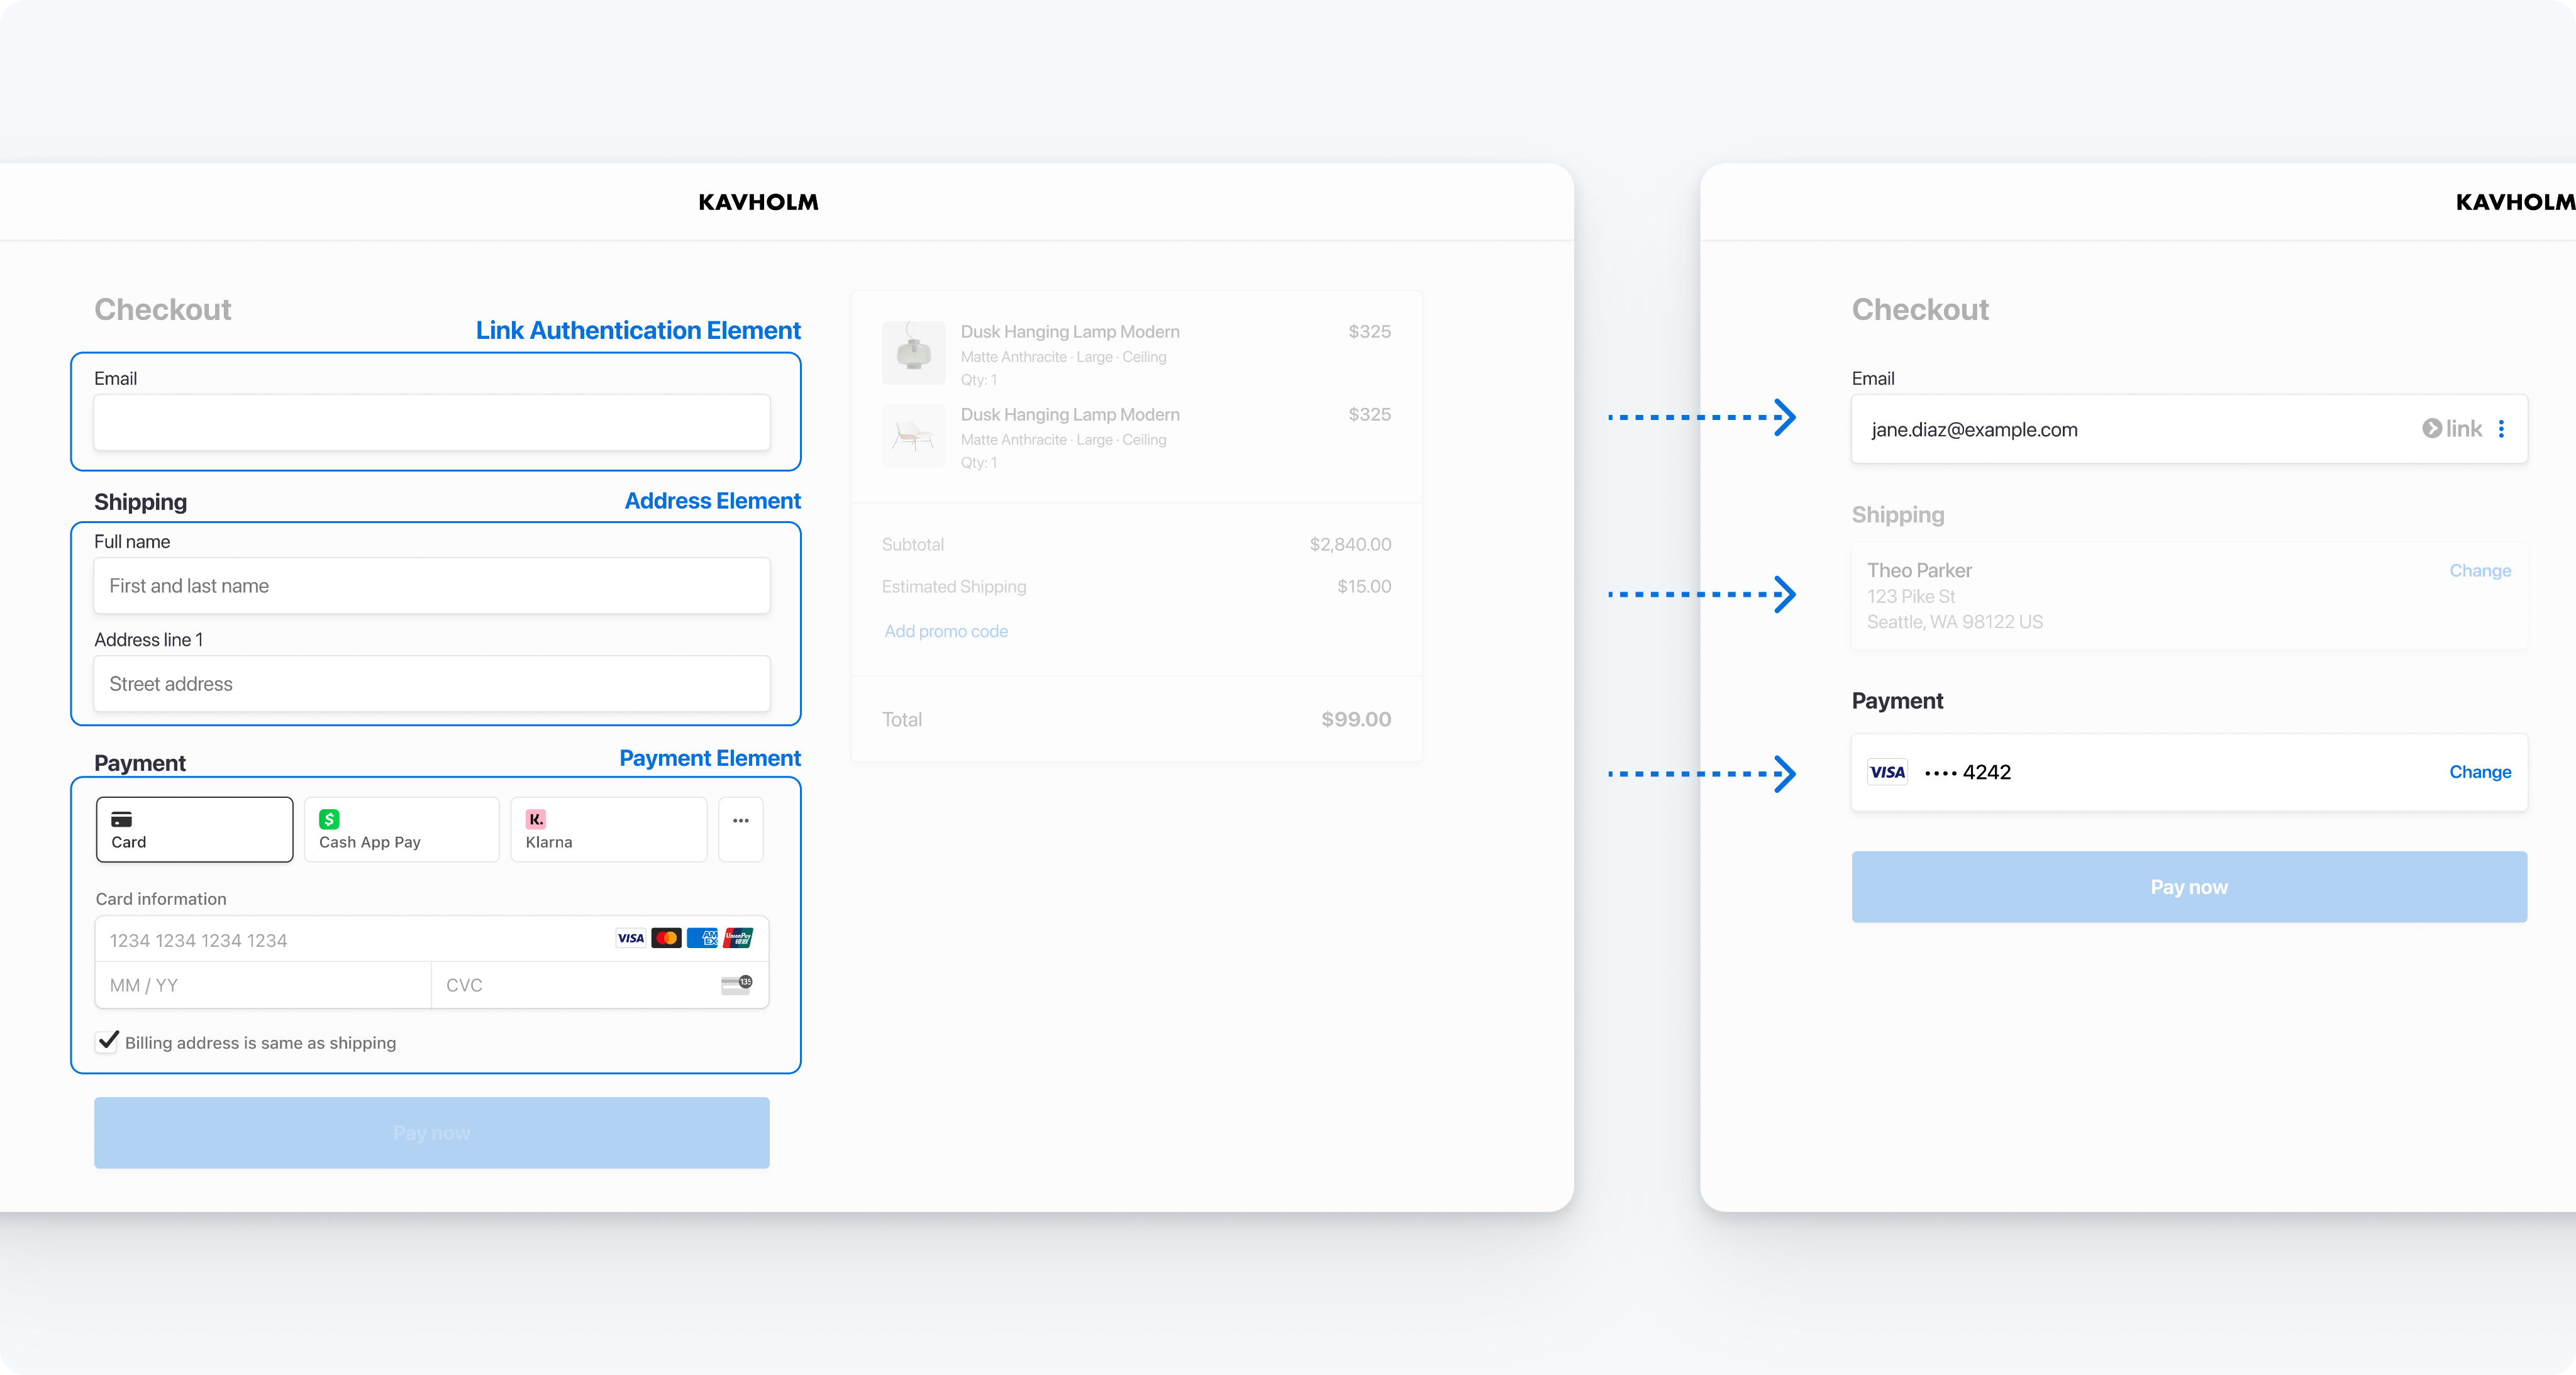
複数の Elements を使用して決済フォームを作成する
自動入力を有効にするには、この例のように、同じ Elements オブジェクトからすべての Element を作成します。
const stripe = Stripe(); const appearance = { /* appearance */ }; const options = { mode: 'shipping' }; const paymentElementOptions = { layout: 'accordion'}; const elements = stripe.elements({'pk_test_TYooMQauvdEDq54NiTphI7jx'}); const linkAuthElement = elements.create('linkAuthentication'); const addressElement = elements.create('address', options); const paymentElement = elements.create('payment', paymentElementOptions); linkAuthElement.mount('#link-auth-element'); addressElement.mount('#address-element'); paymentElement.mount('#payment-element');clientSecret
デザイン
Appearance API を使用して、すべての Elements のスタイルを管理できます。テーマを選択するか、特定の詳細を更新することができます。
たとえば、「flat」のテーマを選択して、主要なテキストの色を上書きします。
const stripe = Stripe(); const appearance = { theme: 'flat', variables: { colorPrimaryText: '#262626' } };'pk_test_TYooMQauvdEDq54NiTphI7jx'
テーマと変数の一覧については、Appearance API のドキュメントをご覧ください。