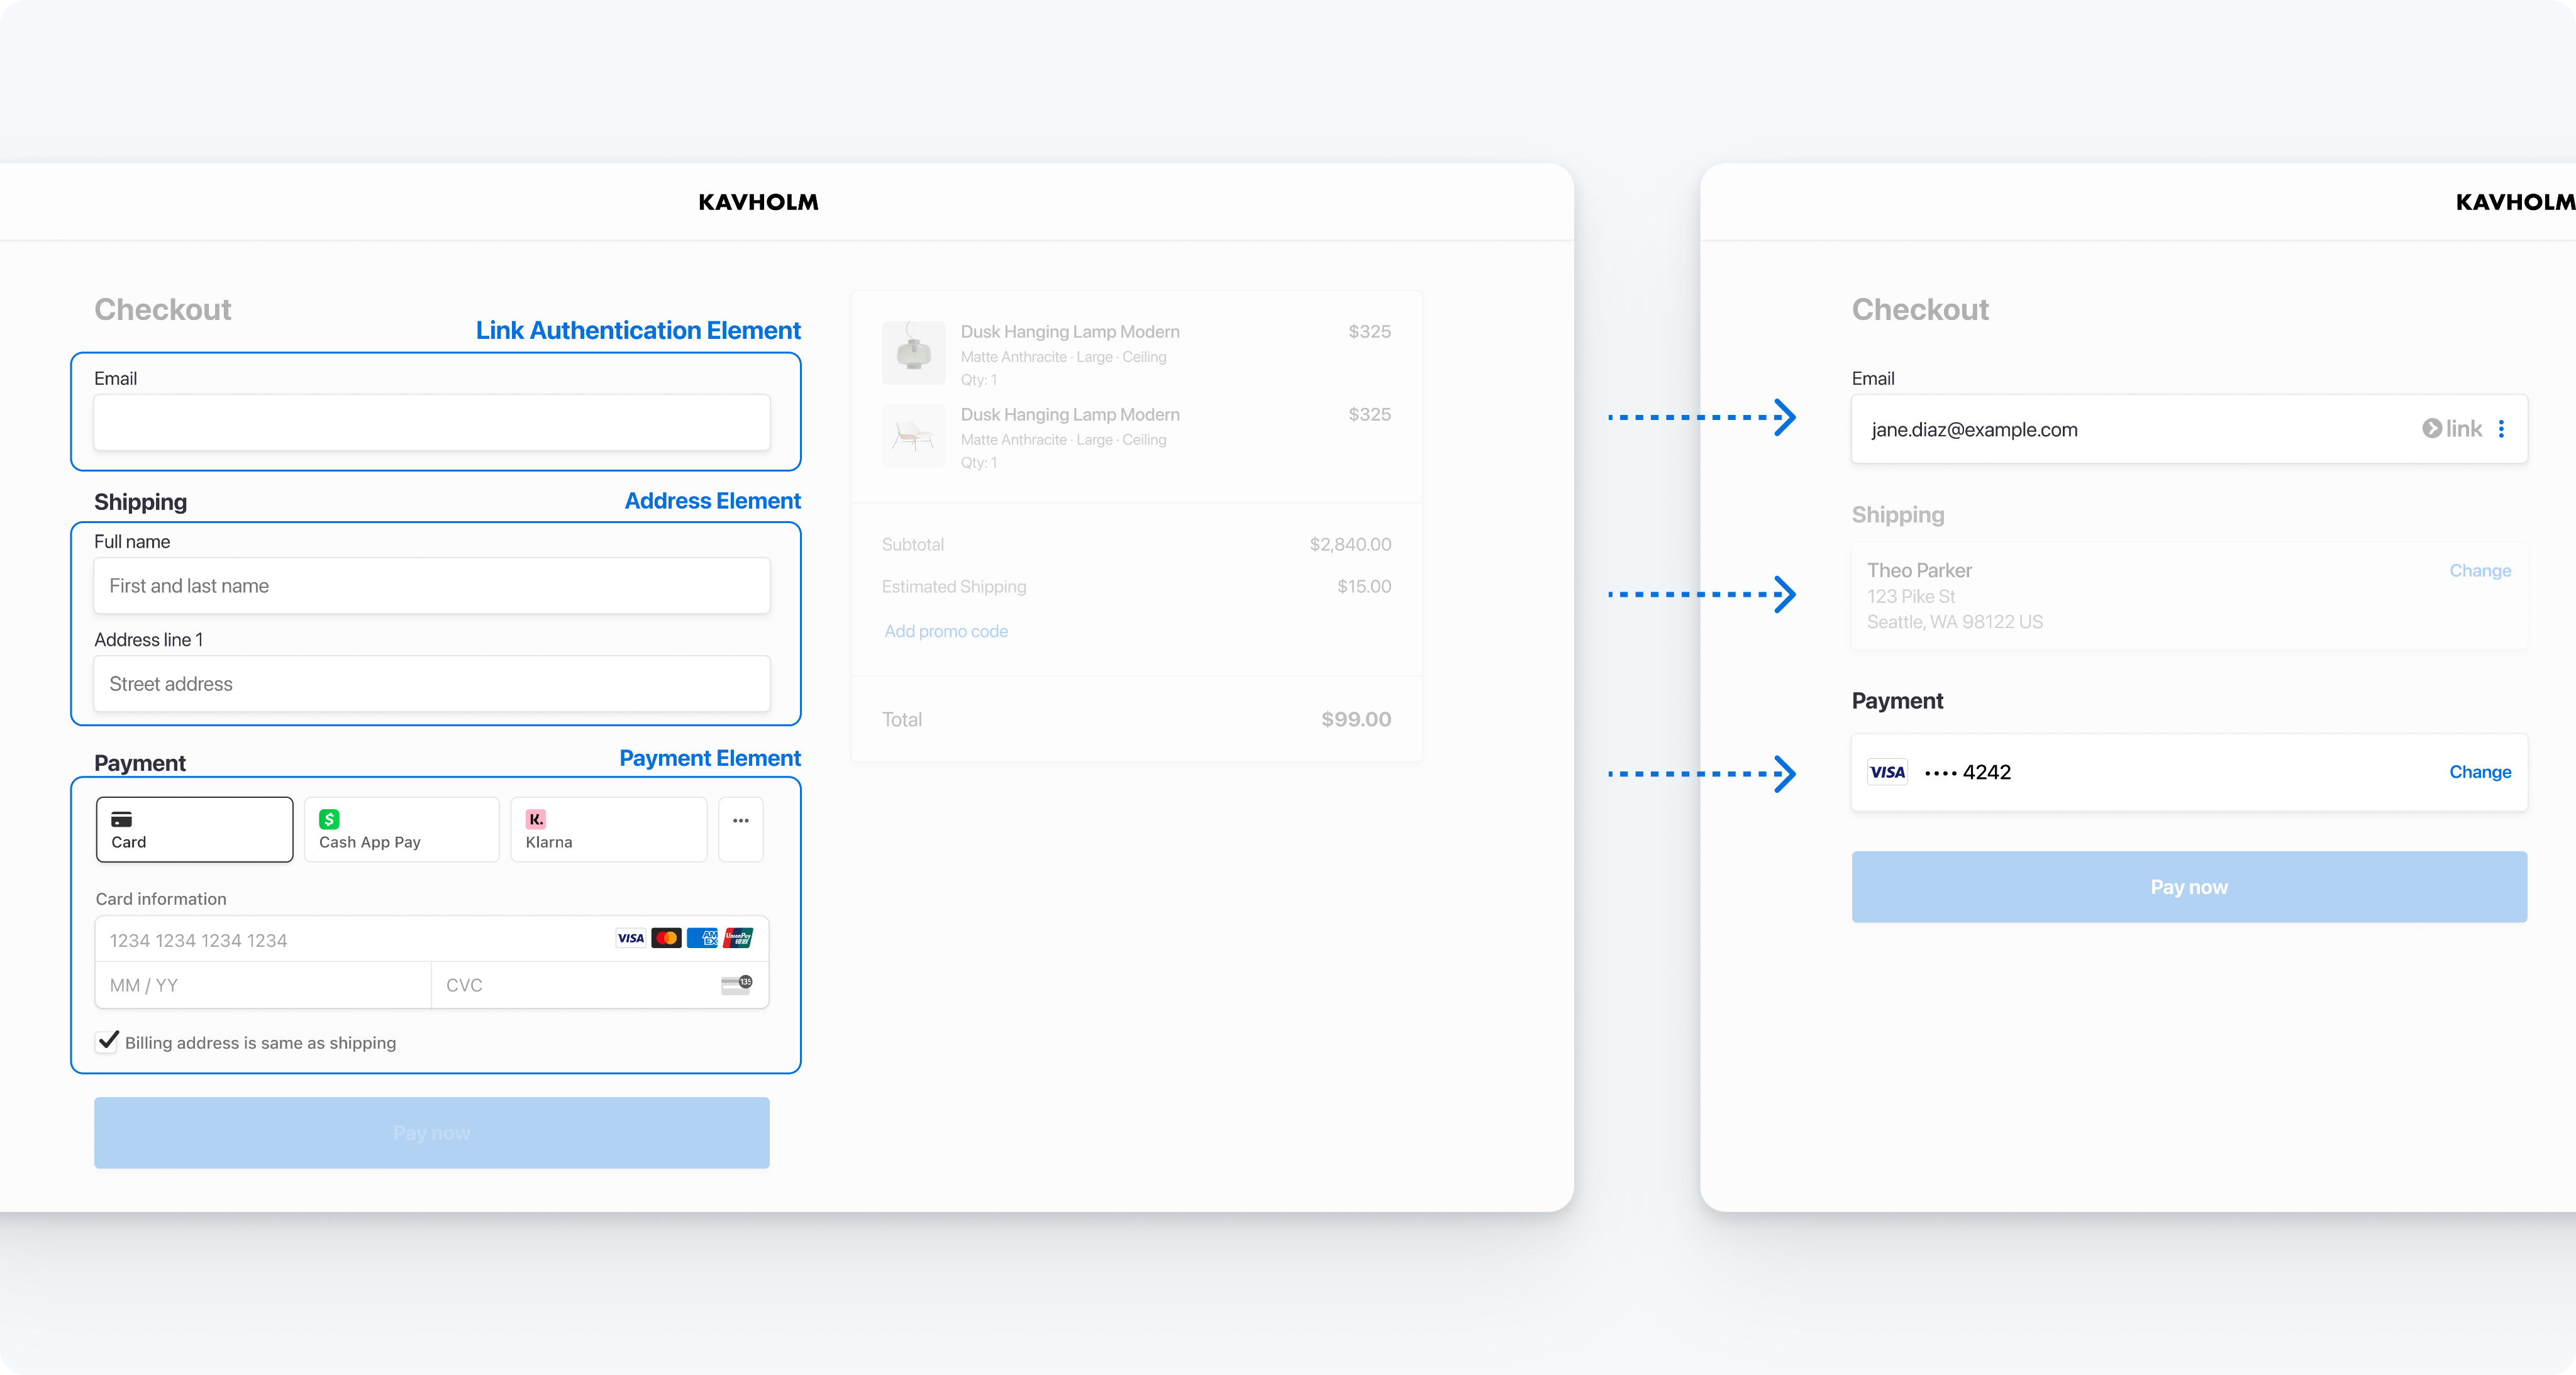
Address Element
Use the Address Element to collect complete billing and shipping addresses.
The Address Element is an embeddable UI component for accepting complete addresses. Use it to collect shipping addresses, or when you need a complete billing address, such as for tax purposes.
| Option | Description |
|---|---|
| Theme | Use the dropdown to choose a theme or customize the theme with the Elements Appearance API. |
| Desktop and mobile size | Use the dropdown to set the max pixel width of the parent element that the Address Element is mounted to. You can set it to 750px (Desktop) or 320px (Mobile). |
| Customer location | Use the dropdown to choose a location for accepting complete addresses. Changing the location localizes the UI language and displays locally relevant payment methods. |
| Phone number | Enable this option to allow phone number collection when the address form is expanded or using a contact. |
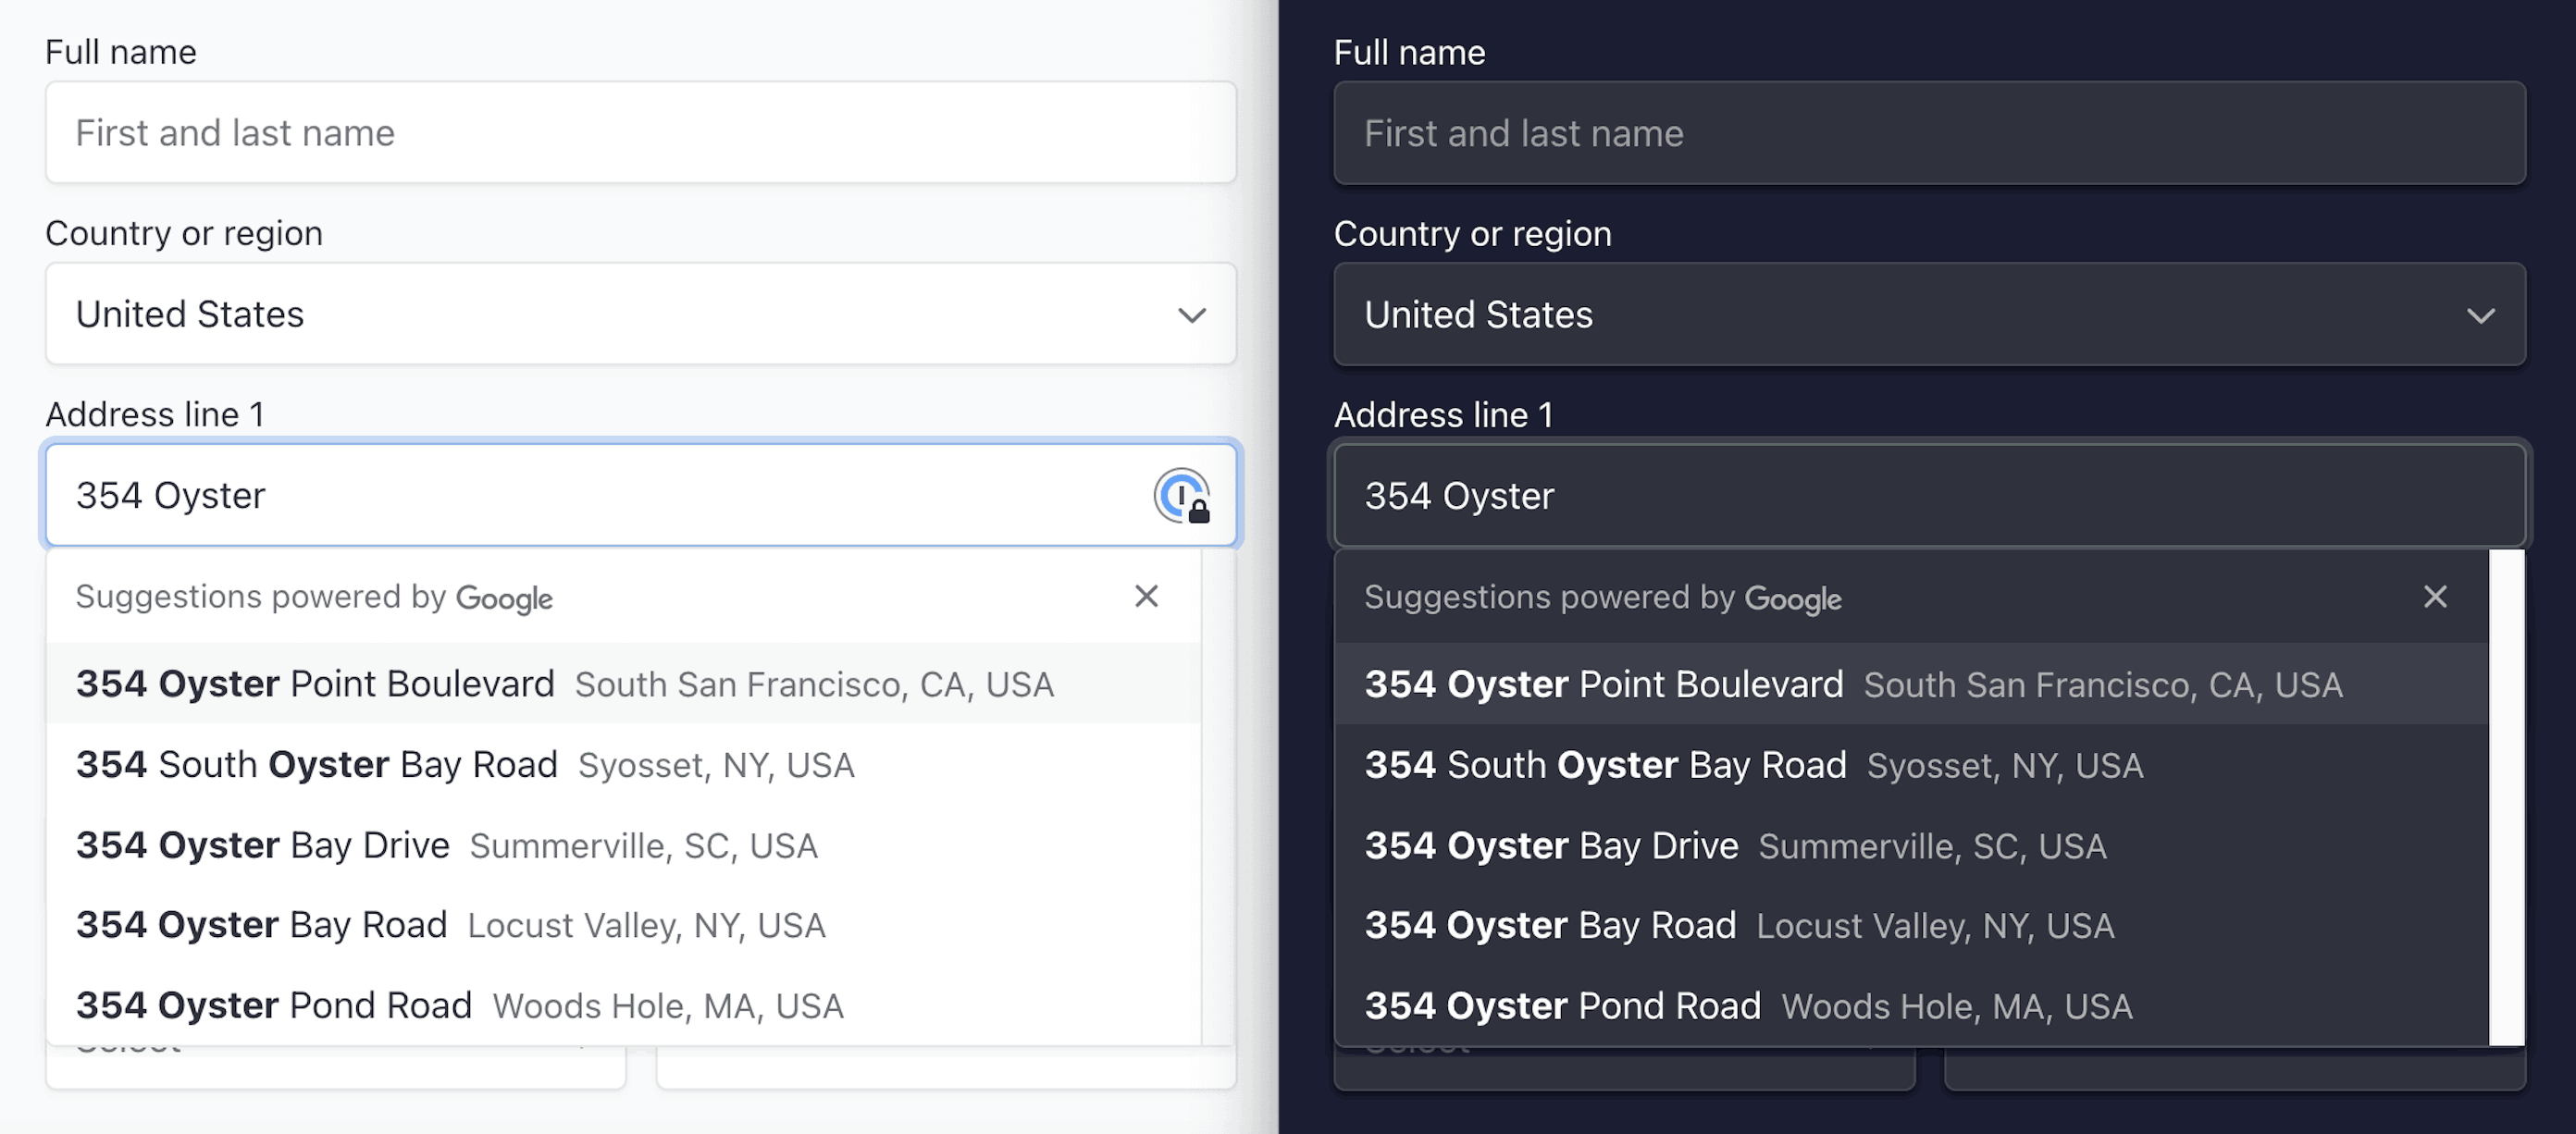
| Autocomplete | Enable this option to decrease checkout time, reduce validation errors, and increase checkout conversion with built-in address autocomplete. Stripe supports 236 regional address formats, including right-to-left address formats. |
| Contacts | Enable this option to add a new address or change an existing address or phone number. |
Start with examples
To see the Address Element in action, start with one of these examples:
Create an Address Element
When you create an Address Element, specify whether to use it in shipping or billing mode.
Use Address Element with other elements
You can collect both shipping and billing addresses by using multiple Address Elements, one of each mode, on your page.
If you need to collect both shipping and billing addresses and only want to use one Address Element, use the Address Element in Shipping mode and use the Payment Element to collect only the necessary billing address details.
When you use the Address Element with other elements, you can expect some automatic behavior when confirming the PaymentIntent or SetupIntent. The Address Element validates completeness upon confirming the PaymentIntent or SetupIntent and then displays errors for each field if there are any validation errors.
Use an address
The Address Element automatically works with the Payment or Express Checkout Element. When a customer provides an address and a payment method, Stripe combines them into a single PaymentIntent with the address in the correct field.
Automatic behavior
The element’s default behavior depends on its mode.
Custom behavior
Normally, the Address Element’s default behavior is enough. But in a complex payment flow, you might need to write custom responses to the customer’s input. For information, see Listen for address input.
Autocomplete
The Address Element can autocomplete addresses for 25 countries. If your customer selects a supported country for their address, then they see the autocomplete options. These are the supported countries for autocomplete:
If you use the Address Element and the Payment Element together, Stripe enables autocomplete with no configuration required. This is done using a Stripe-provided Google Maps API key.
Note
By using autocomplete, you agree to comply with the Google Maps Platform Acceptable Use Policy. If you violate this policy, we might disable autocomplete, or take any other action as necessary.
If you use the Address Element alone, you must use your own Google Maps API Places Library key, which is managed separately from your Stripe account. Pass the key in the autocomplete.apiKey option.
Autofill with Link
Link saves and autofills payment and shipping information for the options you’ve enabled. For example, if the Link customer has a saved phone number, Stripe autofills the phone number only if phone number collection is enabled. When a returning Link customer authenticates, Stripe autofills their shipping information in the Address element.
Create a payment form using multiple Elements
To enable autofill, create all elements from the same Elements object, as in this example:
const stripe = Stripe(); const appearance = { /* appearance */ }; const options = { mode: 'shipping' }; const paymentElementOptions = { layout: 'accordion'}; const elements = stripe.elements({'pk_test_TYooMQauvdEDq54NiTphI7jx'}); const linkAuthElement = elements.create('linkAuthentication'); const addressElement = elements.create('address', options); const paymentElement = elements.create('payment', paymentElementOptions); linkAuthElement.mount('#link-auth-element'); addressElement.mount('#address-element'); paymentElement.mount('#payment-element');clientSecret
Appearance
You can use the Appearance API to control the style of all elements. Choose a theme or update specific details.
For instance, choose the “flat” theme and override the primary text color.
const stripe = Stripe(); const appearance = { theme: 'flat', variables: { colorPrimaryText: '#262626' } };'pk_test_TYooMQauvdEDq54NiTphI7jx'
See the Appearance API documentation for a full list of themes and variables.