Pay out money
Add money to your Stripe balance and pay out your sellers or service providers.
Note
Most platforms can pay out funds only to connected accounts in the same region and in local currencies. Platforms based in the US can make cross-border payouts to accounts in other regions, subject to restrictions.
Use this guide to learn how to add funds to your account balance and transfer the funds into your users’ bank accounts, without processing payments through Stripe. This guide uses an example of a Q&A product that pays its writers a portion of the advertising revenue that their answers generate. The platform and connected accounts are both in the US.
Note
Only team members with administrator access to the platform Stripe account and two-factor authentication enabled can add funds.
When adding funds to your balance, best practice is to use a manual payout schedule. If you enable automatic payouts, you can’t control whether the system uses added funds for payouts. You can configure your schedule in your payout settings.
Prerequisites 
- Register your platform.
- Add business details to activate your account.
- Complete your platform profile.
- Customize your brand settings. Add a business name, icon, and brand color.
Set up StripeServer-side
Install Stripe’s official libraries so you can access the API from your application:
Create a connected account
When a user (seller or service provider) signs up on your platform, create a user Account (referred to as a connected account) so you can accept payments and move funds to their bank account. Connected accounts represent your users in Stripe’s API and facilitate the collection of information requirements so Stripe can verify the user’s identity. For a Q&A product that pays for answers, the connected account represents the writer.
Note
This guide uses connected accounts that use the Express Dashboard, which have certain restrictions. You can evaluate Custom accounts as an alternative.
1. Customize your signup form
In your platform settings, customize your Express signup form by changing the color and logos that users see when they click your Connect link.
Default Express signup form
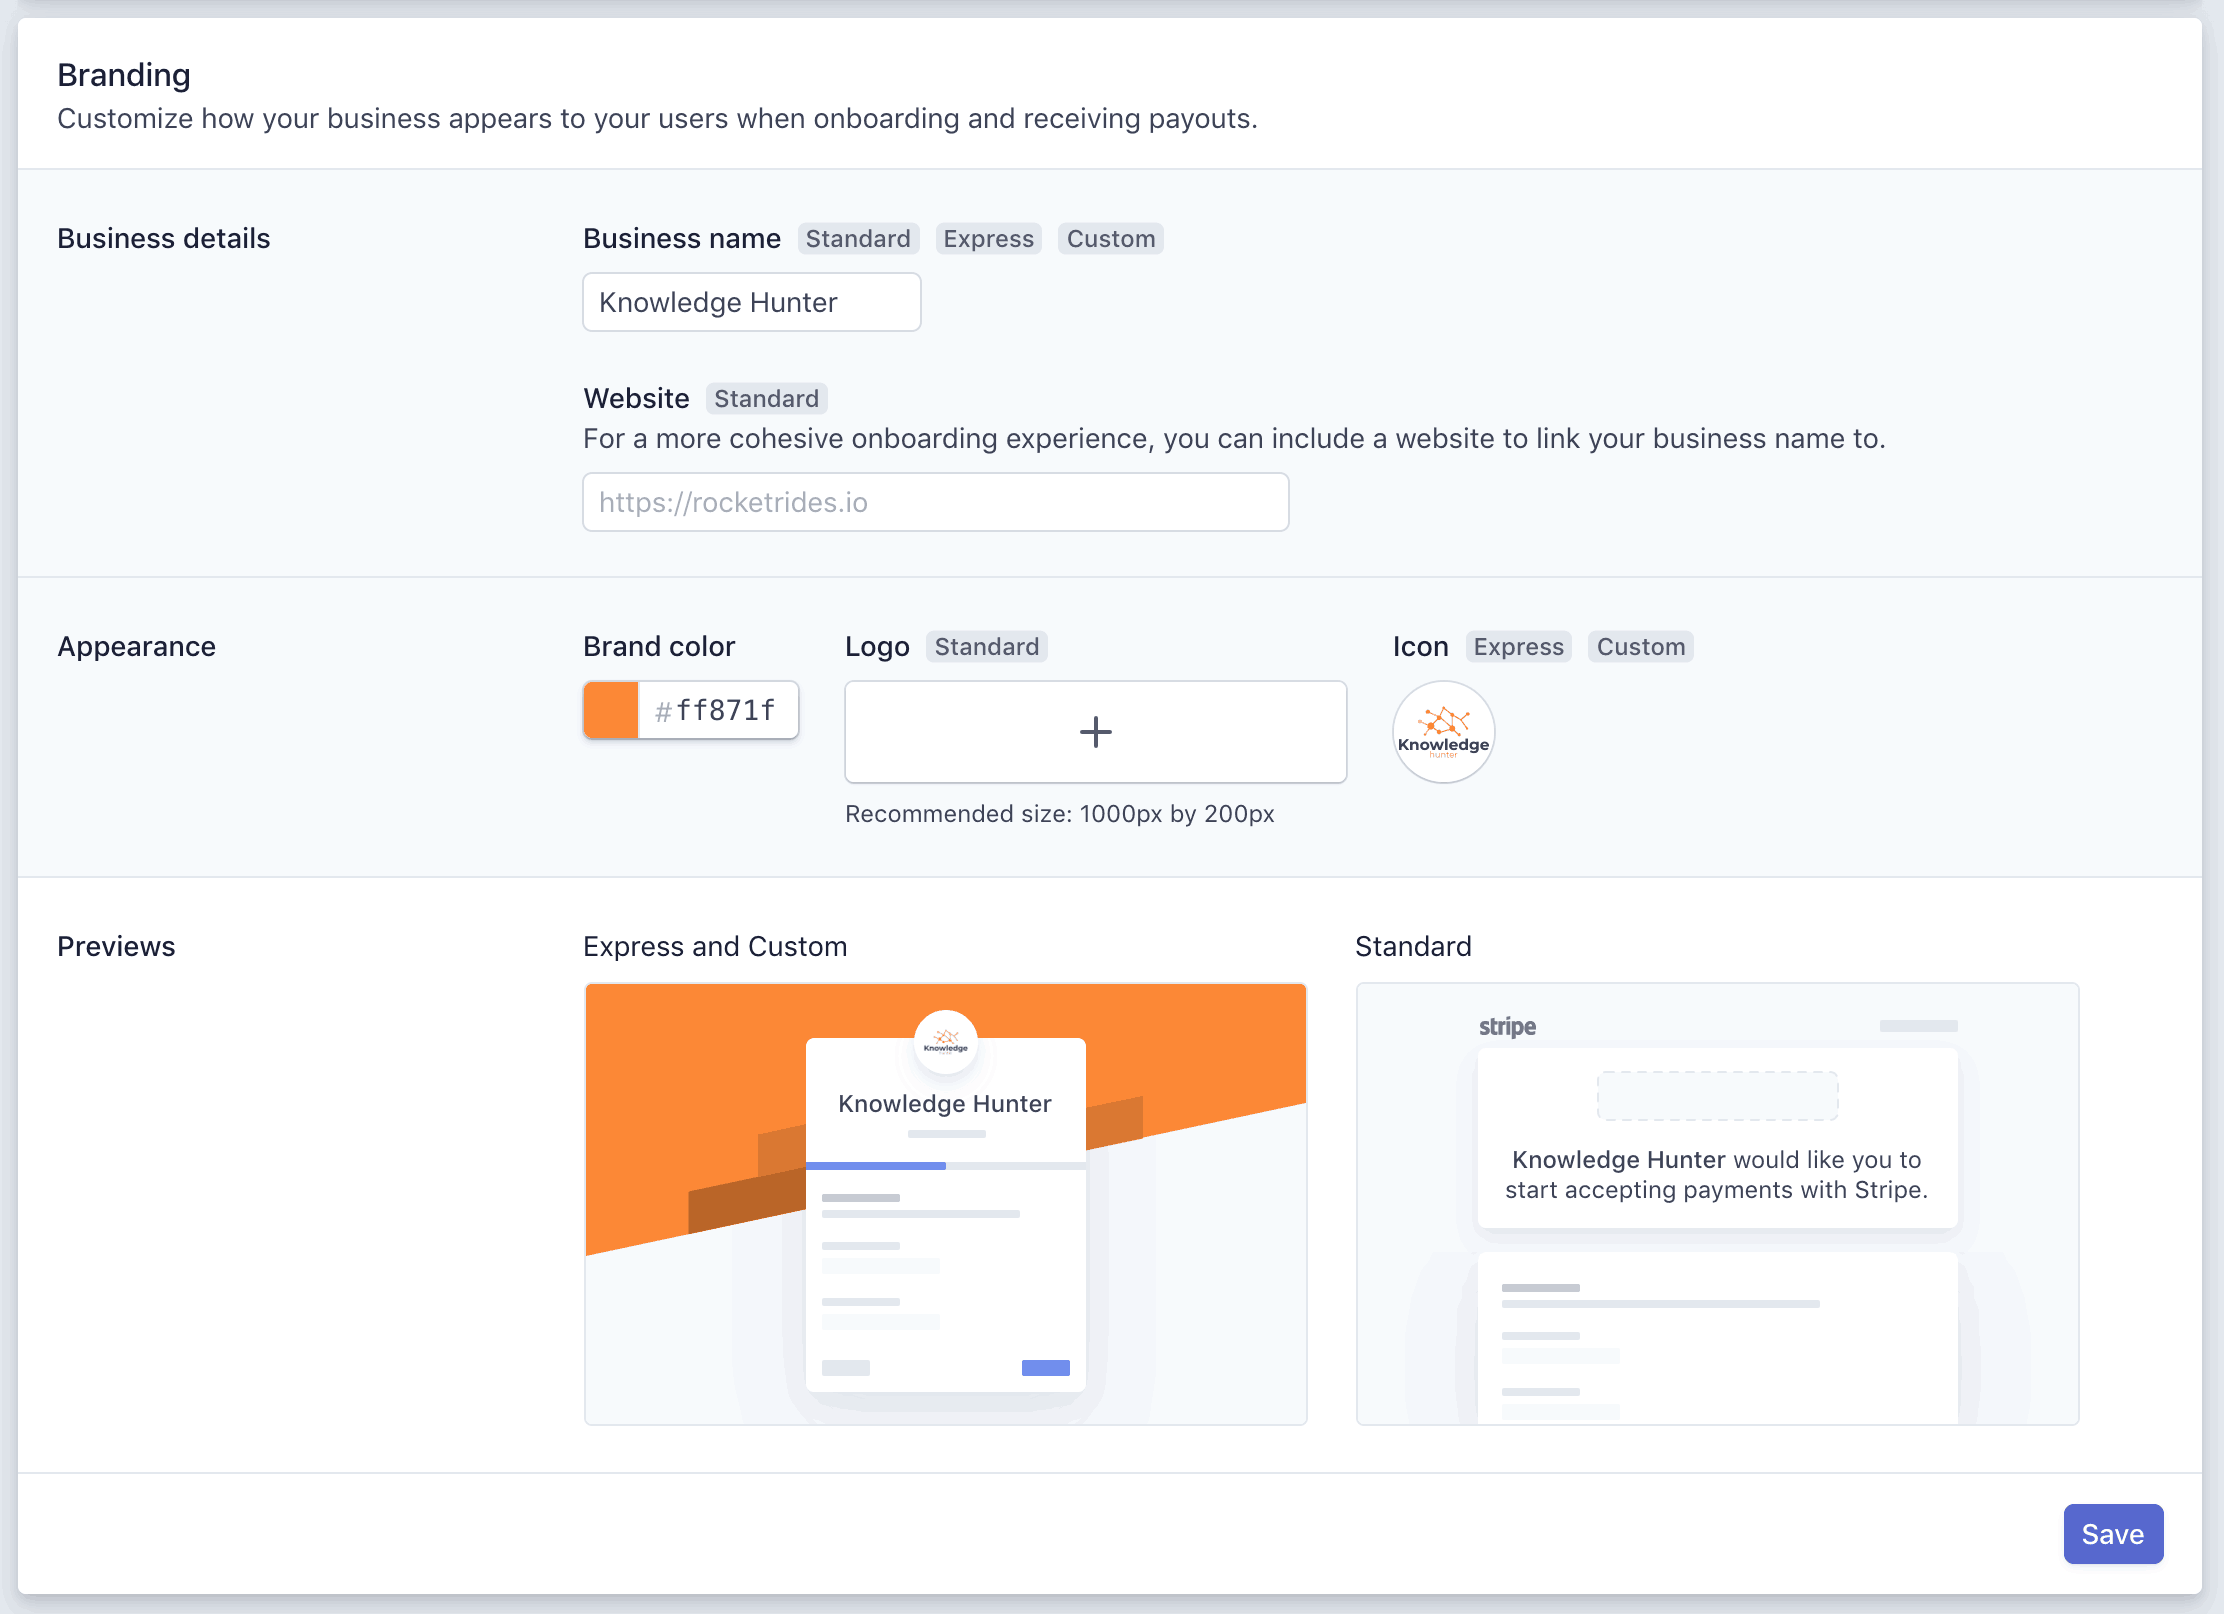
Branding settings
2. Create a connected account and prefill information
Use the /v1/accounts API to create a connected account by specifying the connected account properties, or by specifying the account type.
If you’ve already collected information for your connected accounts, you can prefill that information on the Account object. You can prefill any account information, including personal and business information, external account information, and so on.
Connect Onboarding doesn’t ask for the prefilled information. However, it does ask the account holder to confirm the prefilled information before accepting the Connect service agreement.
When testing your integration, prefill account information using test data.
3. Create an account link
Create an Account Link with the following arguments:
accountrefresh_url return_url type=account_onboarding
4. Redirect your user to the account link
The response to your Account Links request includes a value for the key url. Redirect your user to this link. URLs from the Account Links API are temporary and can be used only once because they grant access to the account holder’s personal information. Authenticate the user in your application before redirecting them to this URL. If you want to prefill information, you must do so before generating the account link. After you create the account link, you won’t be able to read or write information for the connected account.
Security tip
Don’t email, text, or otherwise send account link URLs outside of your platform application. Instead, provide them to the authenticated account holder within your application.
5. Handle the user returning to your platform
Connect Onboarding requires you to pass both a return_ and refresh_ to handle all cases where the user is redirected to your platform. It’s important that you implement these correctly to provide the best experience for your user.
Note
You can use HTTP for your return_ and refresh_ while you’re in a testing environment (for example, to test with localhost), but live mode only accepts HTTPS. Be sure to update testing URLs to HTTPS URLs before going live.
return_url
Stripe issues a redirect to this URL when the user completes the Connect Onboarding flow. This doesn’t mean that all information has been collected or that there are no outstanding requirements on the account. This only means the flow was entered and exited properly.
No state is passed through this URL. After a user is redirected to your return_, check the state of the details_ parameter on their account by doing either of the following:
- Listening to
account.events.updated - Calling the Accounts API and inspecting the returned object.
refresh_url
Your user is redirected to the refresh_ when:
- The link has expired (a few minutes have passed since the link was created).
- The link was already visited (the user refreshed the page or clicked back or forward in their browser).
- The link was shared in a third-party application such as a messaging client that attempts to access the URL to preview it. Many clients automatically visit links which cause them to become expired.
- Your platform is no longer able to access the account.
- The account has been rejected.
The refresh_ should call Account Links again on your server with the same parameters and redirect the user to the Connect Onboarding flow to create a seamless experience.
6. Handle users that haven’t completed onboarding
A user that’s redirected to your return_ might not have completed the onboarding process. Use the /v1/accounts endpoint to retrieve the user’s account and check for charges_. If the account is not fully onboarded, provide UI prompts to allow the user to continue onboarding later. The user can complete their account activation through a new account link (generated by your integration). You can check the state of the details_ parameter on their account to see if they’ve completed the onboarding process.
Add funds to your balance
To add funds, go to the Balance section in the Dashboard. Click Add to balance and select why you are adding funds to your account.
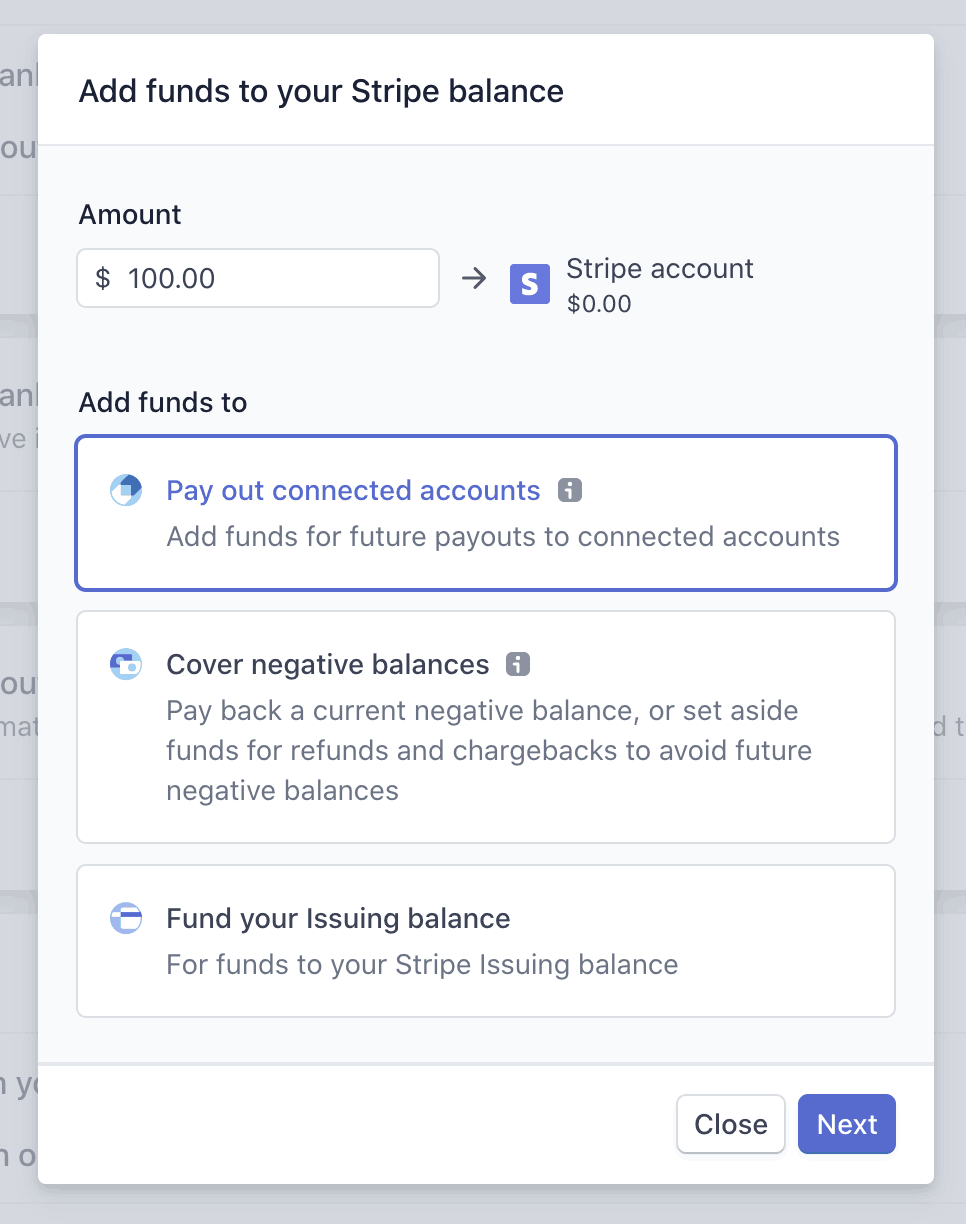
Select Pay out connected accounts to add funds to pay out to your connected accounts. If you are adding funds to your balance to cover future refunds and disputes, or to repay your platform’s negative balance, select Cover negative balances and see adding funds to your Stripe balance.
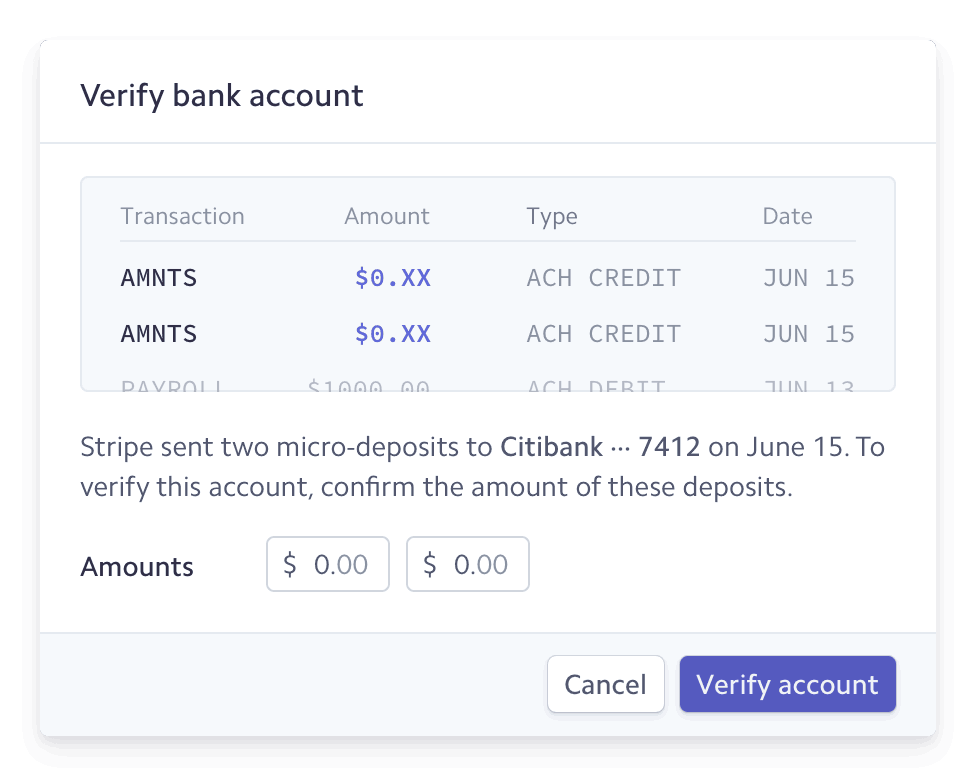
Verify your bank account
Go through the verification process in the Dashboard when you first attempt to add funds from an unverified bank account. If your bank account is unverified, you’ll need to confirm two microdeposits from Stripe. These deposits appear in your online banking statement within 1-2 business days. You’ll see ACCTVERIFY as the statement description.
Stripe notifies you in the Dashboard and through email when the microdeposits have arrived in your account. To complete the verification process, click the Dashboard notification in the Balance section, enter the two microdeposit amounts, and click Verify account.
Create a top-up
Once verified, create a top-up to add funds to your account balance.
When you transfer funds, a statement descriptor appears on your banking statement for the transaction. The default statement descriptor is Top-up. You can customize the statement descriptor and internal description for the top-up.
View funds
View your funds in the Dashboard on Top-ups tab under the Balance page. Each time you add funds, a top-up object is made that has a unique ID in the format tu_XXXXXX, which you can see on the detailed view for the top-up.
Settlement timing
US platforms add funds via ACH debit and can take 5-6 business days to become available in your Stripe balance. You can request a review of your account for faster settlement timing by contacting Stripe Support.
As we learn more about your account, Stripe might be able to decrease your settlement timing automatically.
Adding funds for future refunds and disputes or to repay a negative balance can happen through bank or wire transfers and are available in 1-2 business days.
Pay out to your userServer-side
You can transfer available funds to a connected account using the API. For example, make the following call to transfer 10 USD to an account:
By default, any funds that you transfer to a connected account accumulates in the connected account’s Stripe balance and is paid out on a daily rolling basis. You can change the payout schedule as needed.
Test your integration
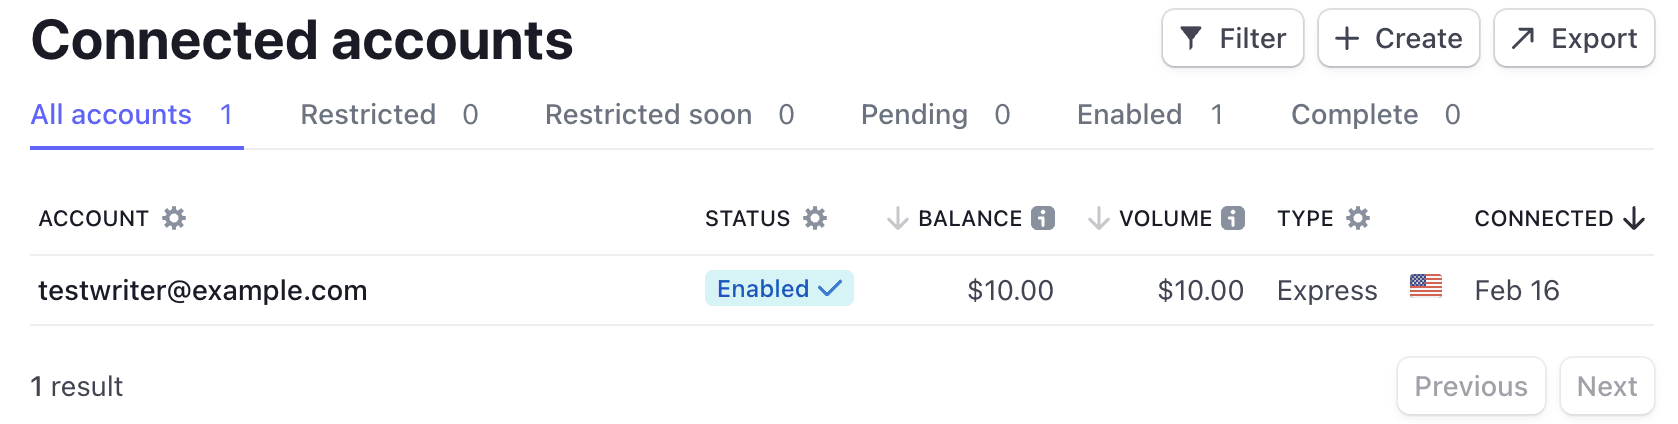
From your account Dashboard, you can view an account and its balance.
Use the test bank tokens to simulate flows for accounts and onboarding, payouts, and adding funds.